

Installation of the Black Oak LED Pods was pretty easy and straight forward thanks to the wiring harness Black Oak included with the light Pods. Each Pod comes with a complete wiring harness which included a built-in fuse, relay, & switch. In our install we wanted a single switch to control both LED Pods together so we would be combining the two wiring harnesses with a single control switch. This was not a difficult task and only requires us to splice together the wires of the two switches into one single switch. We’ll show how we did that below.
For the install you’ll have to decide where to mount them. The windshield brackets from the previous lights were in great, rust-free shape and the location did well to light up the way so we were going to be reusing these brackets. Installation would only require us to mount the lights and install the wiring harness.
The last thing to consider was where the switch was going to be installed. Quick, easy access to auxiliary lighting is a great asset especially when you’re traveling down back roads and you need to toggle the lights on and off quickly so you don’t blind oncoming traffic. I’ve always tried to install the switch that controls my lighting somewhere near the steering wheel so that I could easily reach for the switch in the dark. On the JK I found a good place on the left side of the steering wheel in the recess below the steering wheel tilt adjust lever. It’s inches away from my hand and easy to find quickly. More on that in the installation notes below.
Tool Required for the Install:
- T30 Torx
- Wire Cutters, Wire Stripper, Crimp Butt Connectors (if combining switches)
- 12mm Wrench to bolt down the Pod
- Socket set or wrench set for battery terminal bolts
- Zip-ties
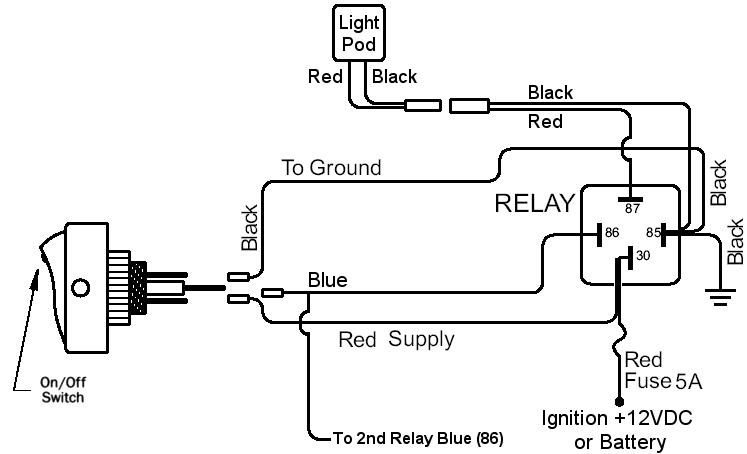
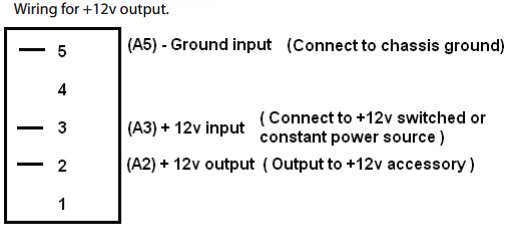
LED Pod Light Relay Wiring Diagram
Mounting the Light Pods
Deciding on where to mount the lights was pretty easy since the pair of lights that were coming off the Jeep were located in a great place to light the way and the brackets were in great shape. So these Pods were going to be installed onto the same windshield brackets.
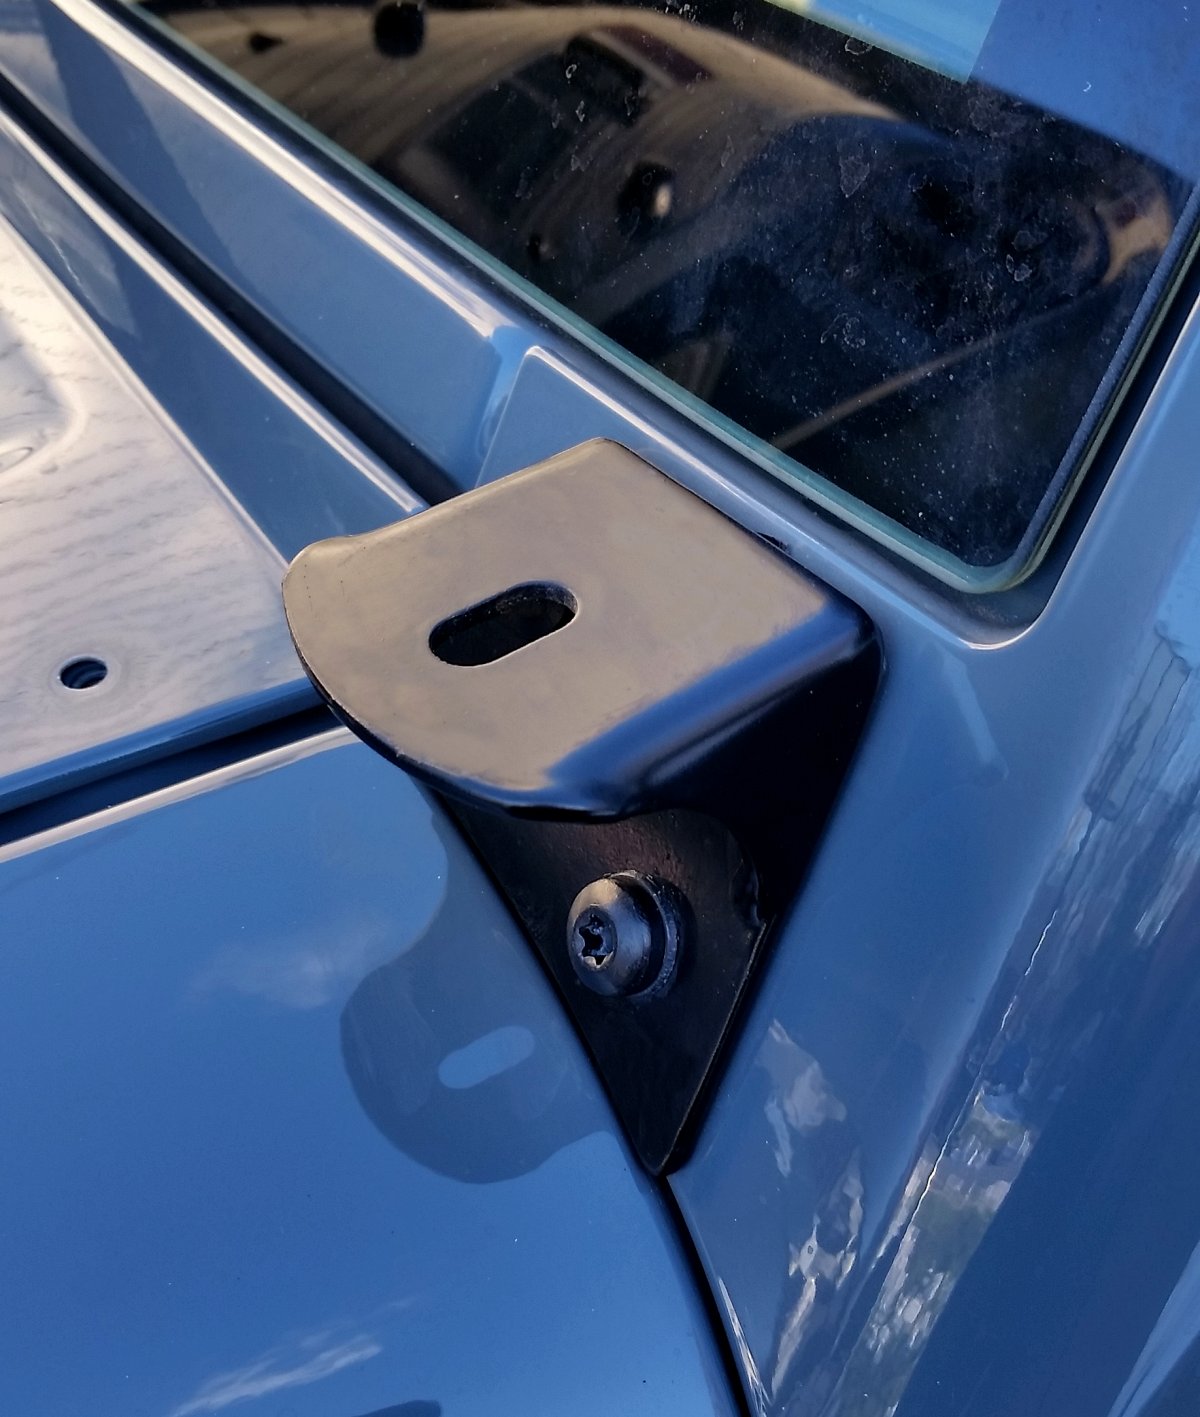
Our Windshield Brackets were in great shape so we decided to reuse the brackets.
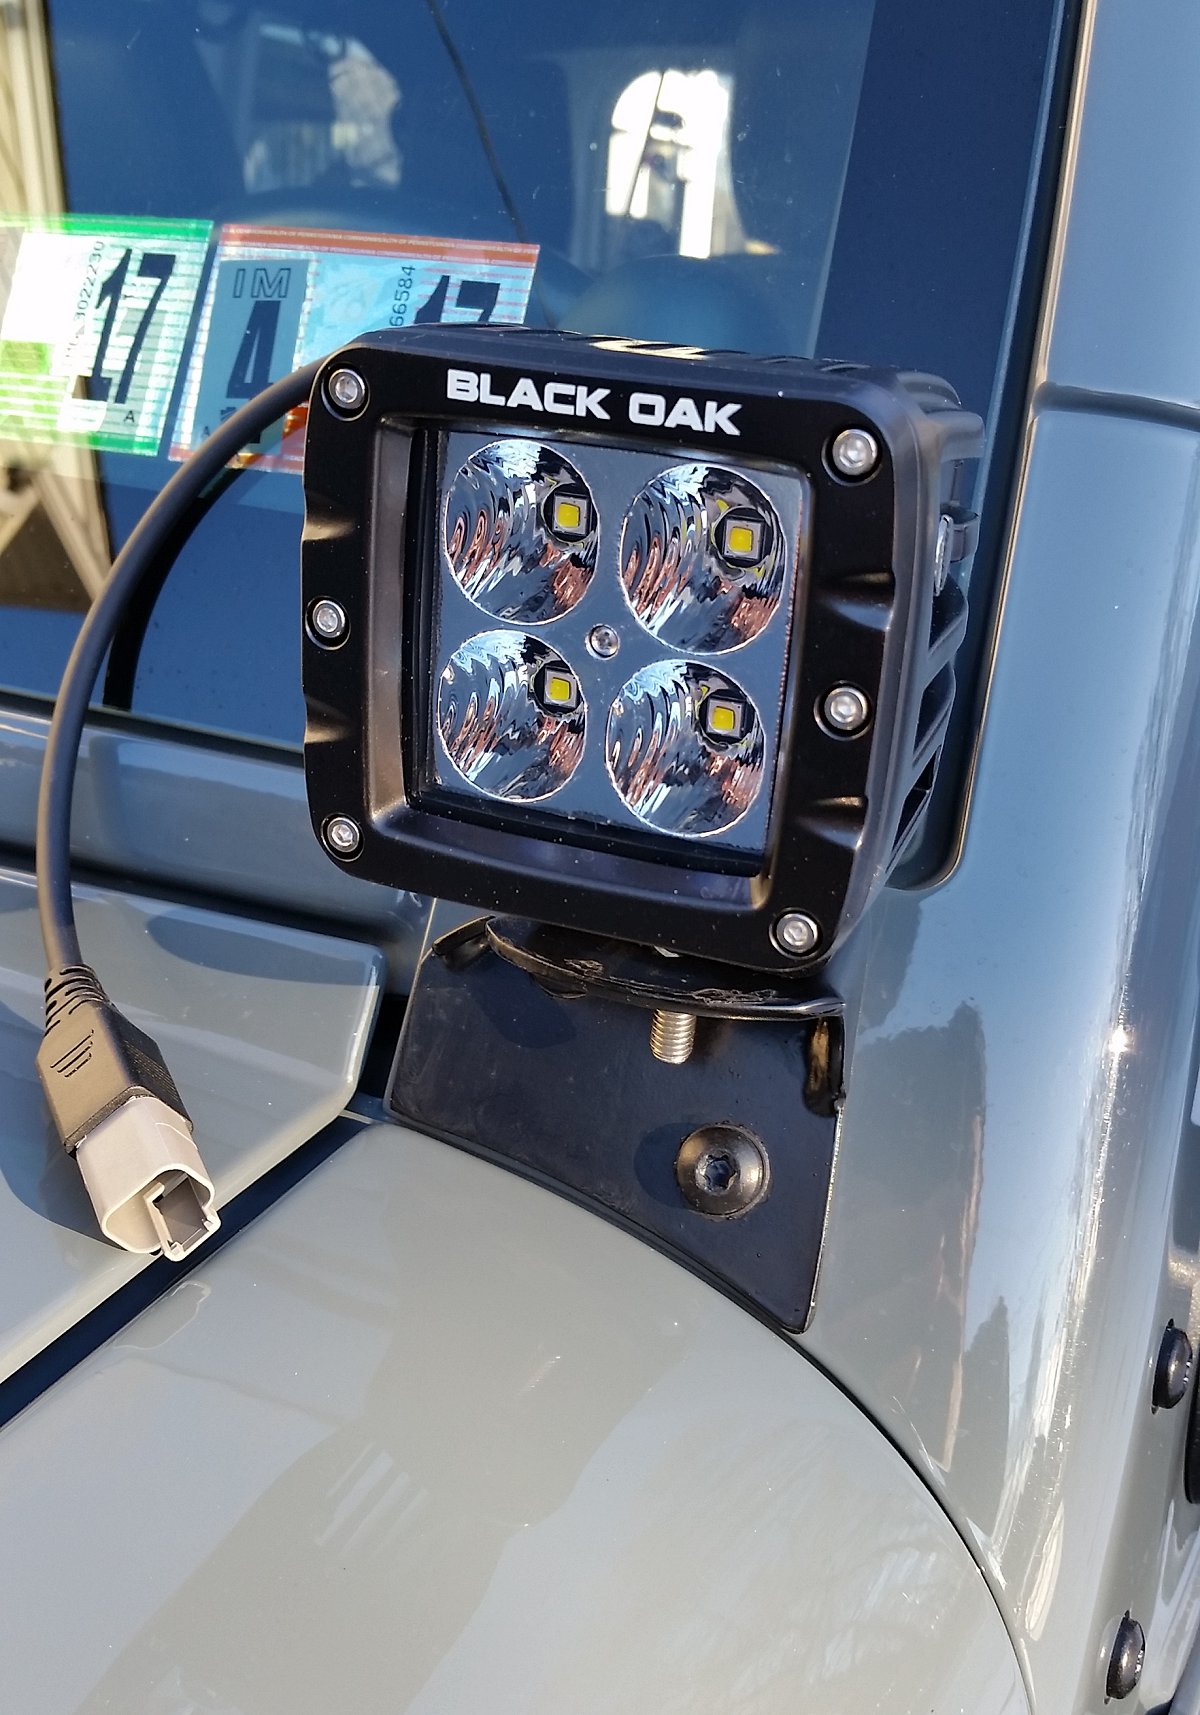
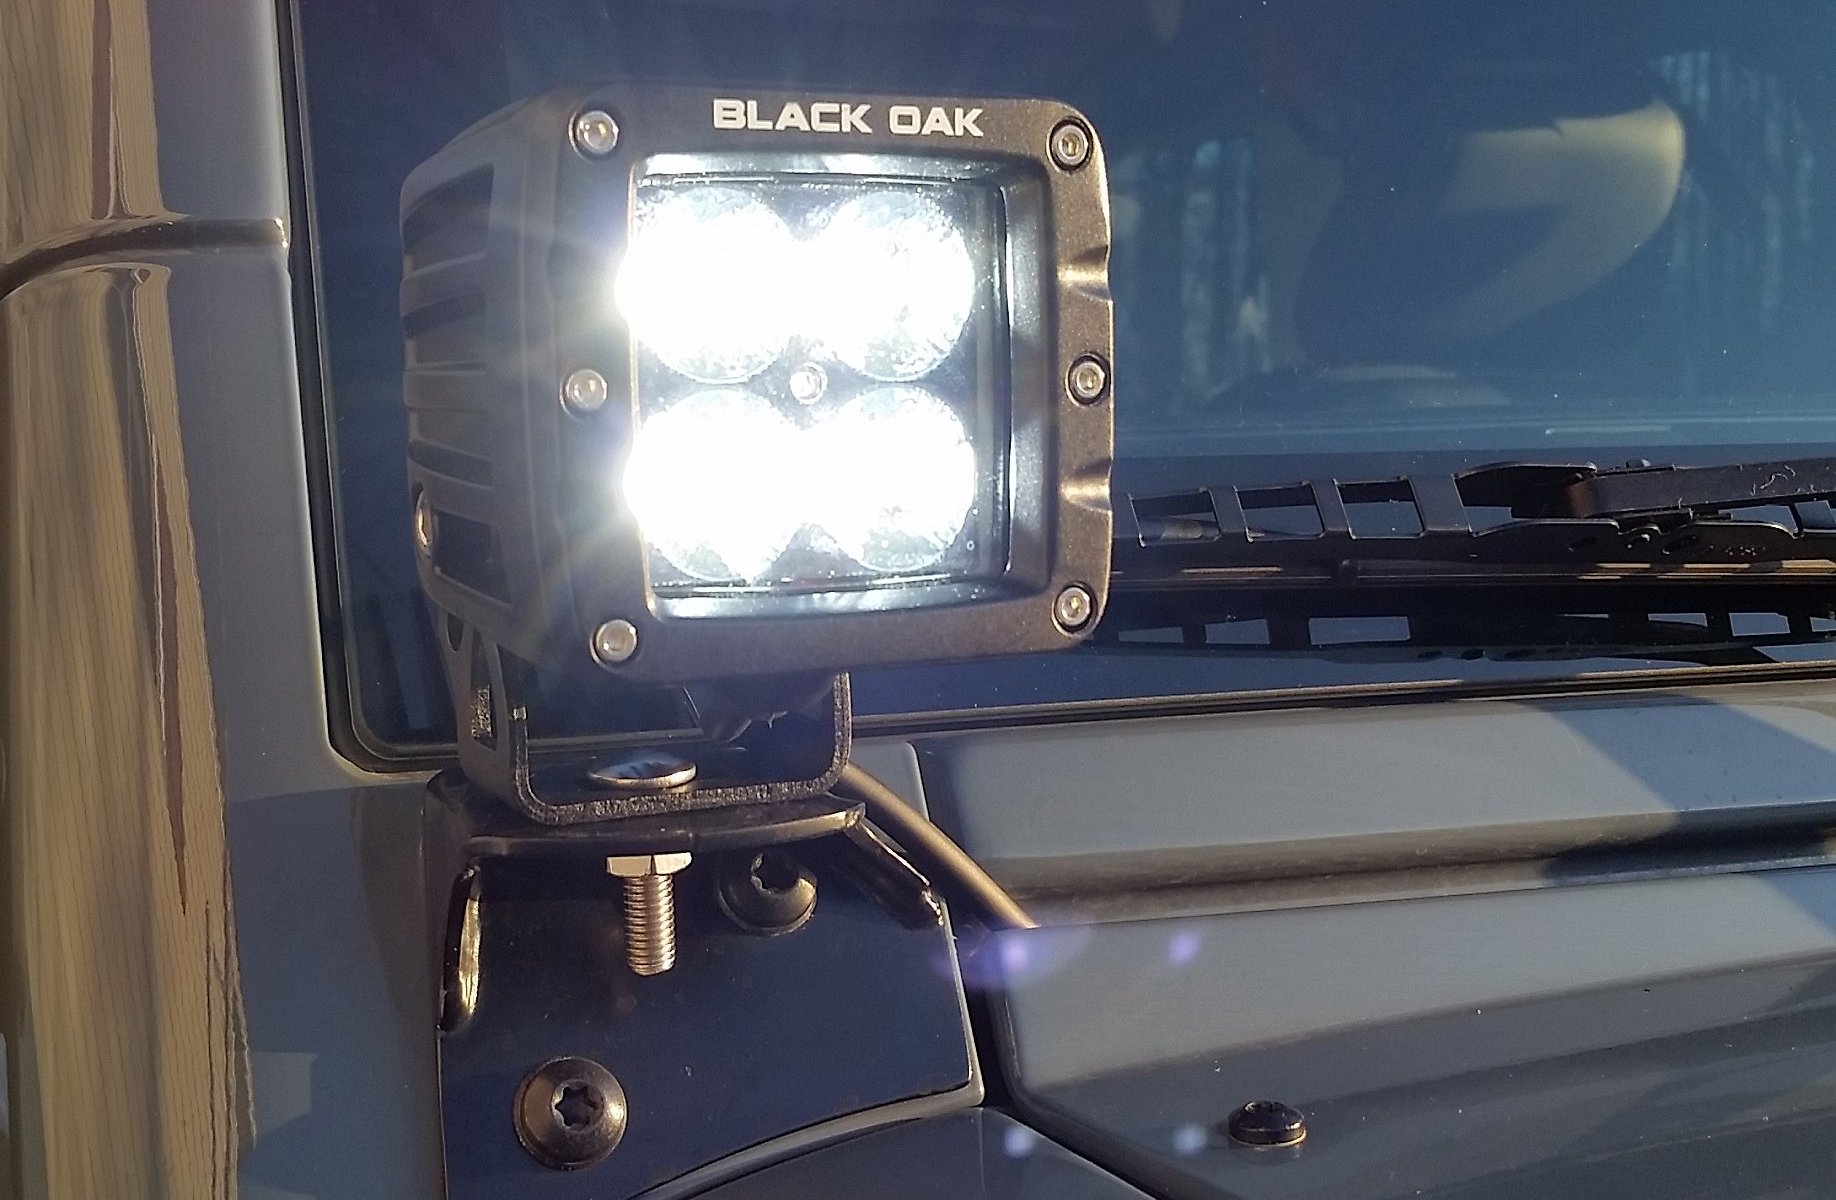
Mounting is easy with a single 12mm bolt. Aiming the lights is done by loosening Allen bolts on either side of the lights, adjusting the tilt and tightening the bolts.
Routing the Wire
When mounting lights on the windshield hinges, the quickest, cleanest wire route for the JK is passing the wire through the seam located under the light. Then route the wire harness under the cowl panel into the engine bay. The cowl panel does not need to be completely removed but it does need to be loosened and lifted slightly to pass the Weather-Sealed Deutsch Connectors through the seam.
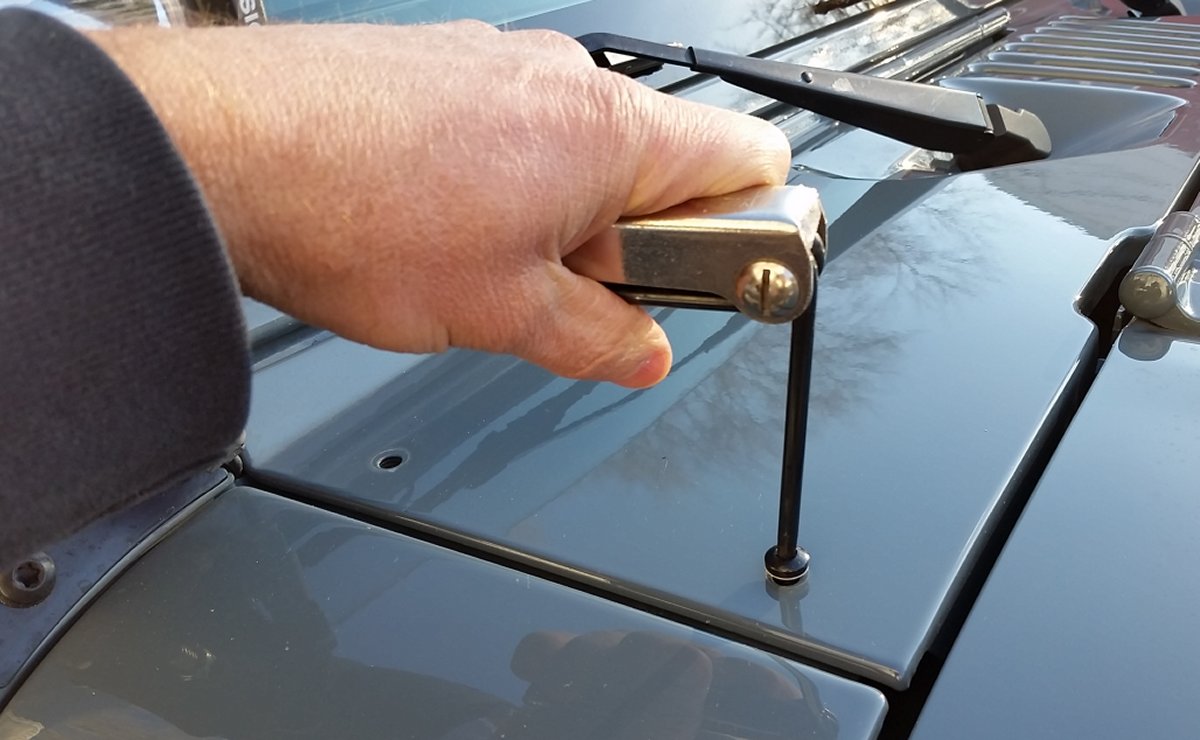
Remove the panel bolts with a T30 Torx.
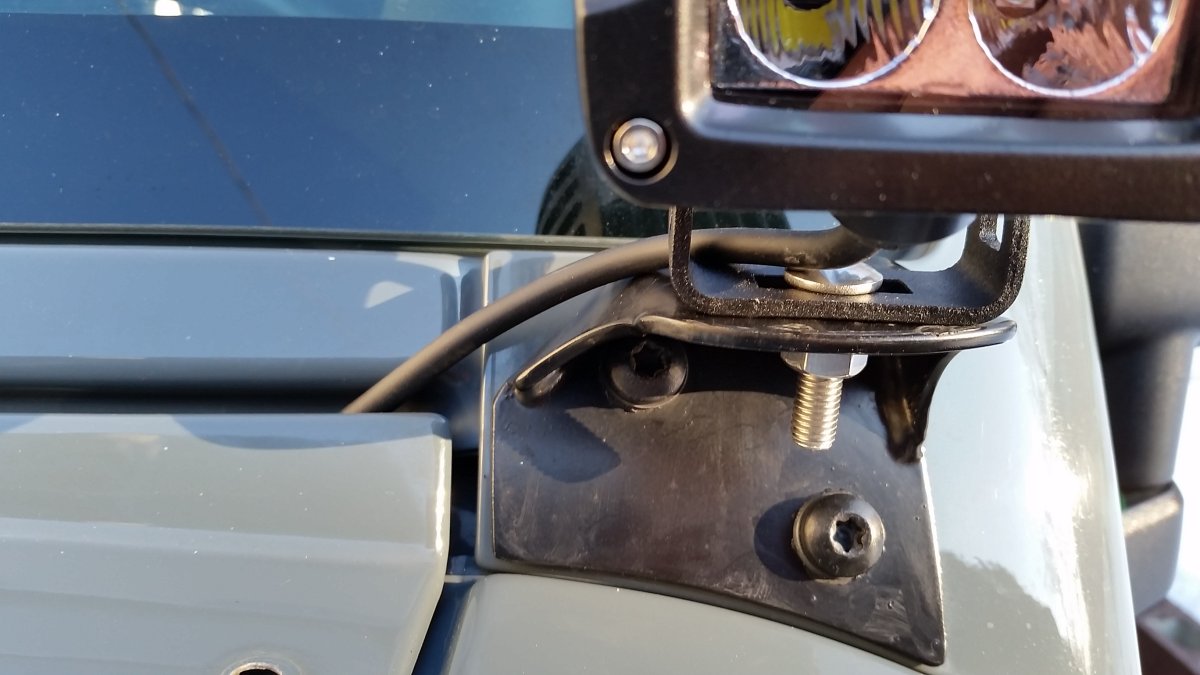
It’s not necessary to fully remove the panel but you do have to lift it enough to get the Deutsch Connector under the panel.

Pass the weather-sealed Deutsch Connector and wire under the panel. Be careful to avoid the windshield wiper linkage by keeping it close to the outer edge of the area under the panel.
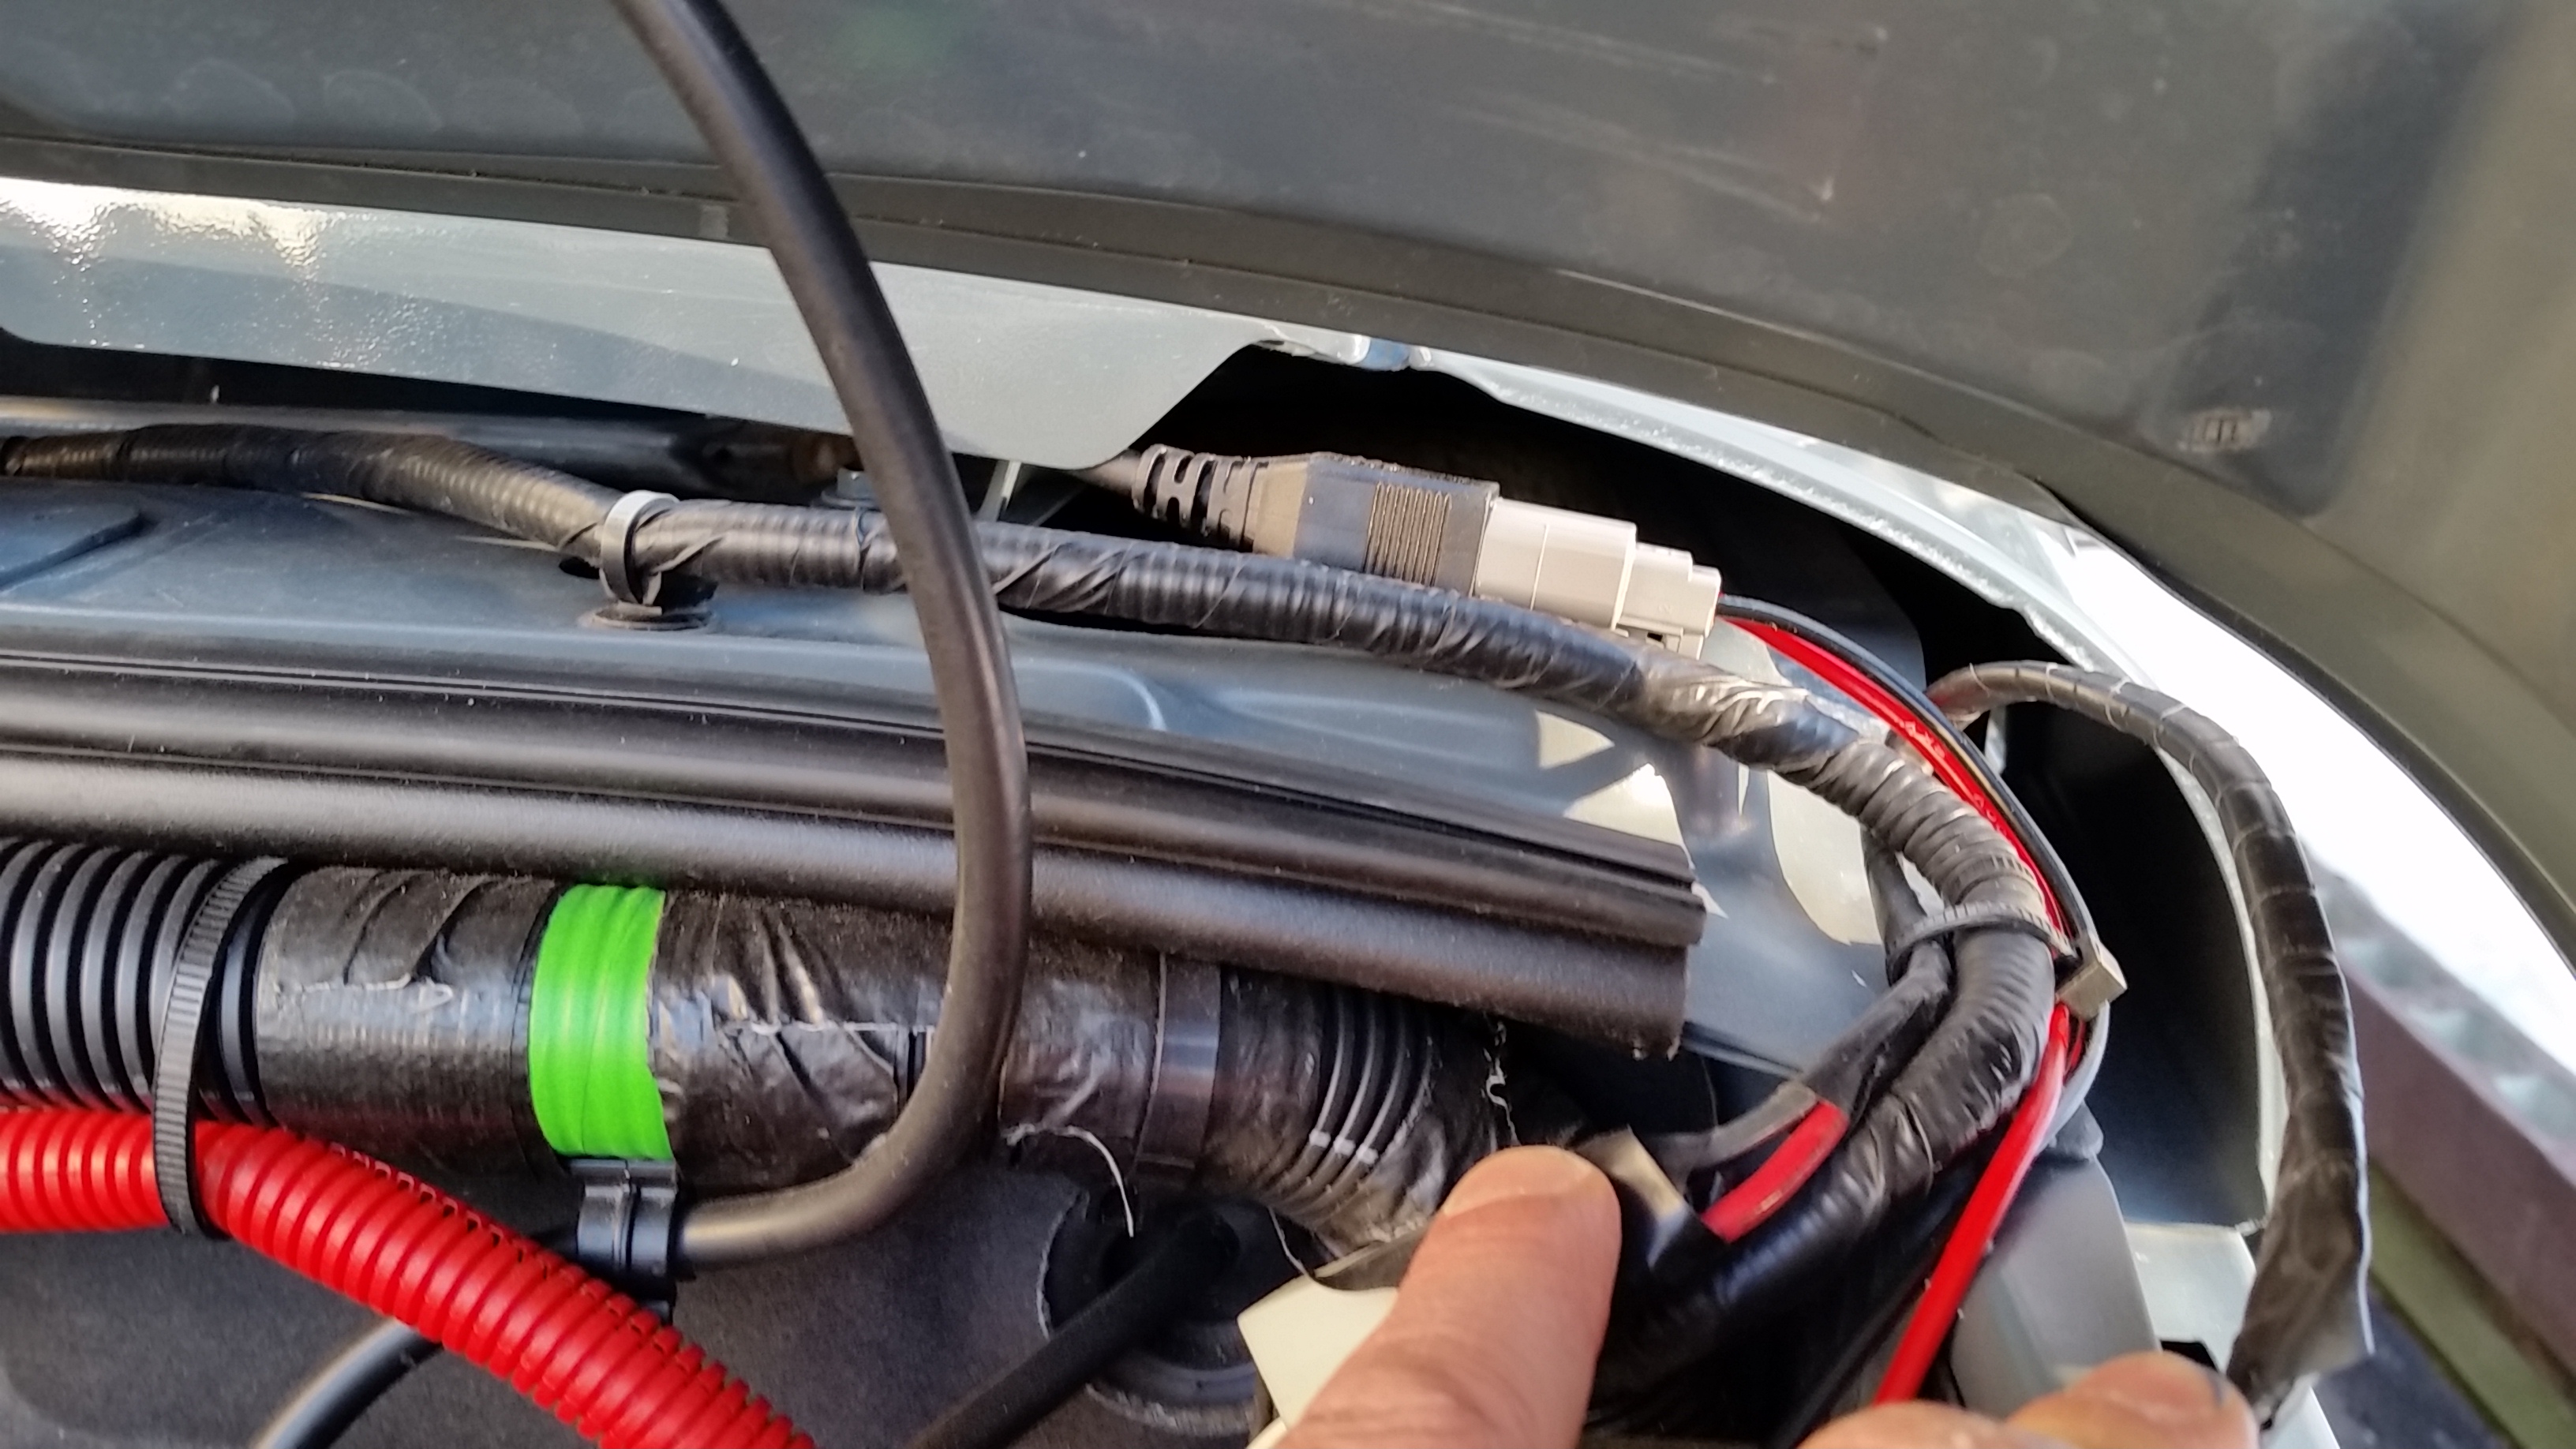
We routed the wires along the path of the Jeeps existing wire harnesses and zip-tied the light wire harness to the Jeep’s wiring, then into 1/2″ Split Loom Tubing.
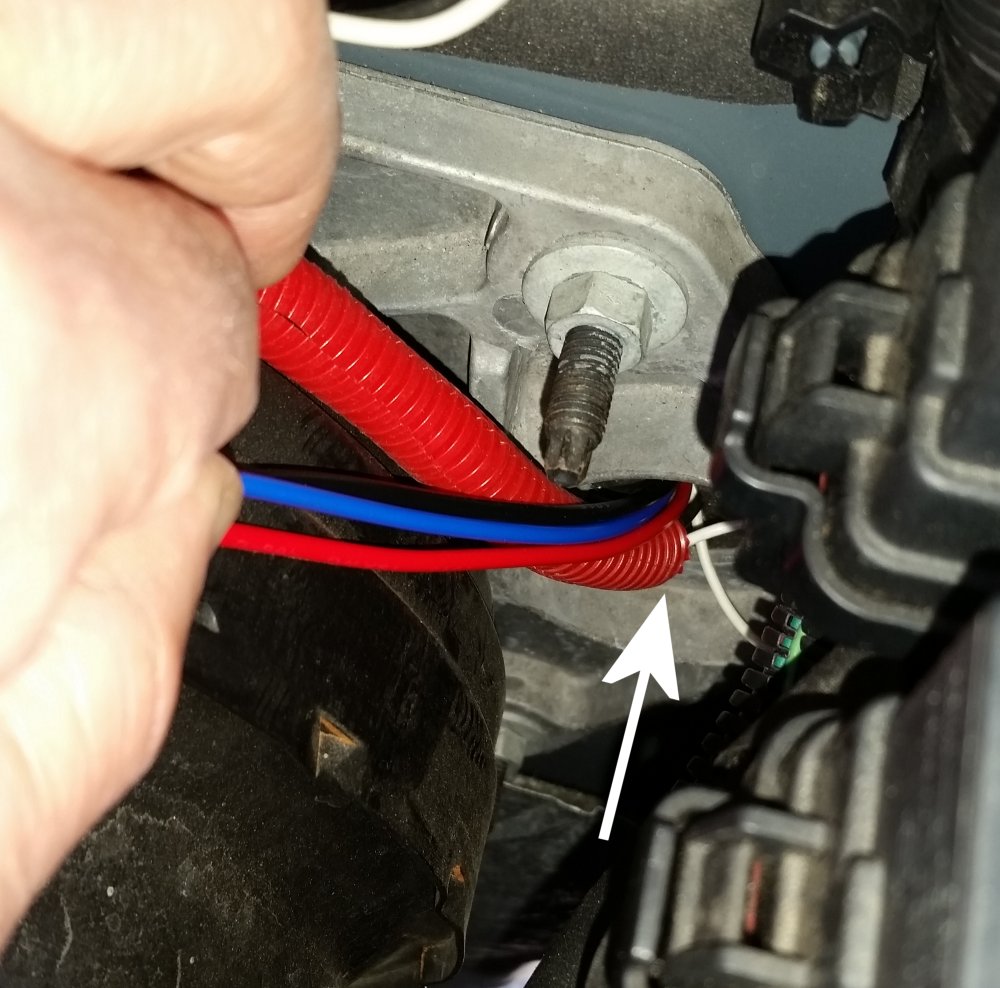
On the Jeep JK driver side, there is a wire pass-through. We disconnected the switch and routed the three wires through the pass-through.
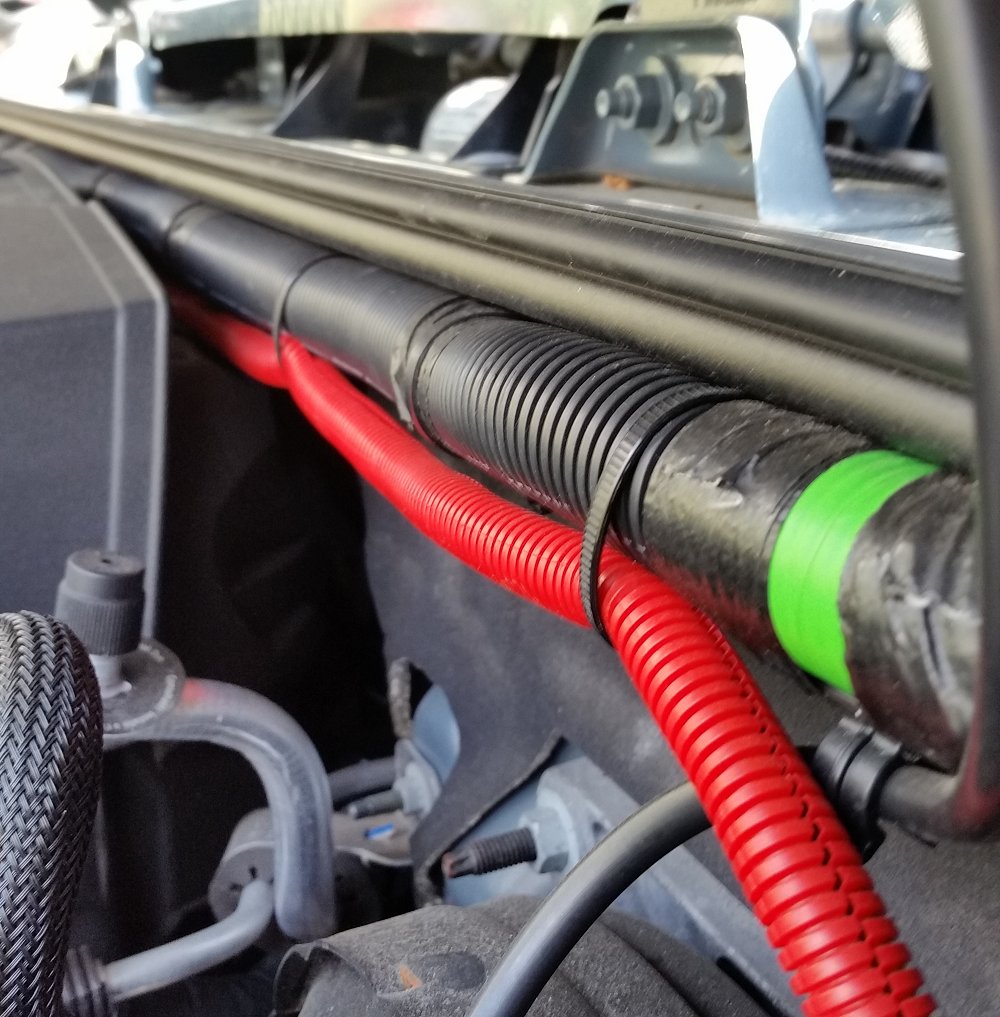
Each Light Pod’s wires were run to the passenger side, where the battery is located. We ran the wire through 1/2″ Split Loom Tubing to keep the engine bay clean and the wires safe from abrasion.
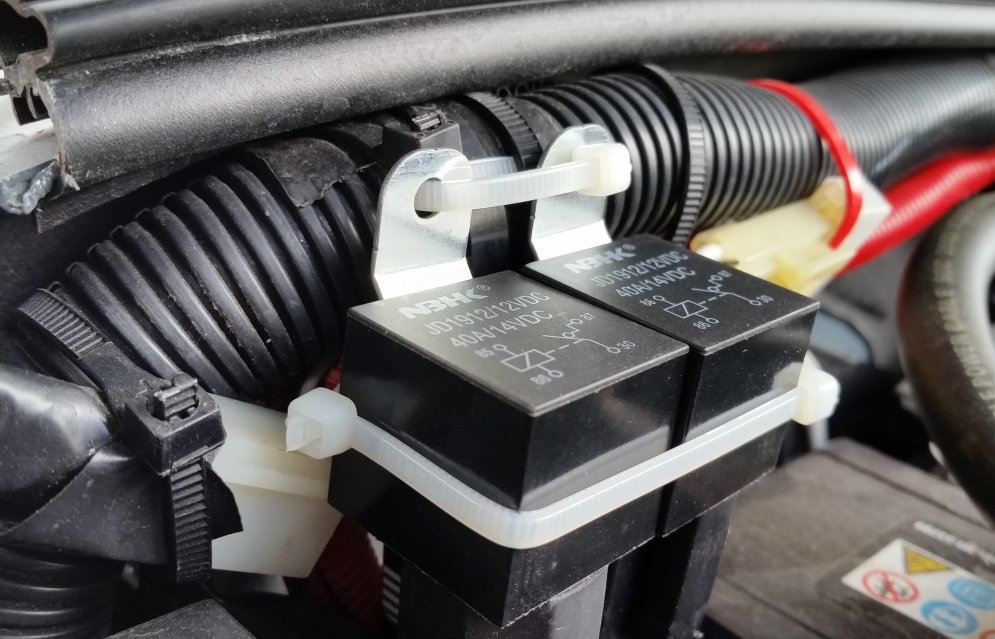
Both relays were mounted to the firewall by securing them to the Jeep’s existing wiring harness and the excess harness wire was bound up and zip-tied. We decided to keep the full length of wire because we may relocated these Black Oak LED Pods to a new location in another project we’re thinking about.
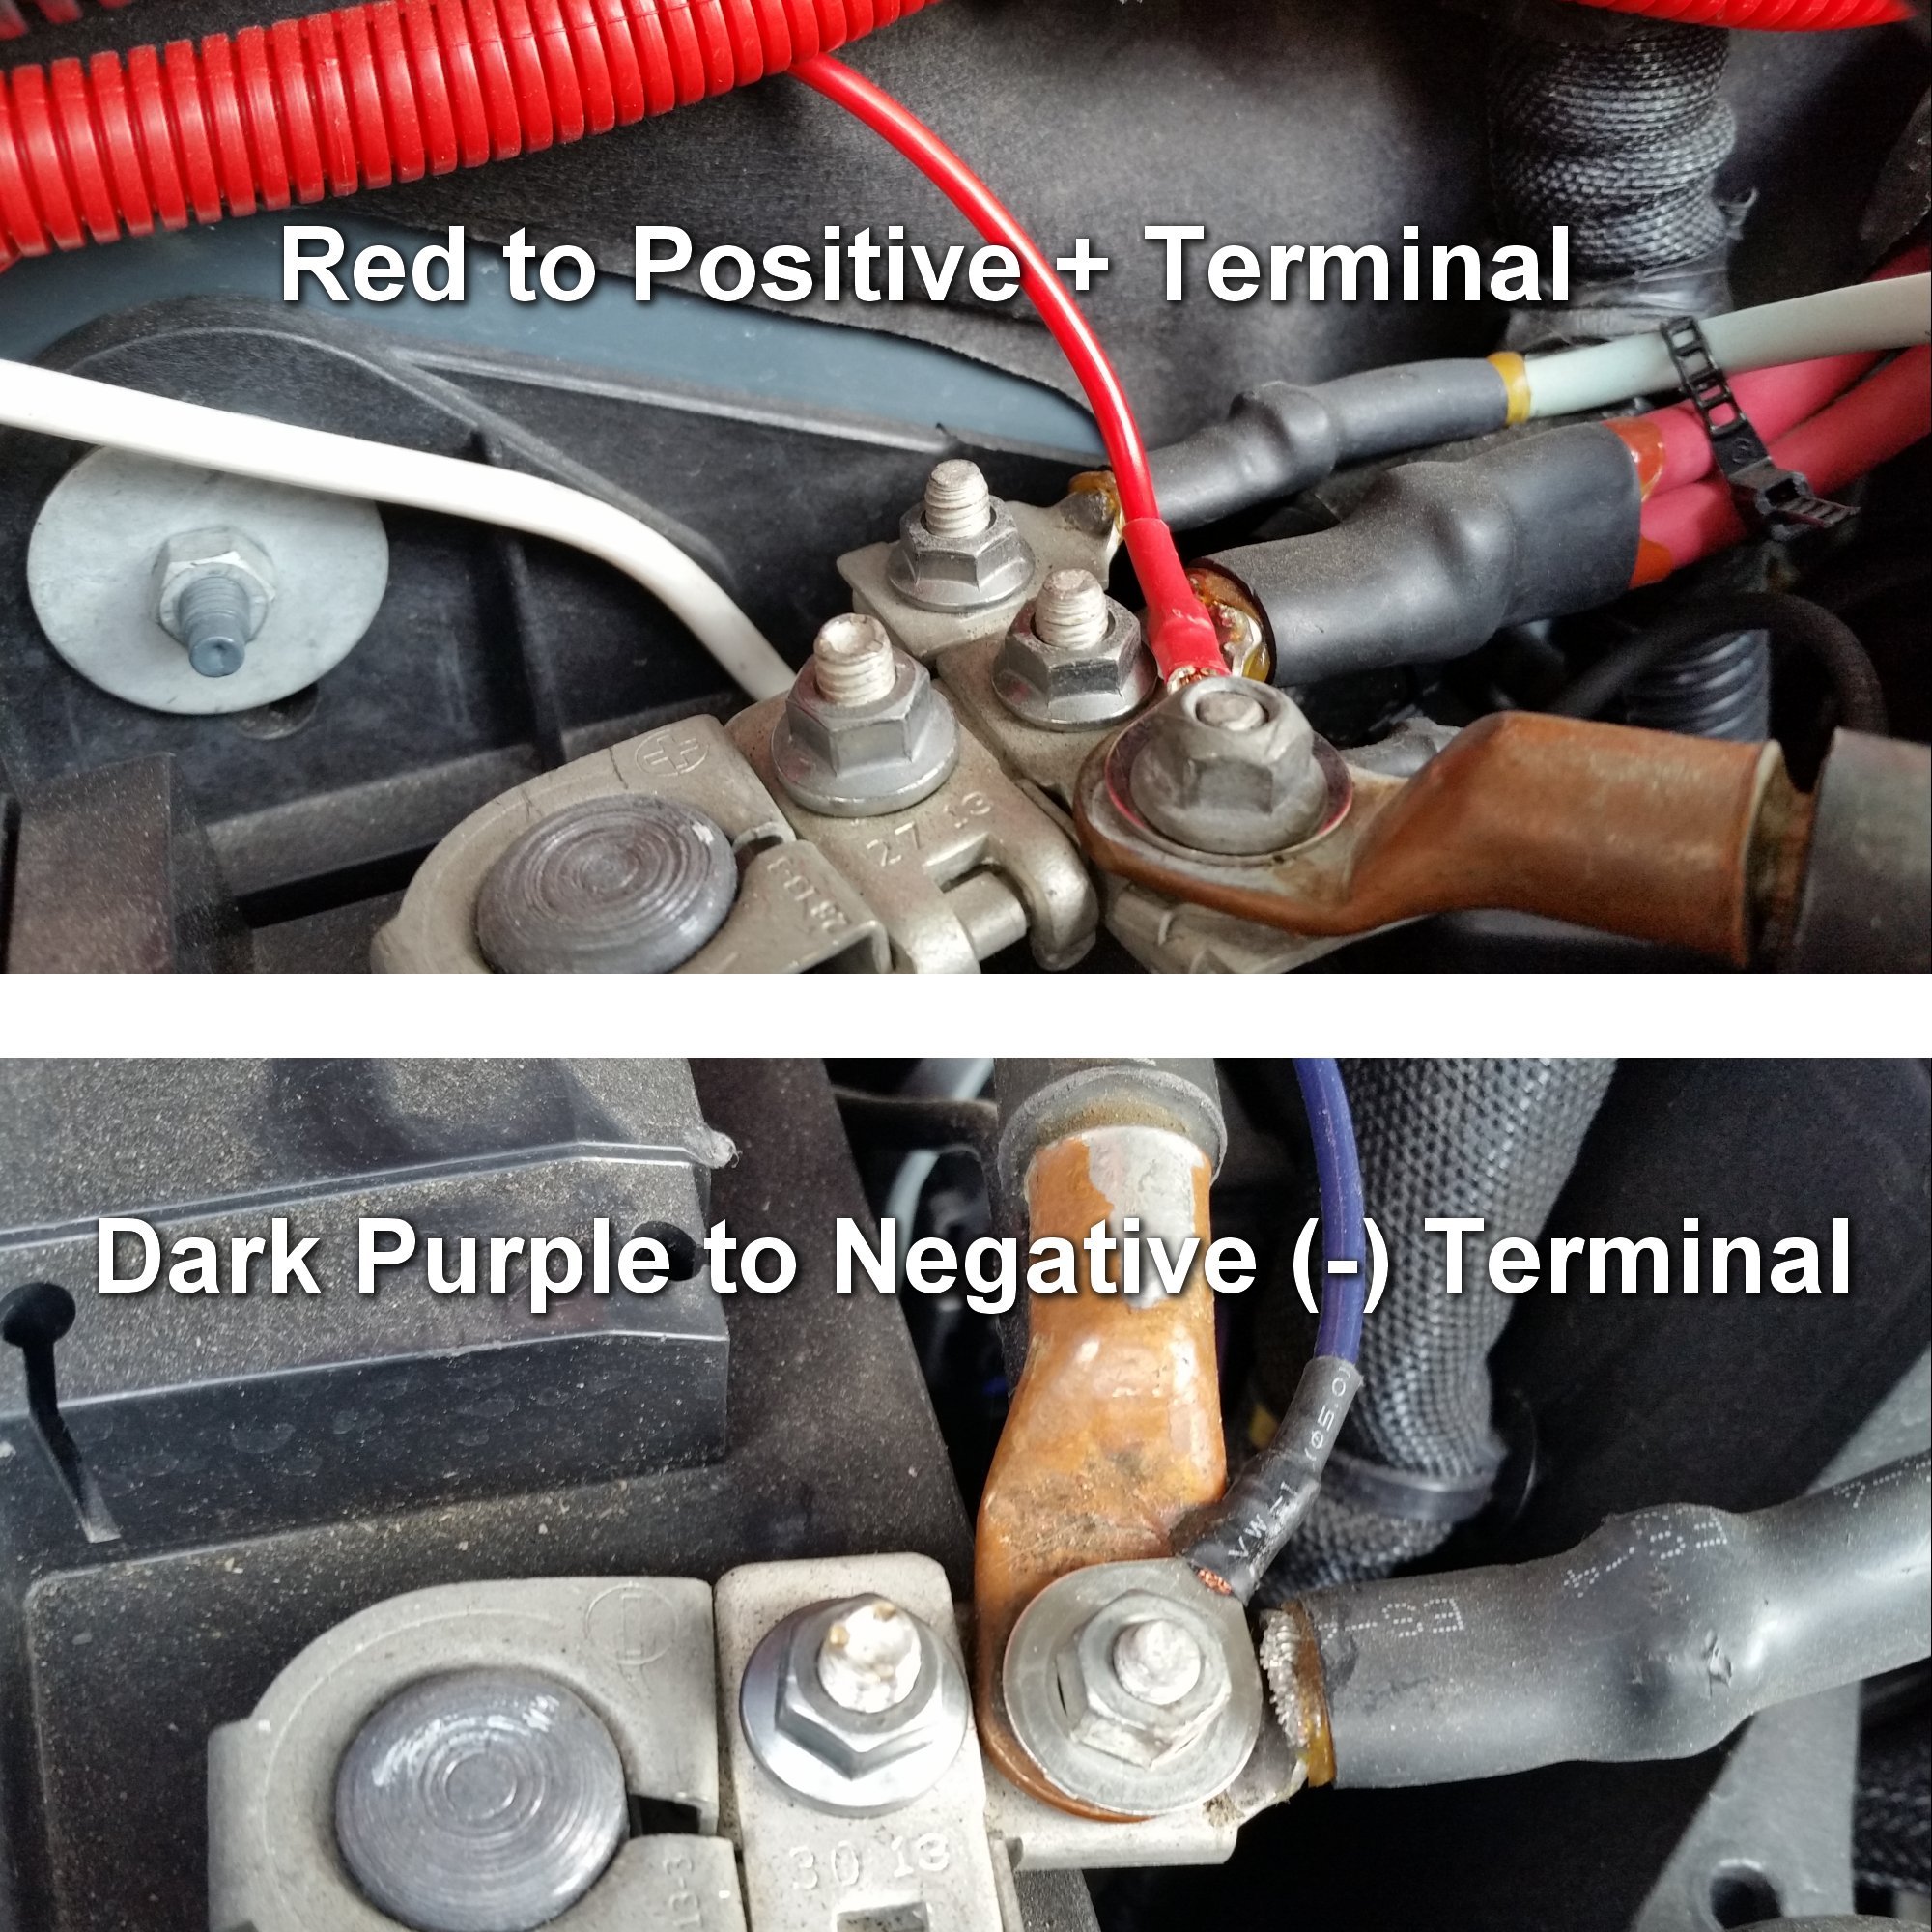
The red fused wire of the Black Oak wiring harness goes to the positive (+) battery terminal and the black, or dark purple wire in this case, goes to the negative (-) terminal of the battery.
Switch Location
Each light comes with it’s own wiring harness and it’s own control switch. While that may be ideal for some people who want to control both lights individually, I preferred to control the lights as a set together with one switch. By combining the Blue wires that connect to the switches in each wiring harness, a single switch can power both harness relays. Then a single switch can be used to control the pair of lights together.
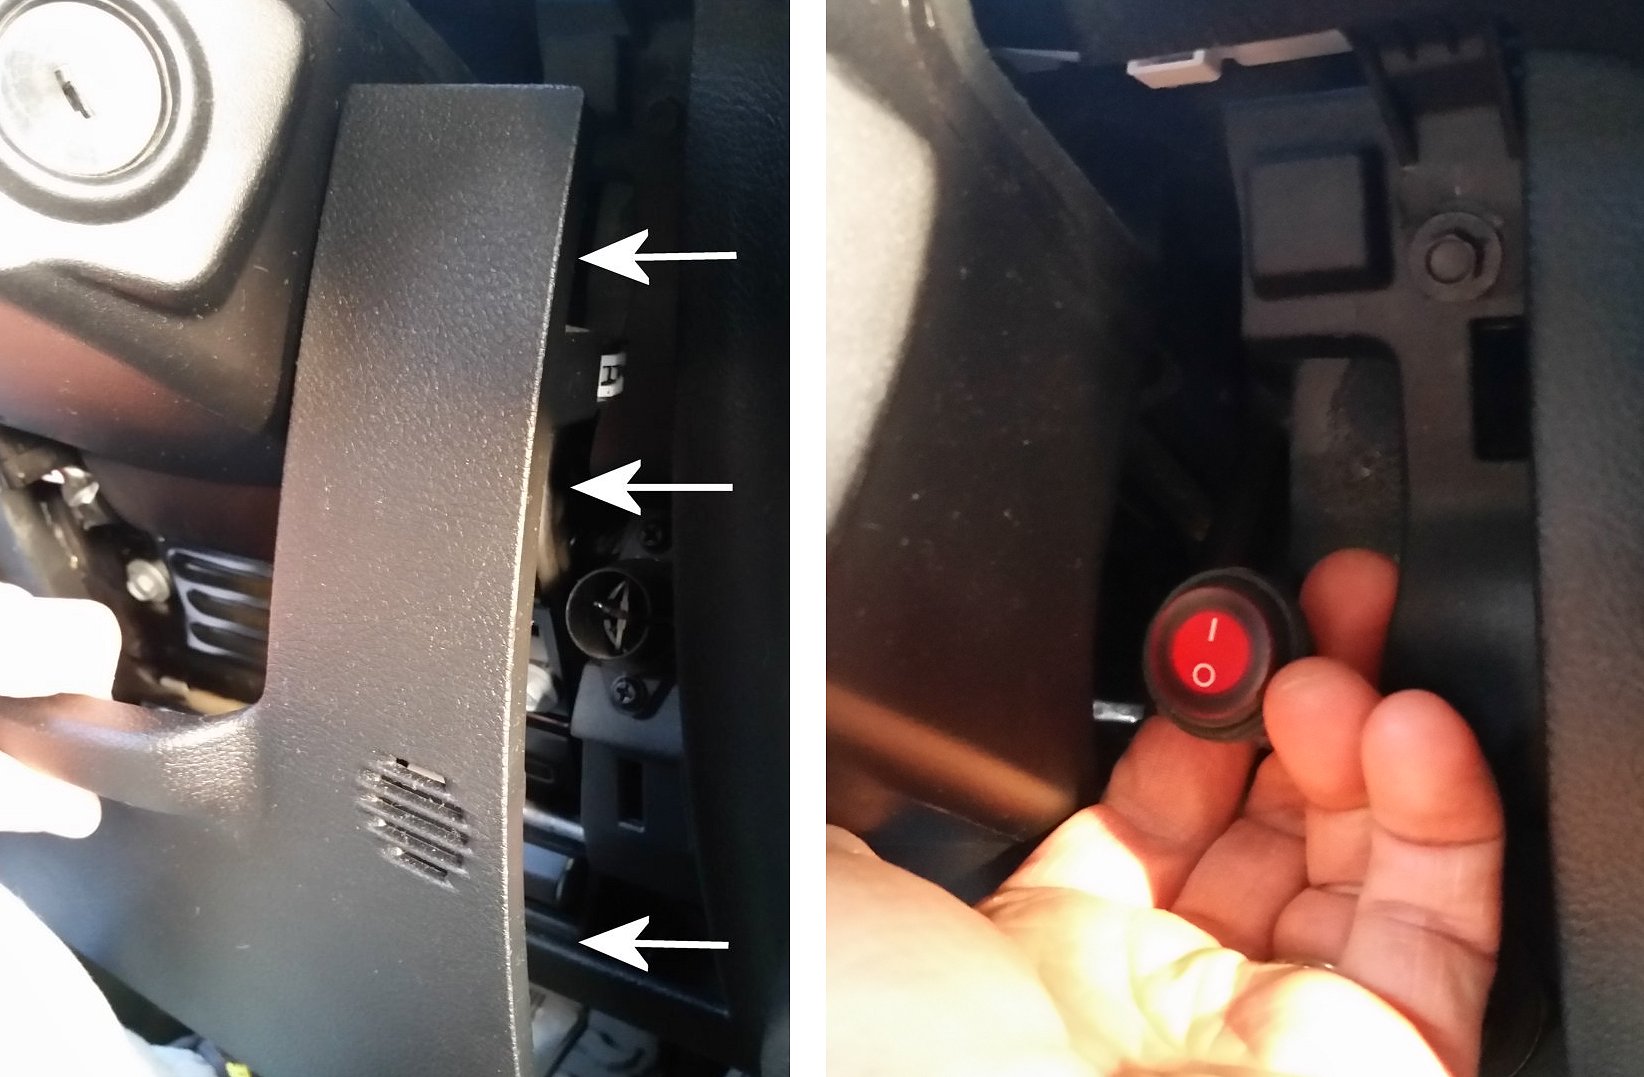
If I were going to use the switches included with the wiring harness, I’d probably install it on the panel below the JK’s steering wheel on the right side. This location gave me a clear view of the switch while driving and was within easy reach to toggle it on and off while driving.
Routing the switch wire to this location is quite easy and only requires the removal of the lower panel, easily removed by pulling on the upper half to pop it off. Installing the switch in this location requires drilling a 3/4″ hole in the panel. If you install it in this location, before you drill make sure the wire has clearance on the back side so that it can pass through the panel and under the steering wheel.
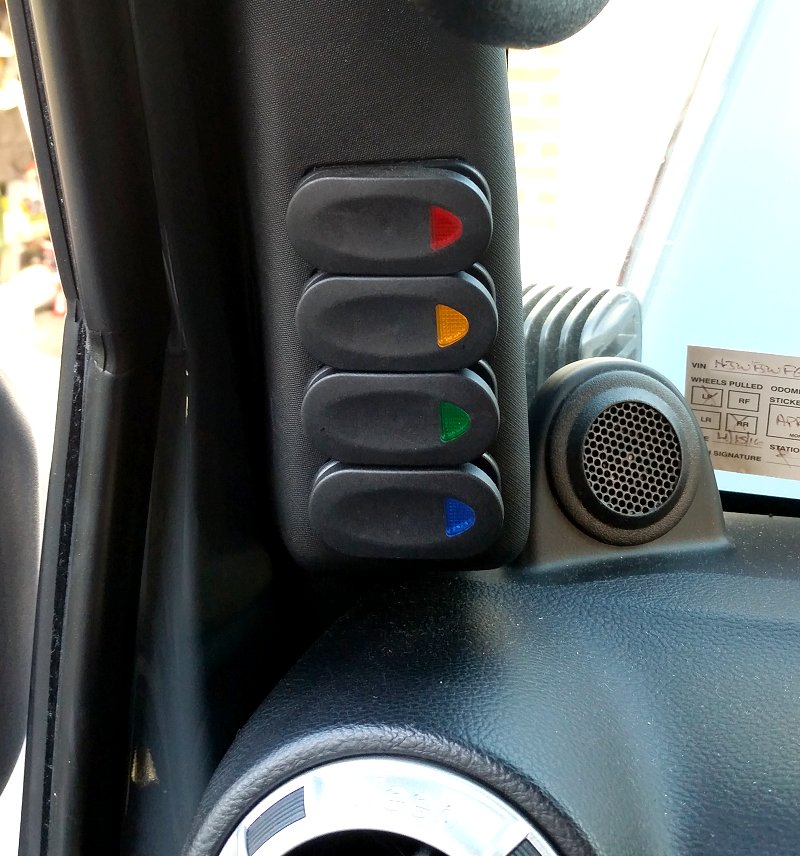
In my case I was planning to use the Rugged Ridge A-Pillar Switch Pod (11-17 Jeep Wrangler JK, 17235.58) that I had installed earlier. These 2 position rocker switches also provided by Rugged Ridge use the same three prong input/output as the switch included on the wiring harness. Below is a wiring diagram of these switches. I combined both wiring harnesses into a single switch to control both lights with this single switch. In my case with this A-Pillar I used the amber switch for these lights, routing the wire down along the left side of the dash.
Thoughts, Analysis & Review
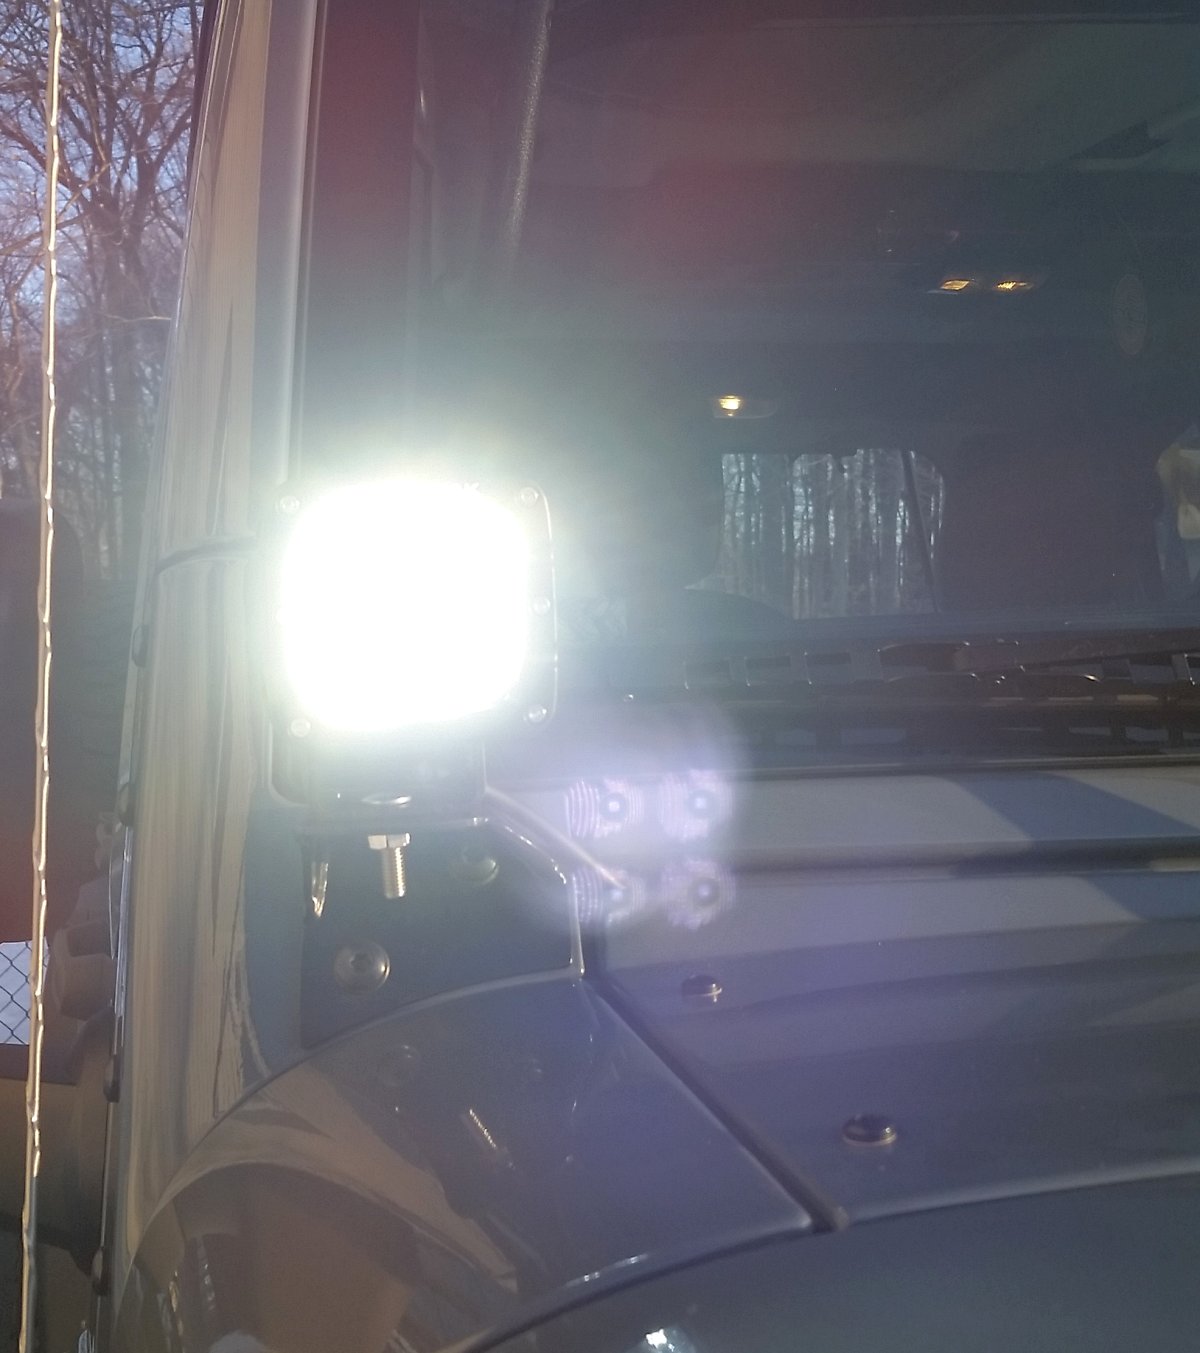
With the Lights install and wired up, we tested our work. First impression: Extremely Bright! Even though we were testing these out for the first time during daylight hours, the power was very noticeable!
So what do we think… We’re still putting together a full breakdown of our thoughts on the light pods, which will be coming up soon in another article but we want to cap off this install with the highlights of what we think about these pods. So here we go.
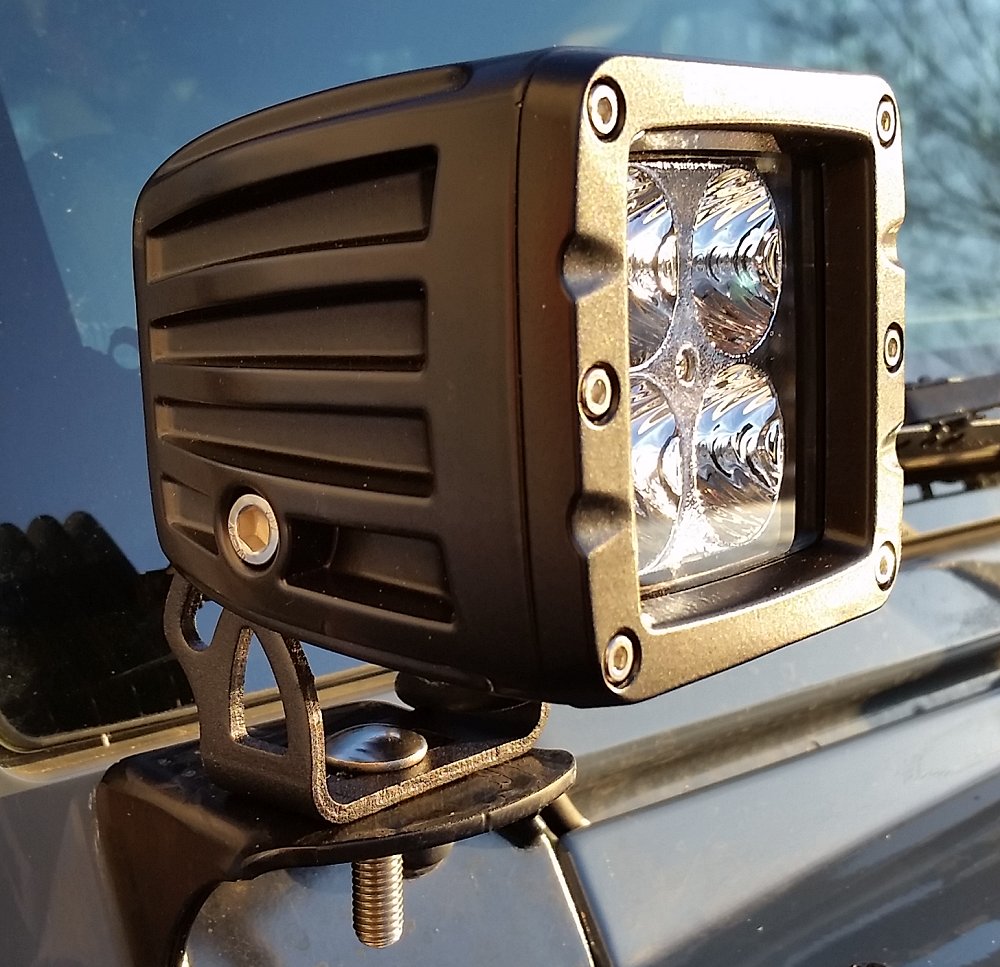
Pod Construction
When it comes to form and function, we like simple, purpose built, no-nonsense design that’s built simple, strong and designed to last. That’s probably why we like Jeeps and military equipment. What we really like about the design of these Black Oak LED Pods is that they look and feel like they were built with these concepts in mind.
The housing is made of thick, strong aluminum that looks like it could take a lot of abuse. The side panels of the housing are contoured to recess the military breather and adjustment bolts from snagging on obstacles. The forward face of the housing is a square aluminum ring bolted down with stainless steel hardware sealing the thick Polycarbonate Lexan lens behind the ring. This creates a highly water resistant seal against moisture and the high winds of driving sealing the electronics from the elements. A top-down view of the housing shows inner thick fins that will disperse any heat generated by the 40 watts worth of Cree XM-L2 LEDs. The weight saving fins are protected by the outer sides of the housing. Another important feature of these lights often overlooked by cheaper light manufacturers is the breathers. Pressure inside of the housing has to equalize with the atmosphere otherwise damage to the seals can occur and water can infiltrate the housing, damaging the electronics. Black Oak didn’t skimp on the need for pressure equalization and use US MIL810-STD military breathers to get the job done. The Black Oak LED lights carry a IP69K rating on the sealed housing.
The powder coated mounting bracket is made of 12 gauge steel and vertical adjustable are easily made with recessed stainless steel hardware. Horizontal adjustments are done with a single stainless steel mounting bolt.
Performance
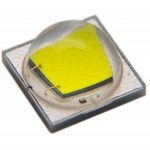
Our set of Pods uses four 10 watt Cree XM-L2 LED’s, which are 60% brighter than previous generation LED’s. That’s 40 watts worth of Cree XM-L2 LED power packed into a small footprint. The Cree XM-L2 is the highest-performing, commercially-available, single-die LED available on the commercial market. The Cree XM-L2 is also optimized for directional lighting meaning 100% of the LED light is projected towards the target unlike conventional lighting bulbs that required a large parabolic reflector to re-direct the light thrown from the bulb in all directions outward towards the target. That’s how LED is capable of throwing immense levels of light in one direction. A fact I’m still getting used to with LED technology. The LED technology has an average life span of about 50,000 hours making them far outlast previous generation lighting options.
The projection of light out of these 8 Cree XM-L2 LED’s at night is amazingly bright. With the two Pods set to overlap just a little in the center of the beam, the spread of light is very even with enough light projected above and below to light a good field of vision.
I use these lights almost daily on my commute through wooded areas. More than a few times I can say these lights have paid for themselves with helping me see deer far ahead of my Jeep crossing the road or off to the side of the road ready to dart out as I passed. Installing a quick and easy switch is a must of you plan to use the lights on the road as I do.
It’s worth noting again that it’s hard to believe this much light comes out of such a small light Pod. With such a small footprint we already have plans to get more of these lights for two other projects. Black Oak LED offers both 5w Osram LEDs or 10 Cree XM-L2 available in a High Throw Spot or Wide Flood Optics.
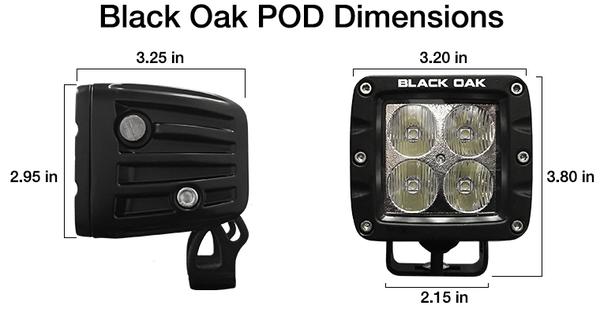
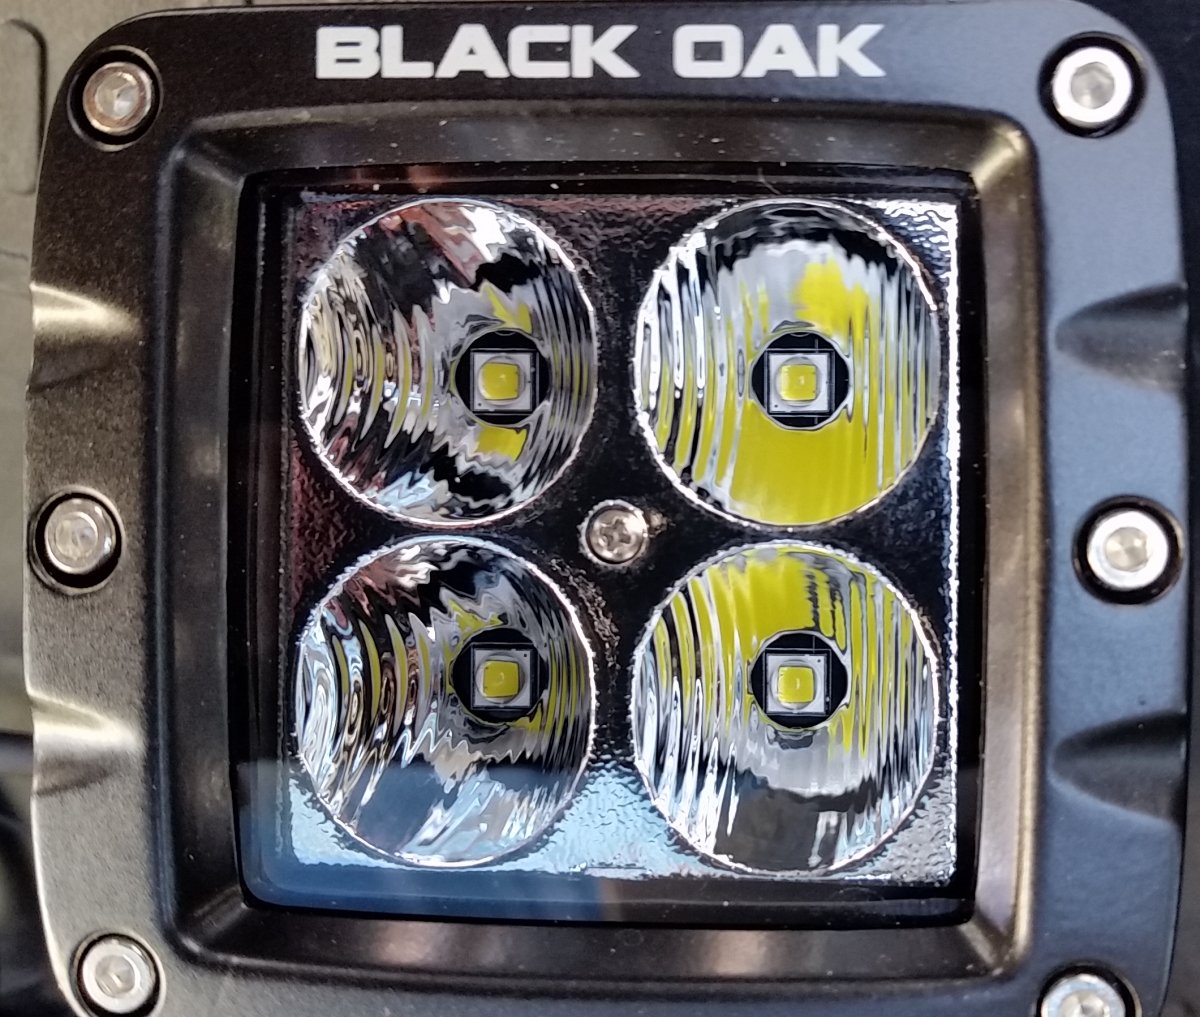
40w CREE XM-L2 LED configuration consisting of four extremely bright CREE XM-L2 LEDs compacted into a 2-inch POD. The parabolic reflector surface of each CREE has a unique shape that appears to be designed to reflect light in a horizontal spread of equal light.
Wiring and Ease of Installation
The wiring harness is really what made the installation easy. We were happy with the quality of the components including the NBHK 40 Amp power relay, the weather-sealed Deutsch connectors, the weather resistant lit-when-on switches and the heavy gauge wire used in the harness. All of the wiring was pre-assembled only requiring installation.
Appearance
We love the visual appearance and styling of these pods. Our previous set of LED lights that were perched up on the windshield hinges were considerably larger than these pods and as a result obstructed our view out past the pillar of the windshield.
Overall Quality to Cost Ratio
Our Pods with the high performance Cree XM-L2 LED’s cost about $89 per pod with free shipping. The 5 watt osram LED’s cost a little less. Comparing this cost to other lights that we have purchased in the past, these lights are far less expensive and vastly outperform anything we’ve ever installed making them a big bang for the buck.
Company info
Black Oak LED
A U.S.A. based, family-owned, veteran-operated business located in in Florida.
Contact Info:
support@blackoakled.com
Phone: 1-800-348-1287
For more on our thoughts and analysis of the Black Oak LED Pods check back soon for an on-road, off-road test and analysis.


Great review, love the detail, very helpful.