
Maximus-3 Build Package Thoughts and Analysis.
The Rubicon 10th Anniversary, X and Hard Rock packages take the Wrangler’s appearance to a whole new level of sophistication and offroad prowess with the MOPAR Rubicon Front and Rear Off-Road Bumpers and the Power Dome Hood. However as most Jeep owners can attest, the stock Jeep, even in its special addition package form, still screams to be personalized and improved upon. With our 2014 Rubicon X project already planned out and delved into, we looked to Maximus-3 to take our Rubicon X to the next level.
In our introduction of this project (Project Intro) we mentioned that we had known about Maximus-3 for awhile prior to even making the Rubicon purchase. It was several write-ups and happy Rubicon 10th Anniversary owners posting comments and photos that caught our attention. Photos of the Classic Hoop and Winch Mount prompted us to add these superbly engineered add-ons to our wish list. The end of 10th Anniversary production lead to an excited order for a Rubicon X in Anvil and a quick review of our Rubicon wish-list.
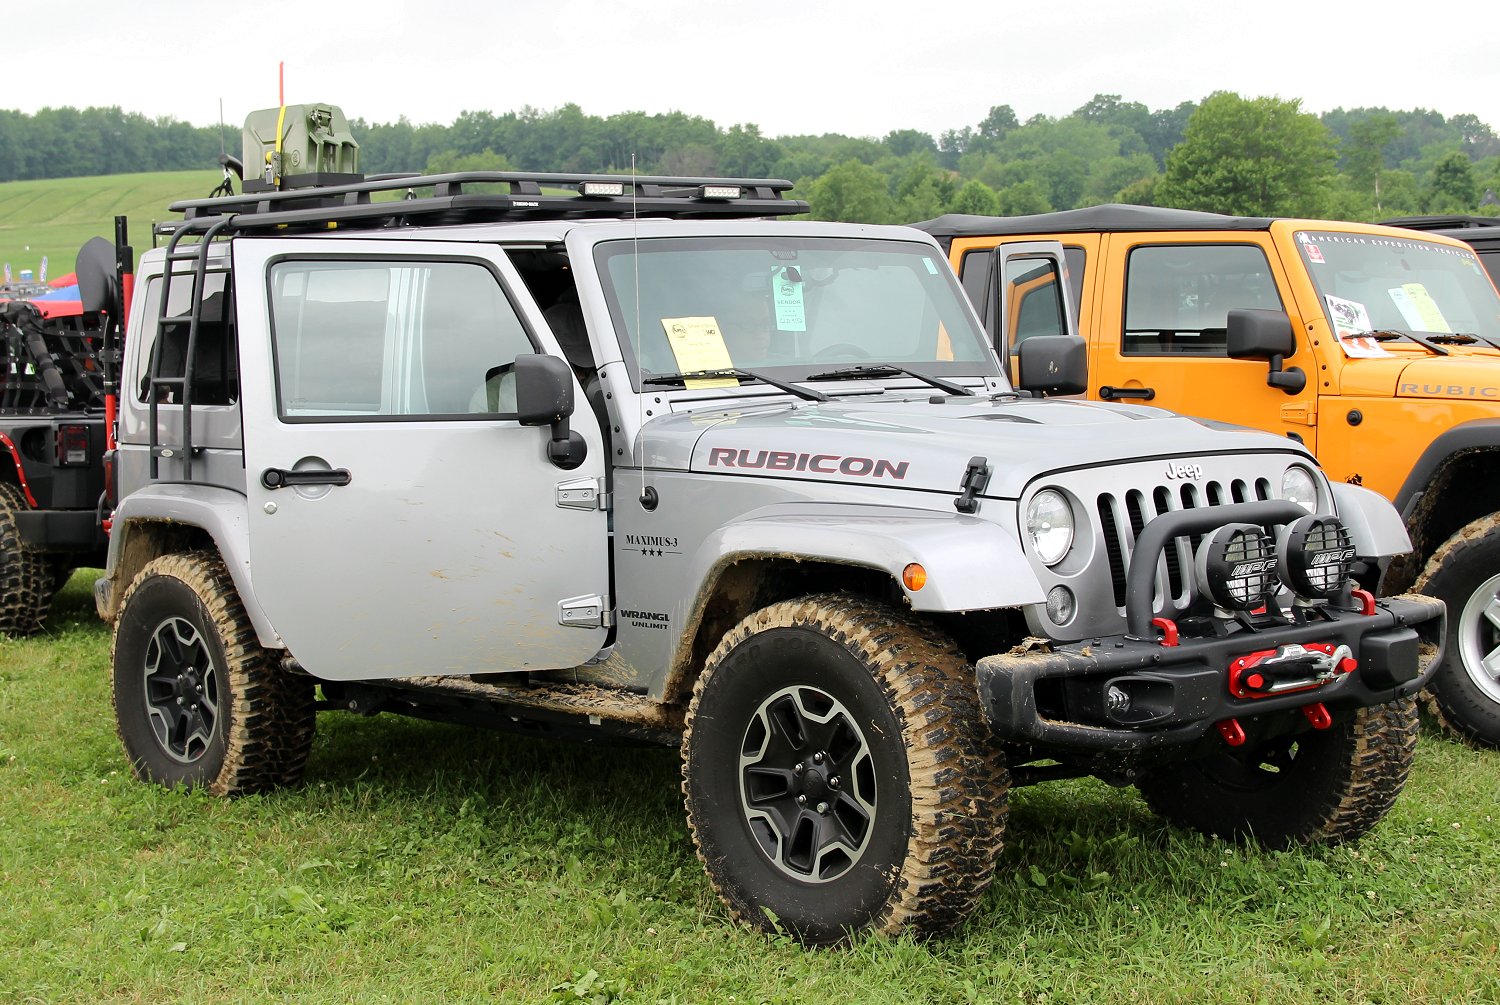
We didn’t realize how well crafted these Maximus-3 components were until we saw them first hand on a Rubicon X at the Bantam Heritage Jeep Festival in Butler PA. This sharp JK was decked out with a slew of Maximus-3 products but still maintained the sophisticated factory X-package appearance. We spent some time drooling over the JK and talking to the owner. As luck would have it, we were talking to one of the engineers at Maximus-3, who was very happy to show us around the JK and point out some engineering forethought that went into their products. We’ve seen plenty of Maximus-3 photos up to this point but a first hand Engineer guided examination sold us on their product line.
Boxes at the Front Door!
- Upgrades to the Rubicon Limited Edition Package
- Rubicon Bumper Removal
- Maximus-3 Winch Mount Installation
- Winch Install onto Maximus-3 Winch Mount
- Maximus-3 D-Ring Loops Installation
- Maximus-3 Hook Anchor & Hauser Fairlead Install
- Reinstall Bumper & Maximus-3 Hoop Bar Install
What follows is our review of the installation, design and appearance of the Maximus-3 Winch Mount, Classic Hoop, Light Brackets, Winch Hook Anchor and D-Ring Loops.
Maximus-3 Classic Hoop
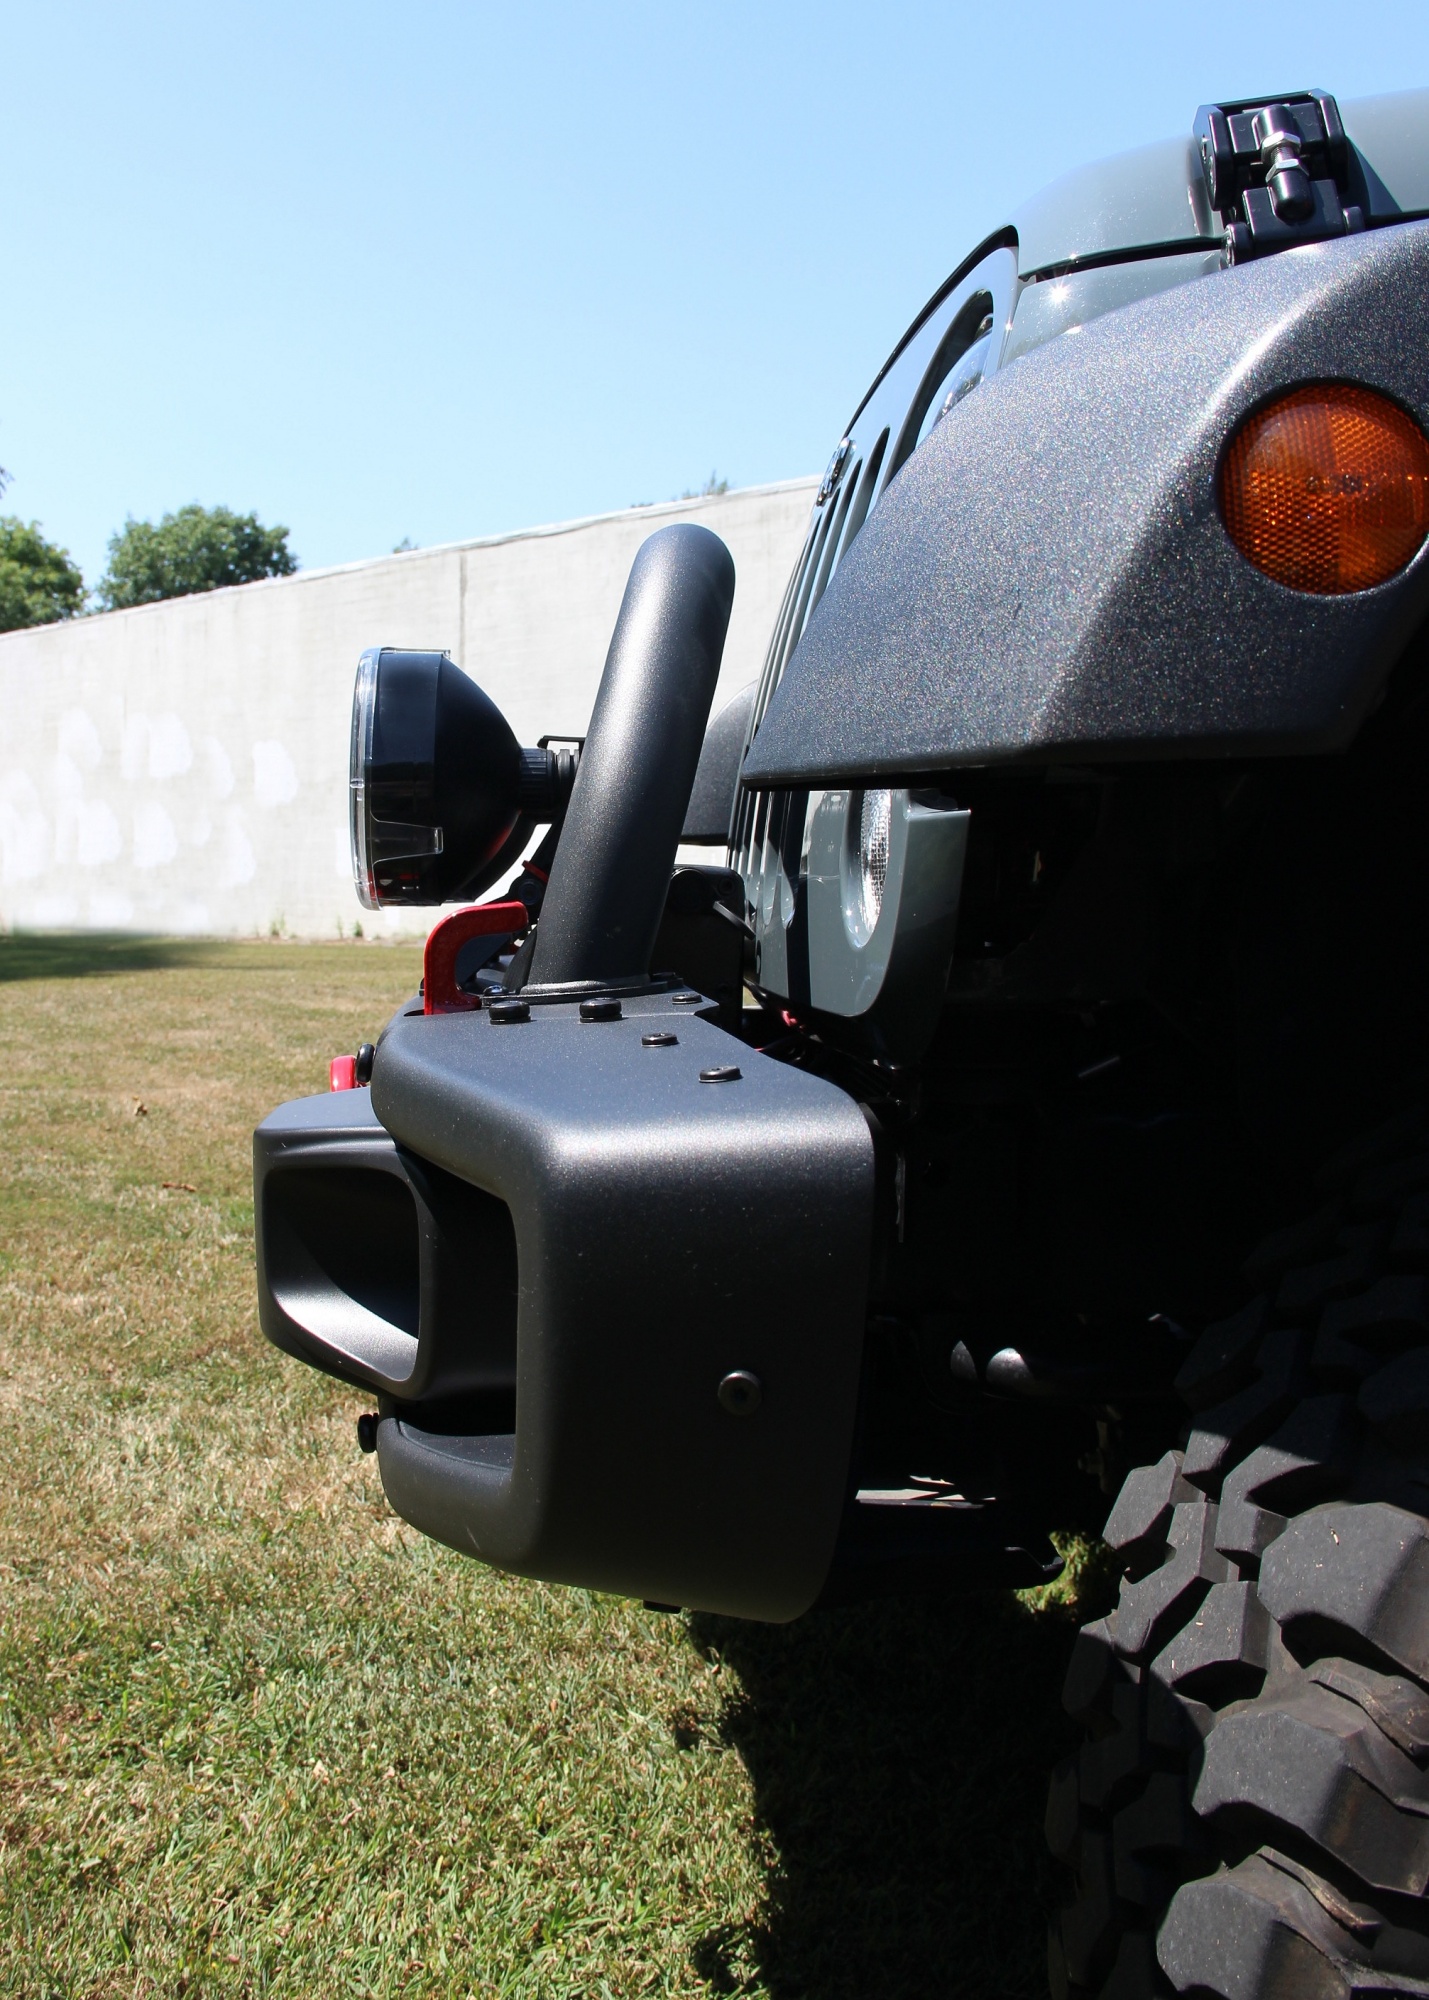
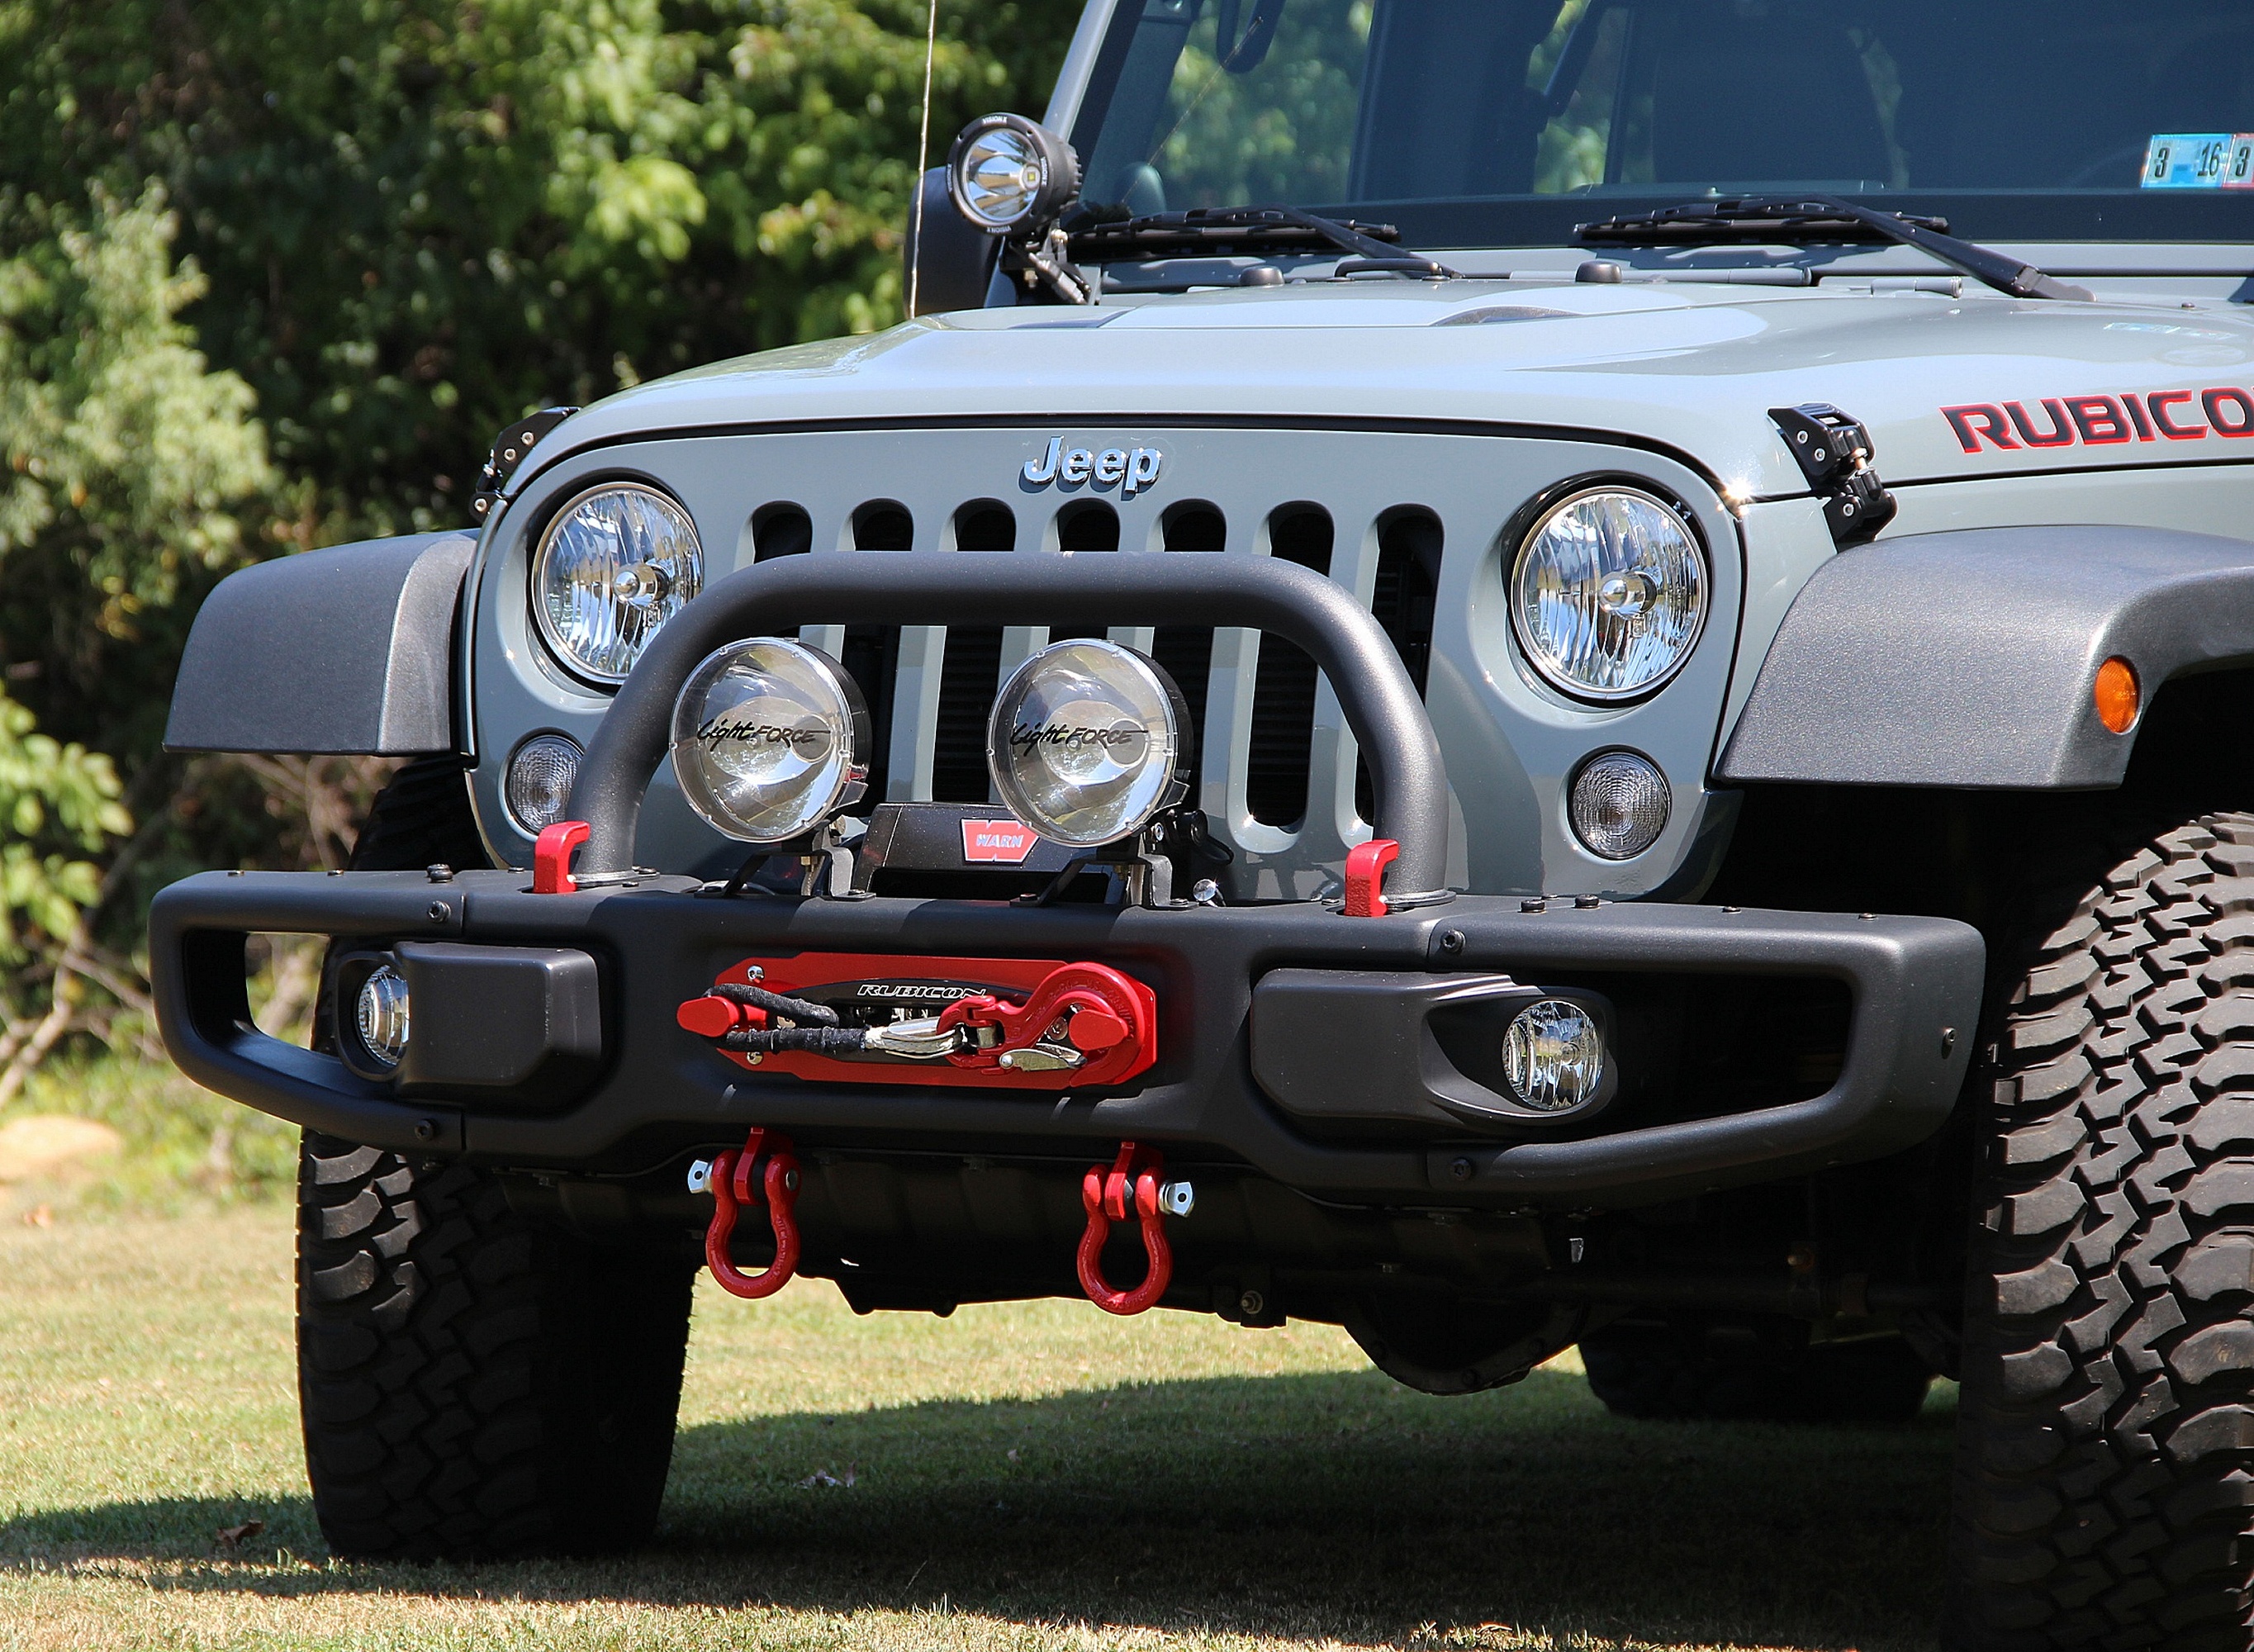
Maximus-3 puts together several packages for these bumpers that are meant to increase the drool factor and functionality without replacing or concealing our production bumper. This is a huge plus with these factory special addition packages. The last thing a Jeep owner would want to do is replace something they shelled out their hard earned cash for in their special addition Rubicon package. We certainly didn’t want to anyway. Nor did we want to bolt something onto the Jeep that detracted from or devalued the factory Package appearance. Maximus-3 definitely comes through with components that intensify the appearance of the Mopar bumper while making it appear to be a part of the factory package. The Classic Hoop visually stands out in form and function, giving the 7-slot grill a beefy, protected appearance without sticking out like some cheap gaudy aftermarket add-on.
Several features of the Classic Hoop stood out to us. Appearance wise, we really liked the angle of the Classic Hoop. It precisely and deliberately matched the swept back angle of the JK’s grill. We also really liked the double bend on the sides of the Classic Hoop and how well these match the form of the JK itself.
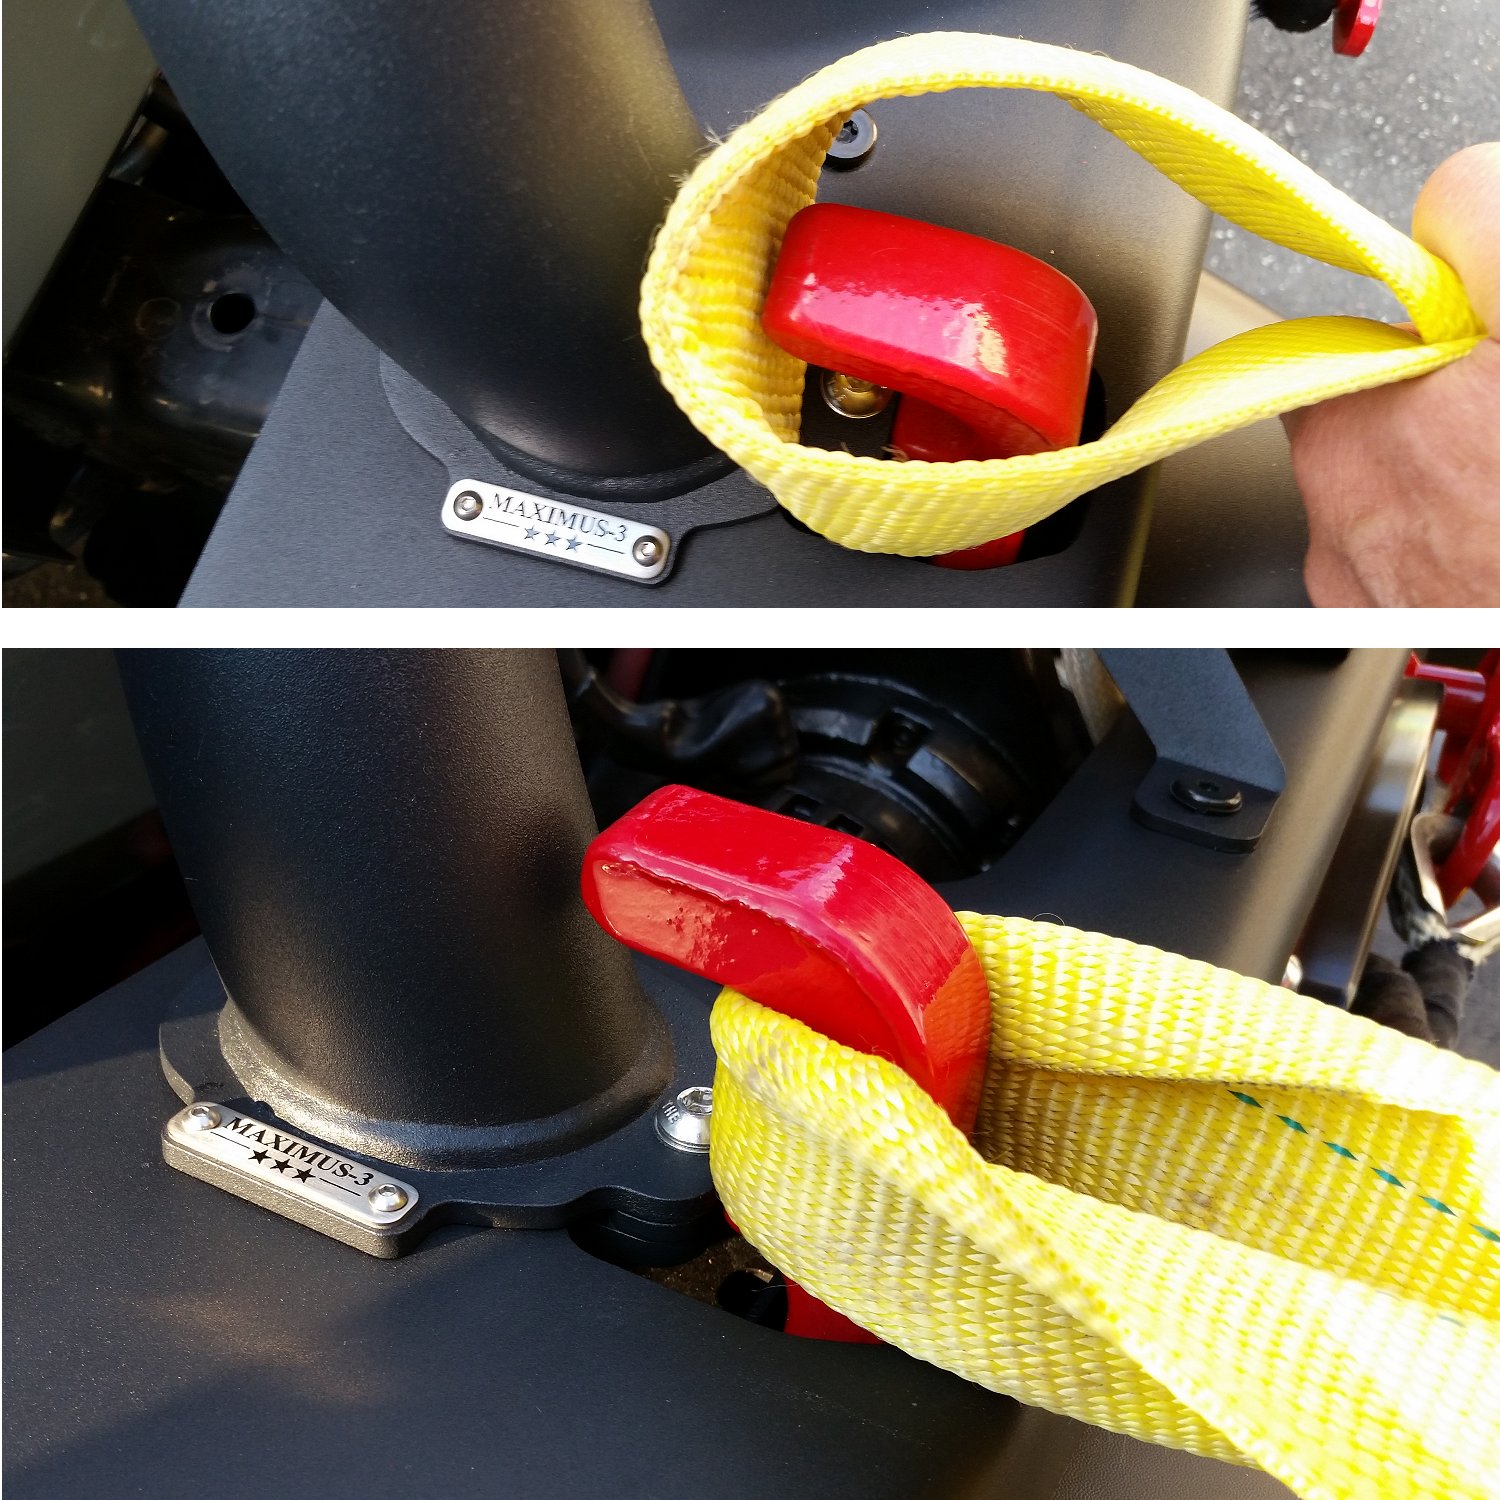
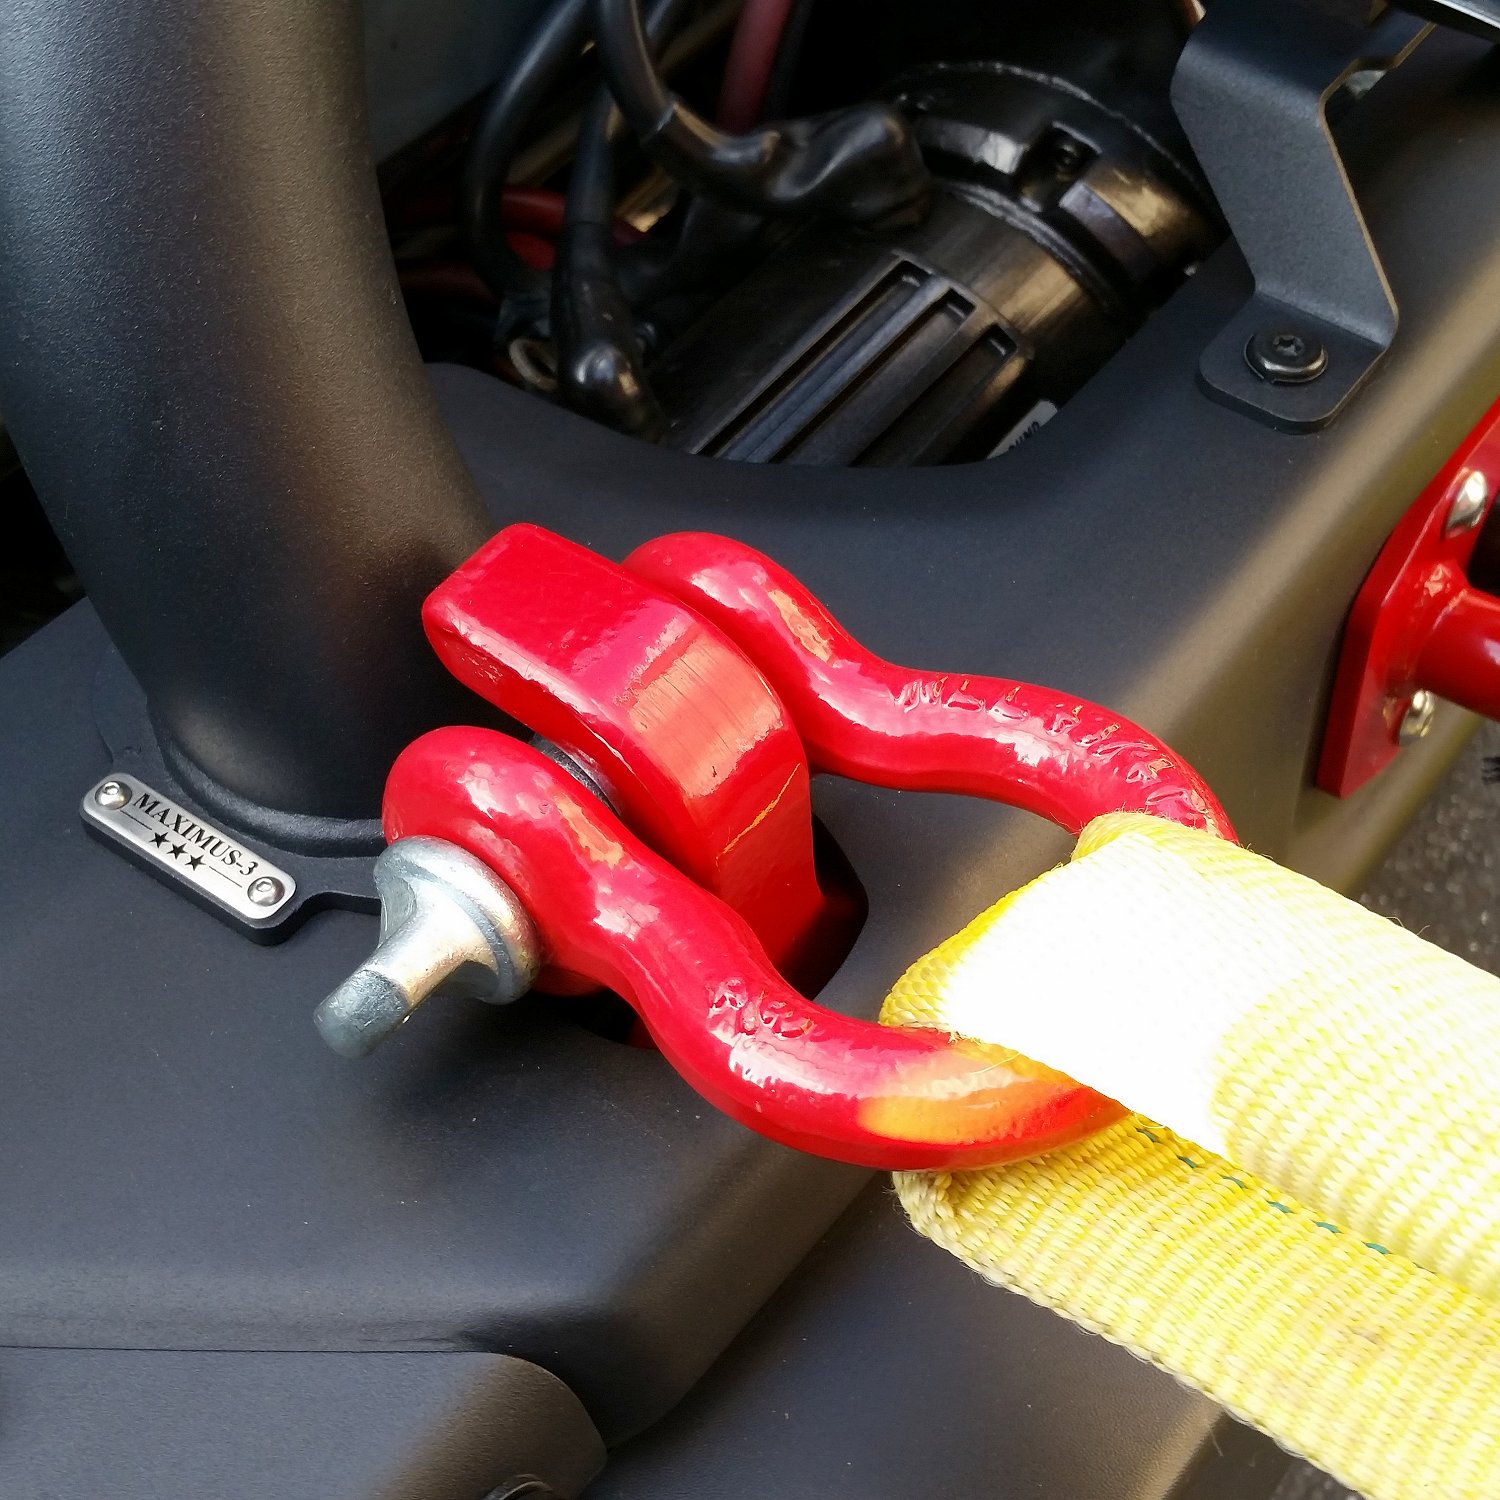
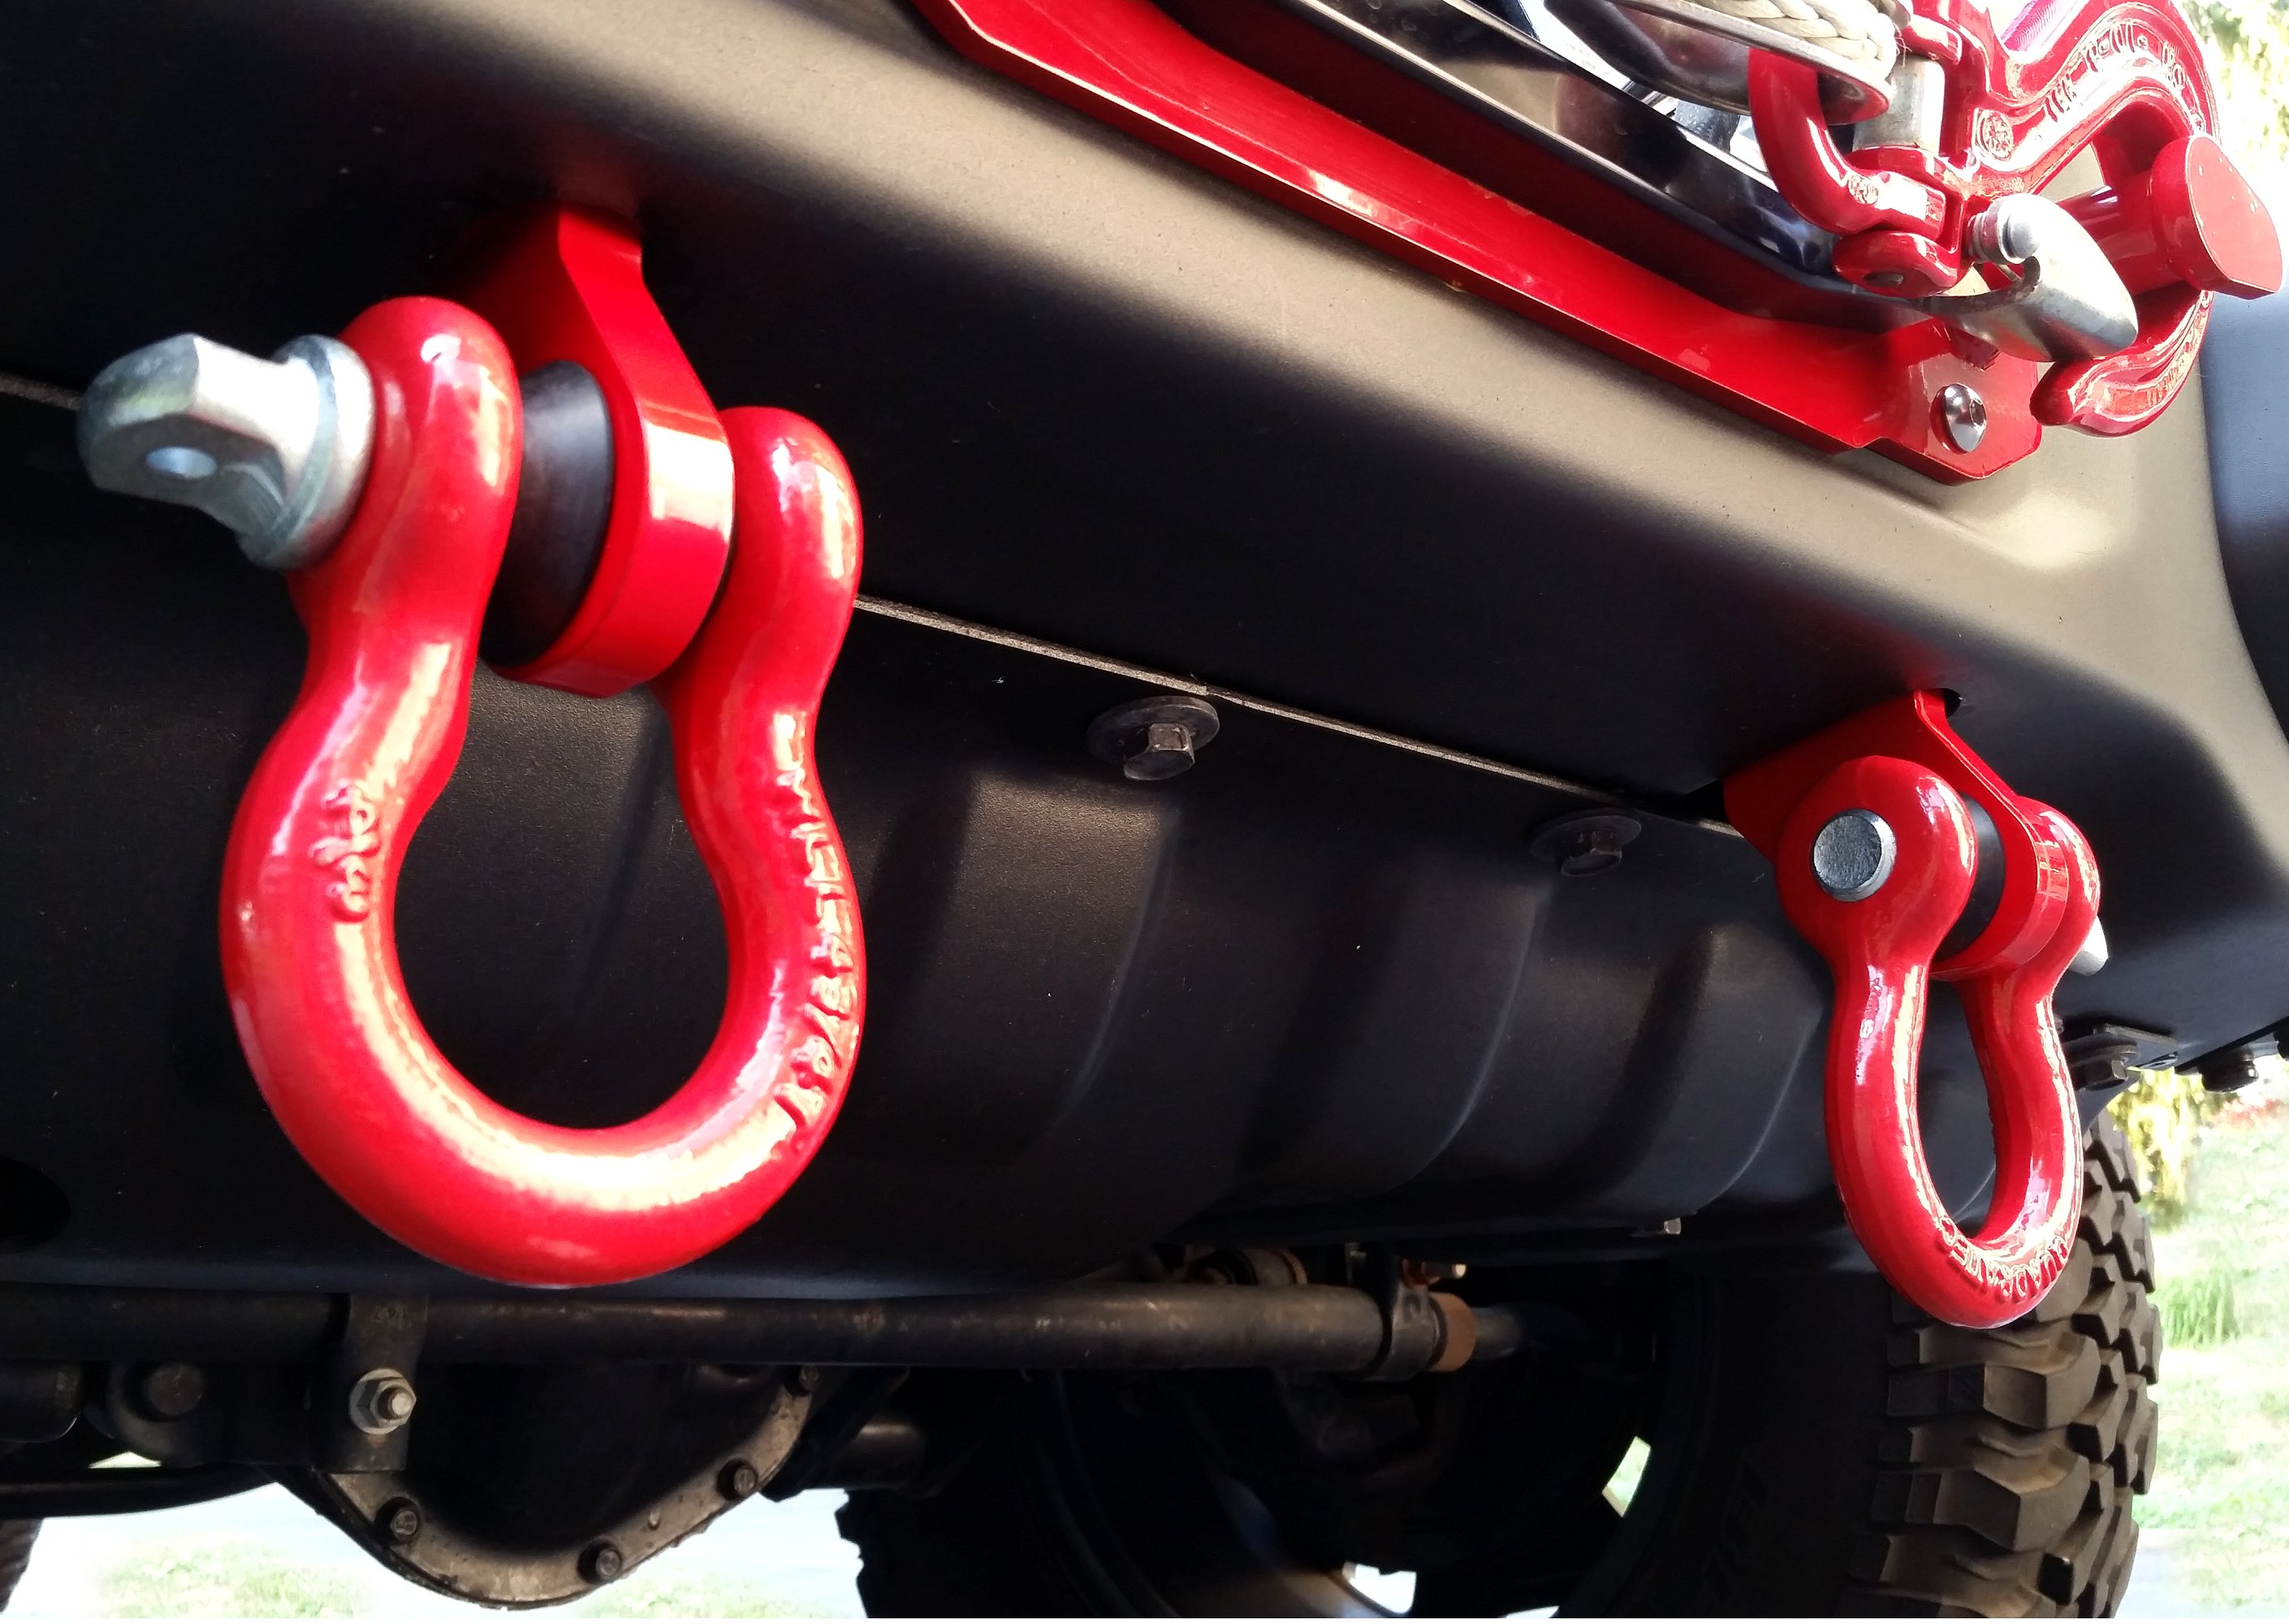
Placement of the Hoop had us a little concerned about how it might interfere with attaching recovery straps to the factory hooks. But after the installation we realized that the Hoop position actually enhanced rather than hindered use of recovery straps by aiding to retain the strap and preventing it form slipping off during a pull. Clearance between the Hoop and the factory hook is large enough to allow us to slip our thick 30,000 lb. 3-inch strap onto the factory hook with no problem at all. The location also gave us an option we didn’t have before adding D-Ring retention and increasing our recovery options.
Classic Hoop Installation & Construction
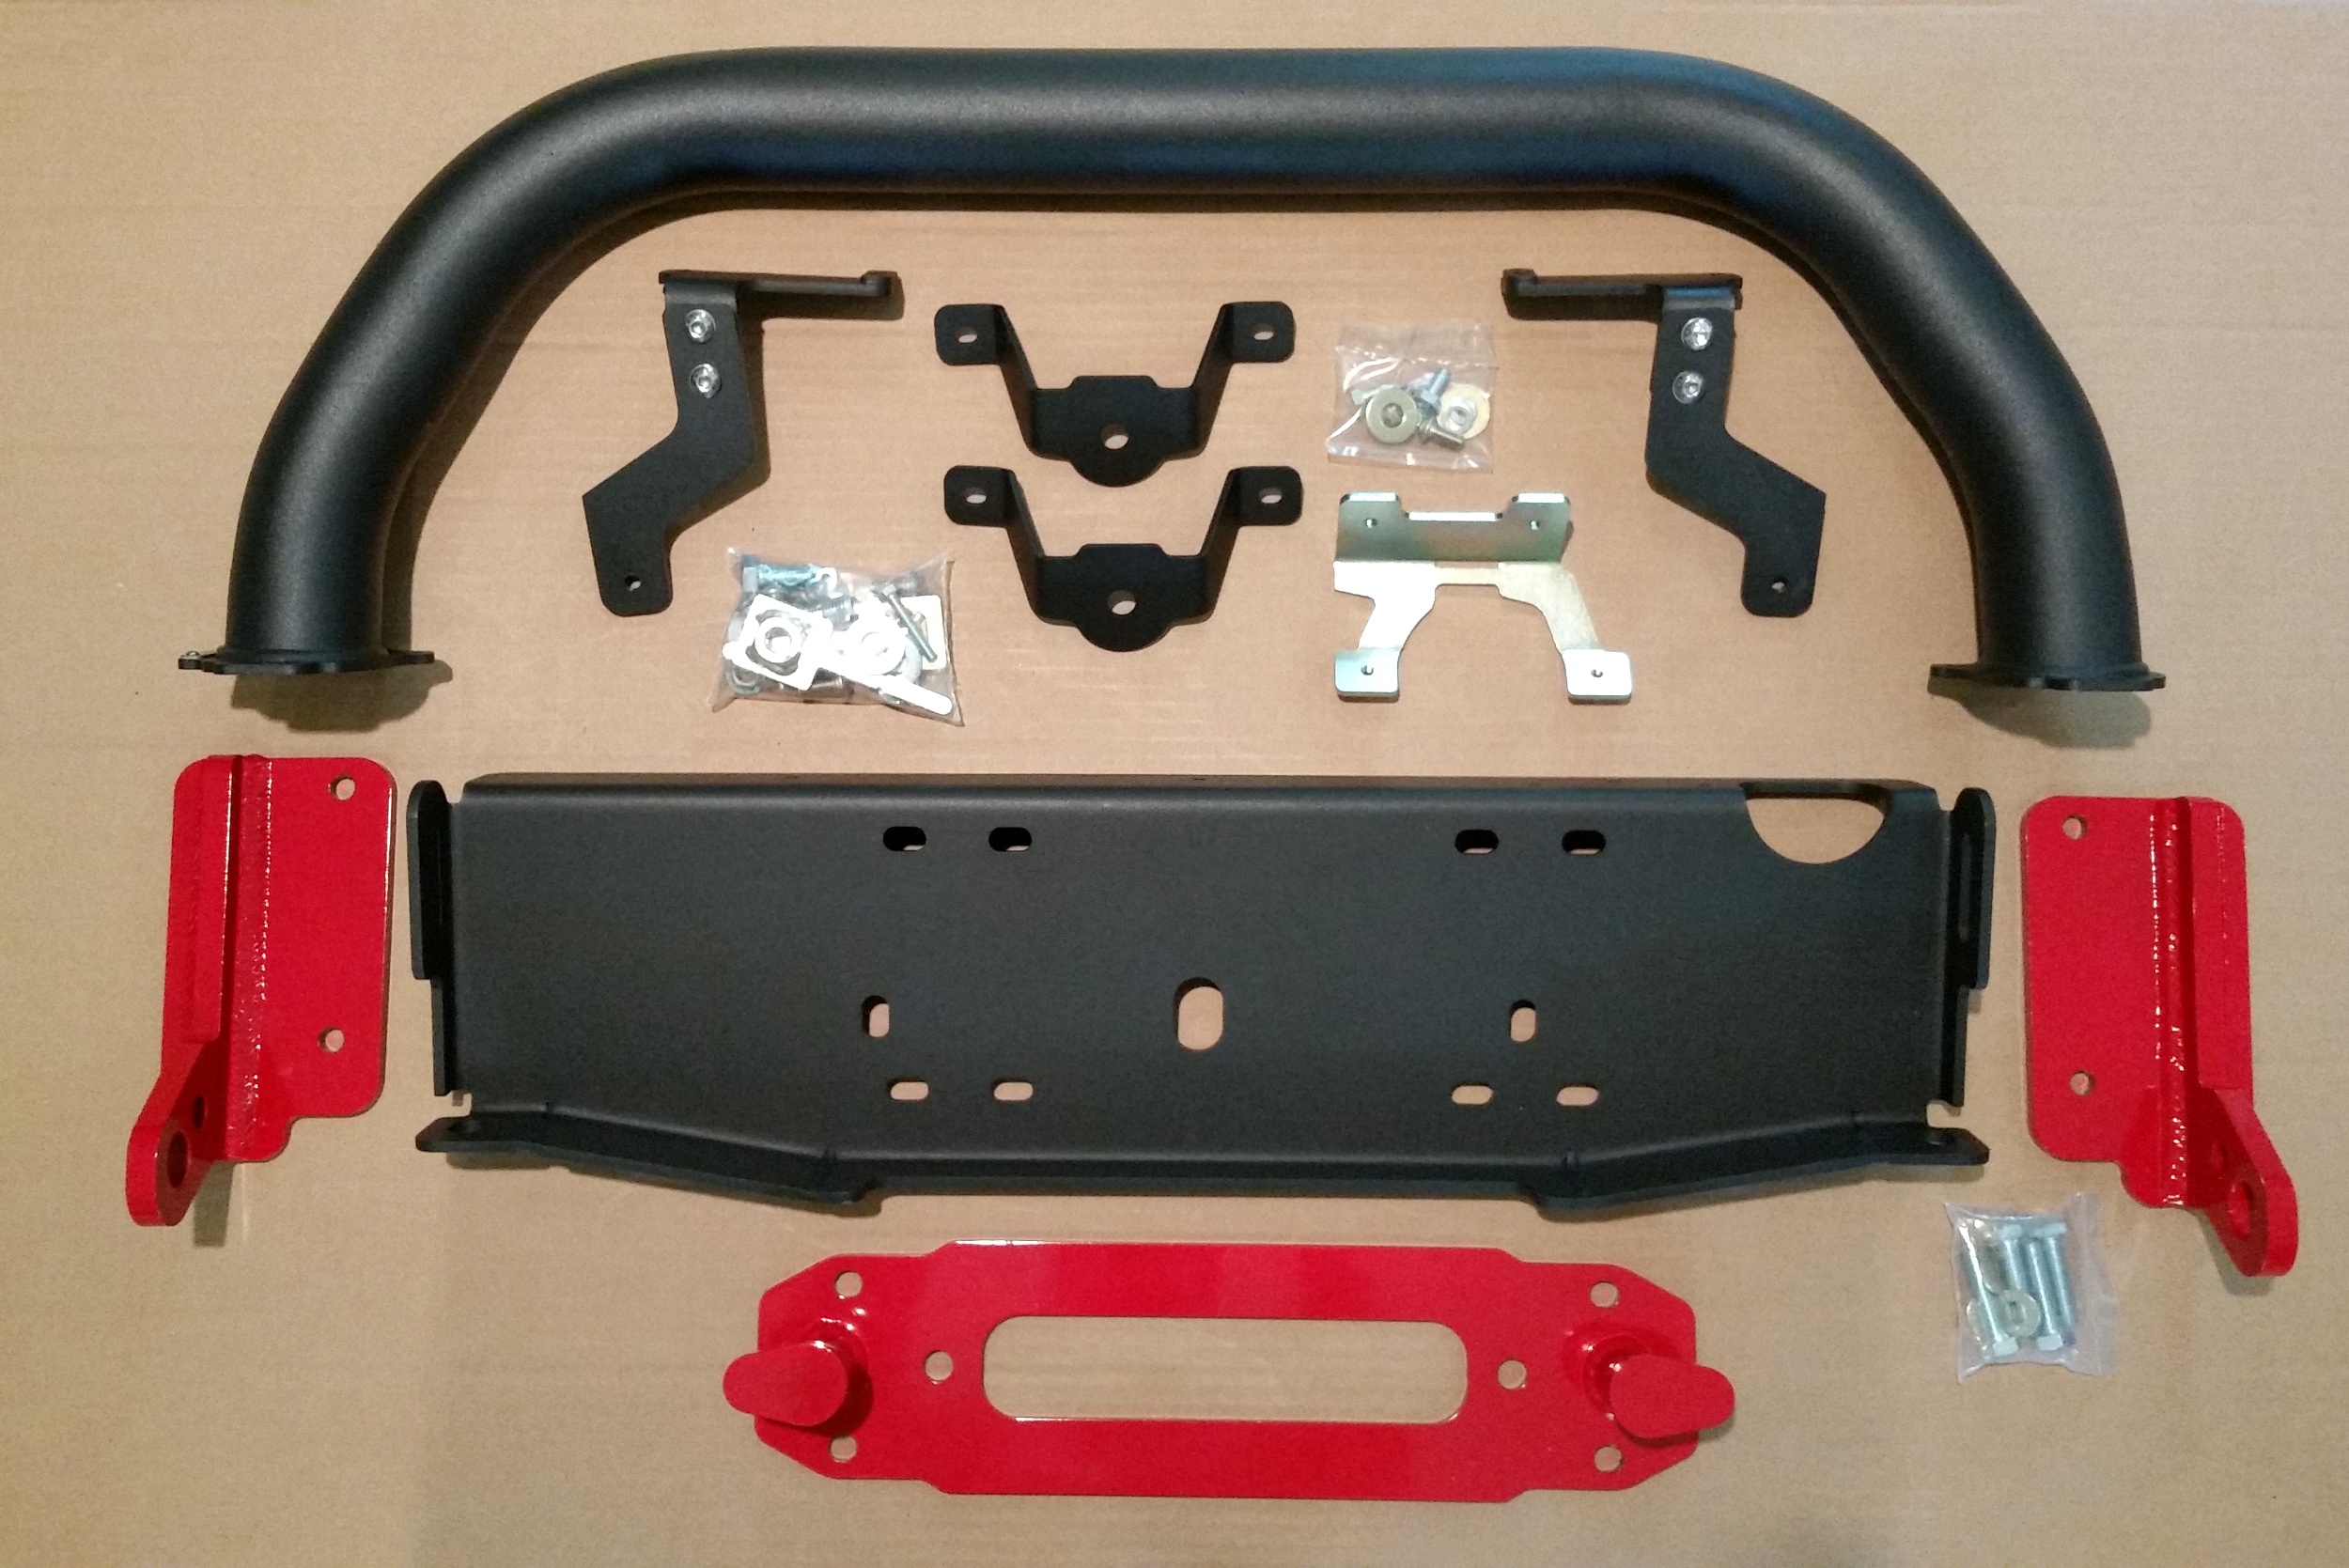
 The Classic Hoop installation in itself was a breeze. The Hoop is 100% bolt-on with added reinforcement brackets that install onto factory locations, with no additional drilling necessary. Constructed from heavy gauge tubular steel, the Classic Hoop feels heavy duty in the hands and would certainly give the front of the Jeep, specifically the plastic grill and vulnerable radiator, much needed protection from not just brush but something as unfortunate as an encounter with a deer crossing.
Rigidness of the Classic Hoop is strengthened by the reinforcement brackets and hardware that discretely install under the bumper and support the hoop as well as the bumper, using the frame for stability. We like these reinforcement brackets, which for purely visual purposes would not be necessary since the bumper’s own strength would provide enough rigidness to make the Hoop feel strong. But here Maximus-3 engineered for added protection, with the reinforcement brackets strengthening the Hoop and bumper. The Hoop is installed on top of the bumper, behind the factory hooks, using the open space behind the hook to discreetly attach to the reinforcement brackets along with other factory bolts. The Classic Hoop works with 2013 through 2015 Rubicon X/10th Anniversary/Hard Rock Rubicons and can be installed easily by itself, without a winch, making factory Rubicon special addition bumpers look fantastic. Well worth the investment, transforming the look of the front end and adding significant protection.
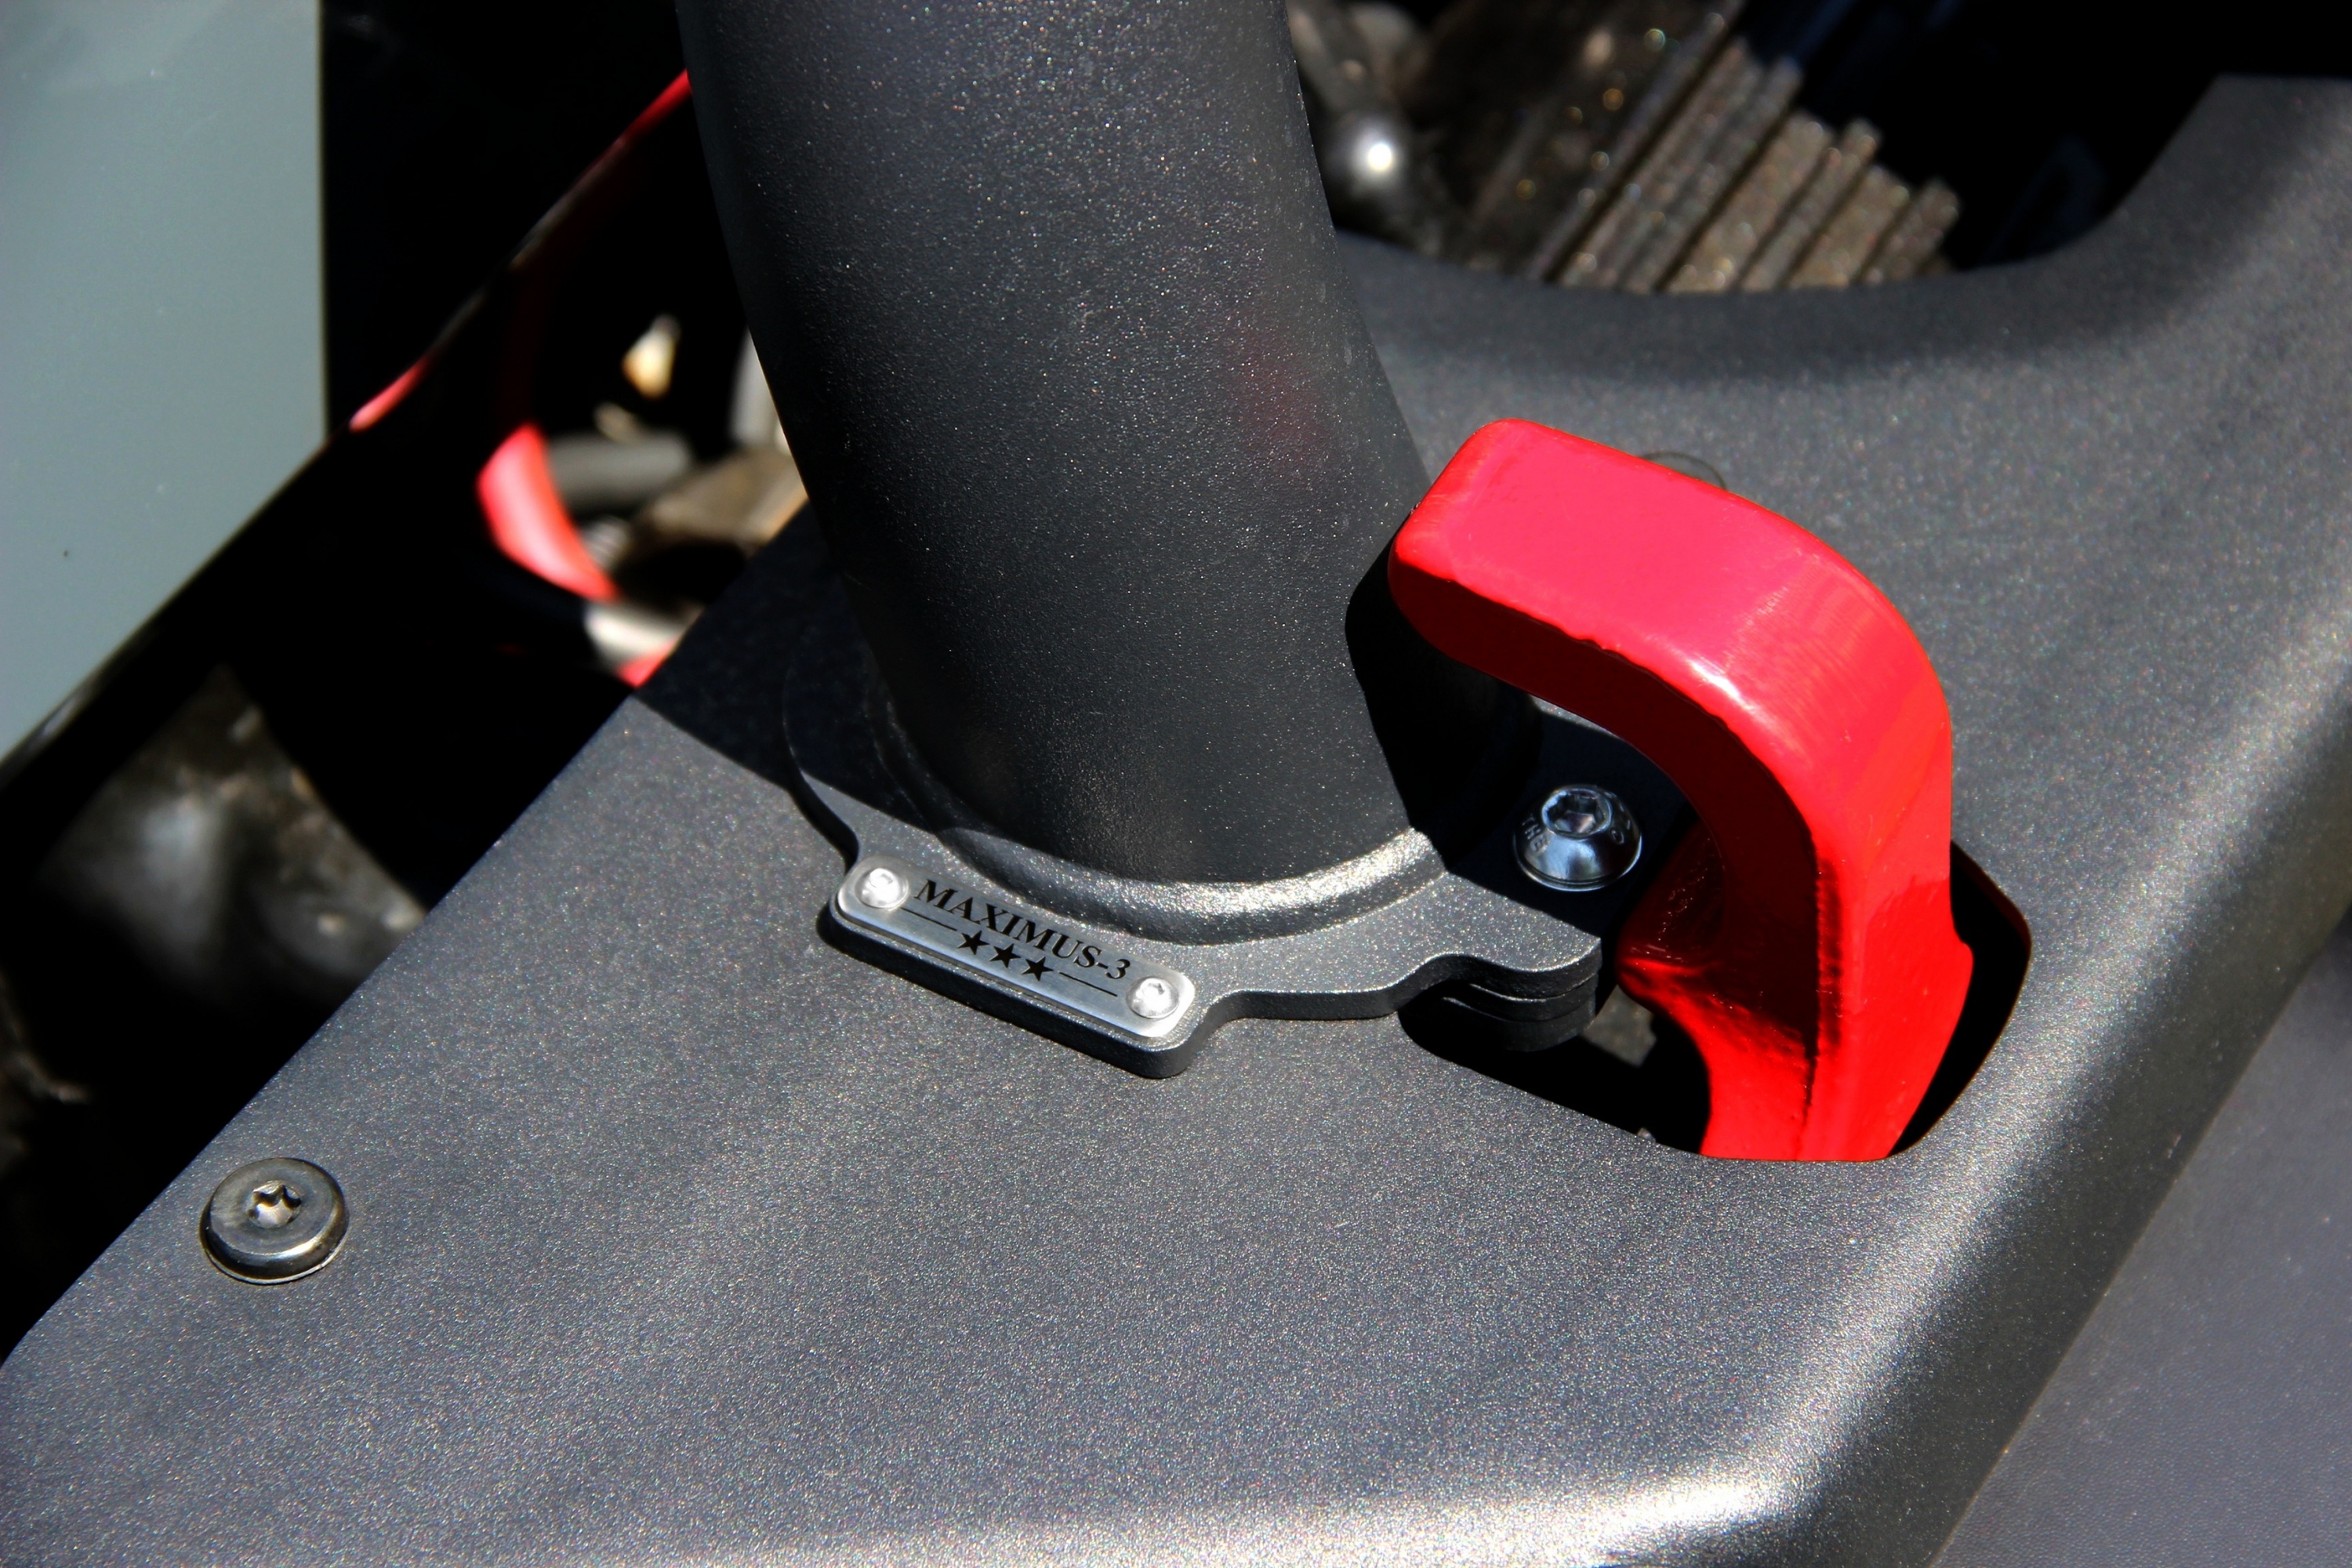 Maximus-3 excels in their attention to details. All of the steel components that we received were precision laser cut steel with very tight tolerances, and sharp lines that matched part to part mating as well as the Jeep itself in both assembly and appearance. Welds are top quality professional appearance with zero splatter or bulging. The powder coat finish is spot on to the factory finish of the Mopar factory bumper, aiding in the singular package appearance. We even dig the little Maximus-3 logo attached to the base plate of the Classic Hoop with stainless steel button head screws! Very cool. Very sharp detail.
The Maximus-3 Winch Mount

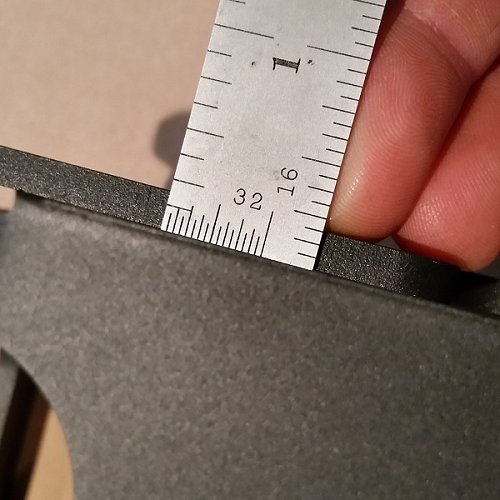 When Jeep designed the frame of the JK, they made space provisions for the possibility that a winch may be installed behind the bumper. Mopar offers a winch mounting kit for around $450, however we found several reasons why Maximus-3’s Winch Mount is a better deal than the Jeep kit. Though cost is always a factor when you are working within a budget, our main reason was the desire to center mount our winch, a configuration not offered by Mopar. Strength was also a consideration and while we are not sure on the gauge of steel used in the Mopar winch plate but we do know the Maximus-3 plate is 3/16″ (4.76mm) or Gauge 7, which is plenty strong. The Maximus-3 Winch Mount is laser cut, bent and welded, and is considerably less expensive than the factory kit. The final product from Maximus-3 is then powder coated in the same textured black finish as the rest of the Mopar bumper. The Maximus-3 Winch Mount offers two options for winch mounting, centered and off-center, as well as provisions for vacuum pump relocation for large winches.
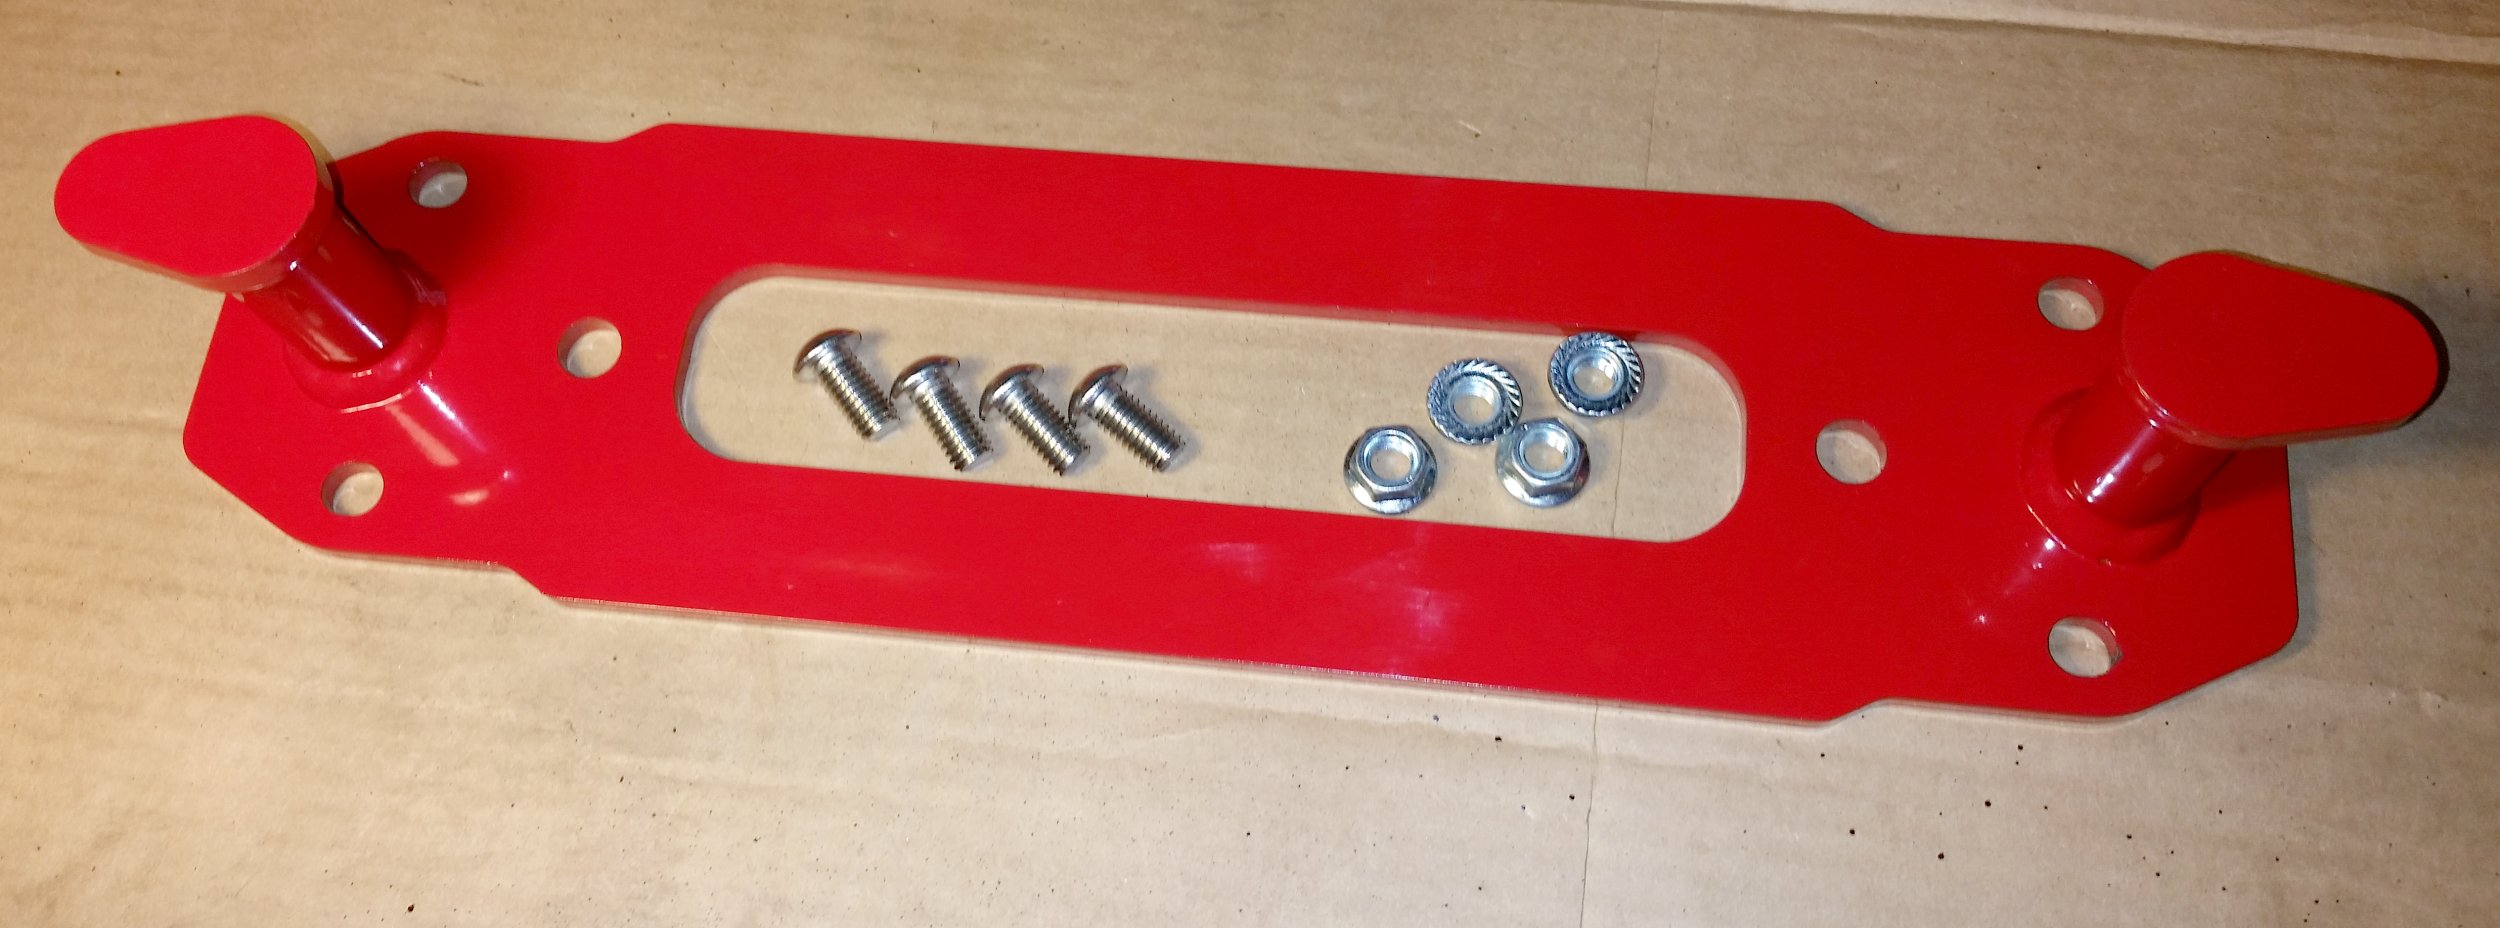
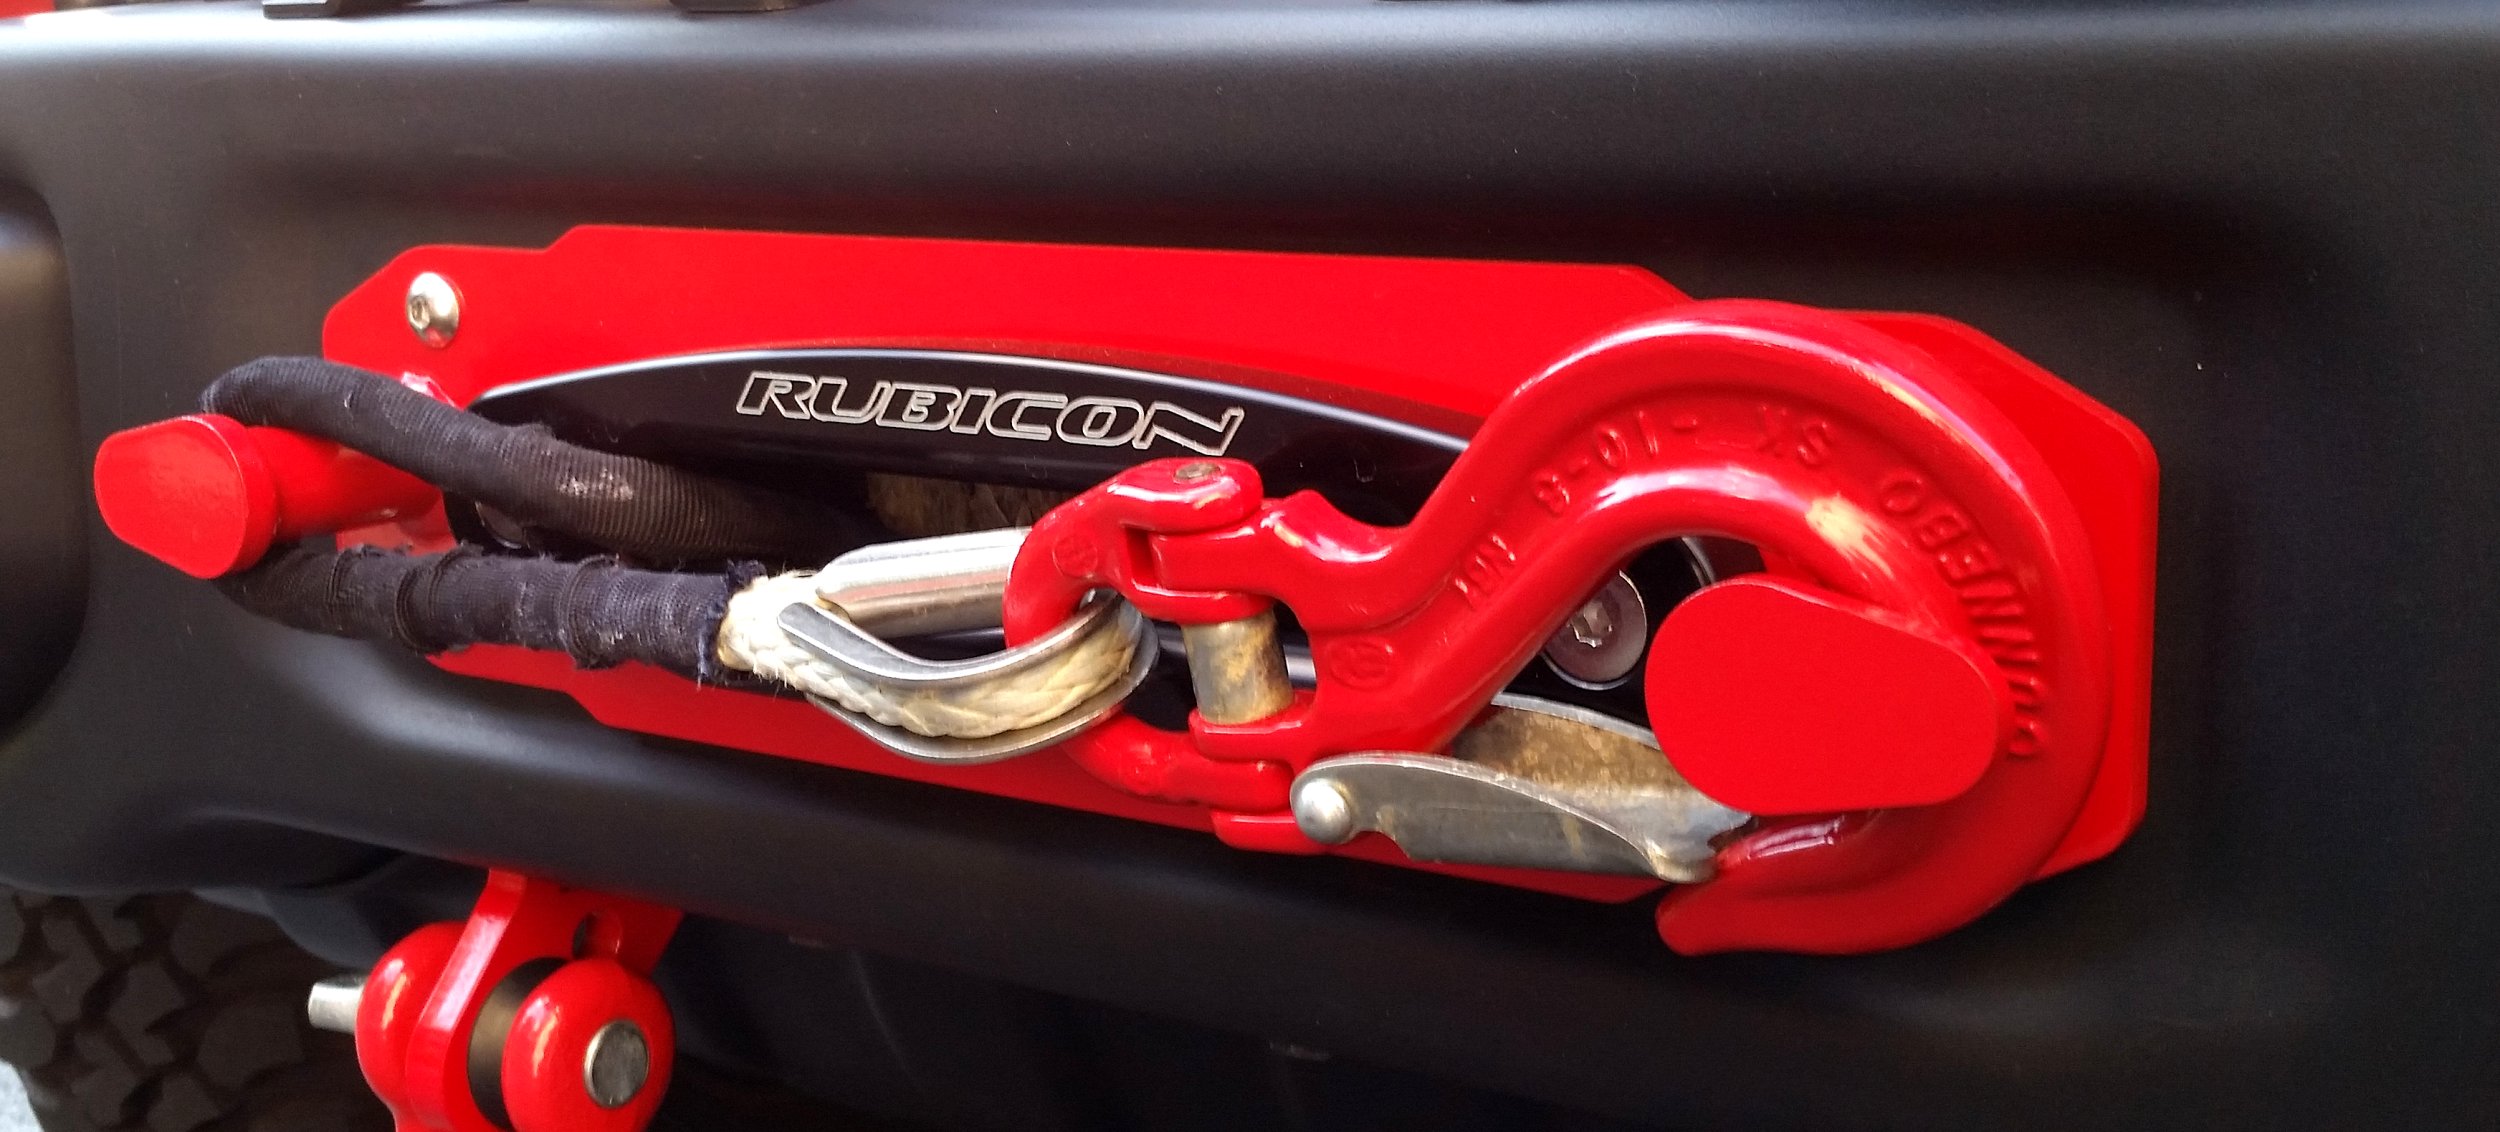
Installation of the Winch Mount was not difficult, fitting snug between the frame rails. Maximus-3 uses a pair of Key Nuts and bolts to secure the sides of the Mount, and the factory bumper studs and factory flange to secure the front. With the Winch Mount securely locked between the frame rails, this setup appears plenty strong enough for the toughest pulls. We opted for the centered installation, which presented a challenge for our large Warn HS9500i, but we managed to make it fit. Maximus-3 Engineers were very helpful with helping us determine how our winch installation was going to go, and gave use some useful tips on what we were going to encounter. Maximus-3 included a Fairlead Centering Plate with the Winch Mount, but we chose their Winch Hook Anchor in red, which serves as a relocation plate for the Fairlead and allows installation of the winch in the centered position. We really like their Winch Hook Anchor / Centering Plate because it gives us a stable place to securely dock the winch hook without jamming the hook against the Hauser Fairlead. With their double post Winch Hook Anchor, we can wrap our rope around one post and attach the hook to the other, and it looks like it belongs there. Plus with the bright red paint job straight from the Maximus-3 shop, it pops on our Anvil Rubicon.
The Maximus-3 Winch Hook Anchor / Centering Plate is designed to work with Hawse Fairlead and a synthetic winch line, and is not meant to work with the Roller Fairlead and steel/wire winch line. The installation in the centered position required a minor modification to the off-centered factory fairlead slot on the bumper.
Maximus-3 Auxiliary Light Brackets
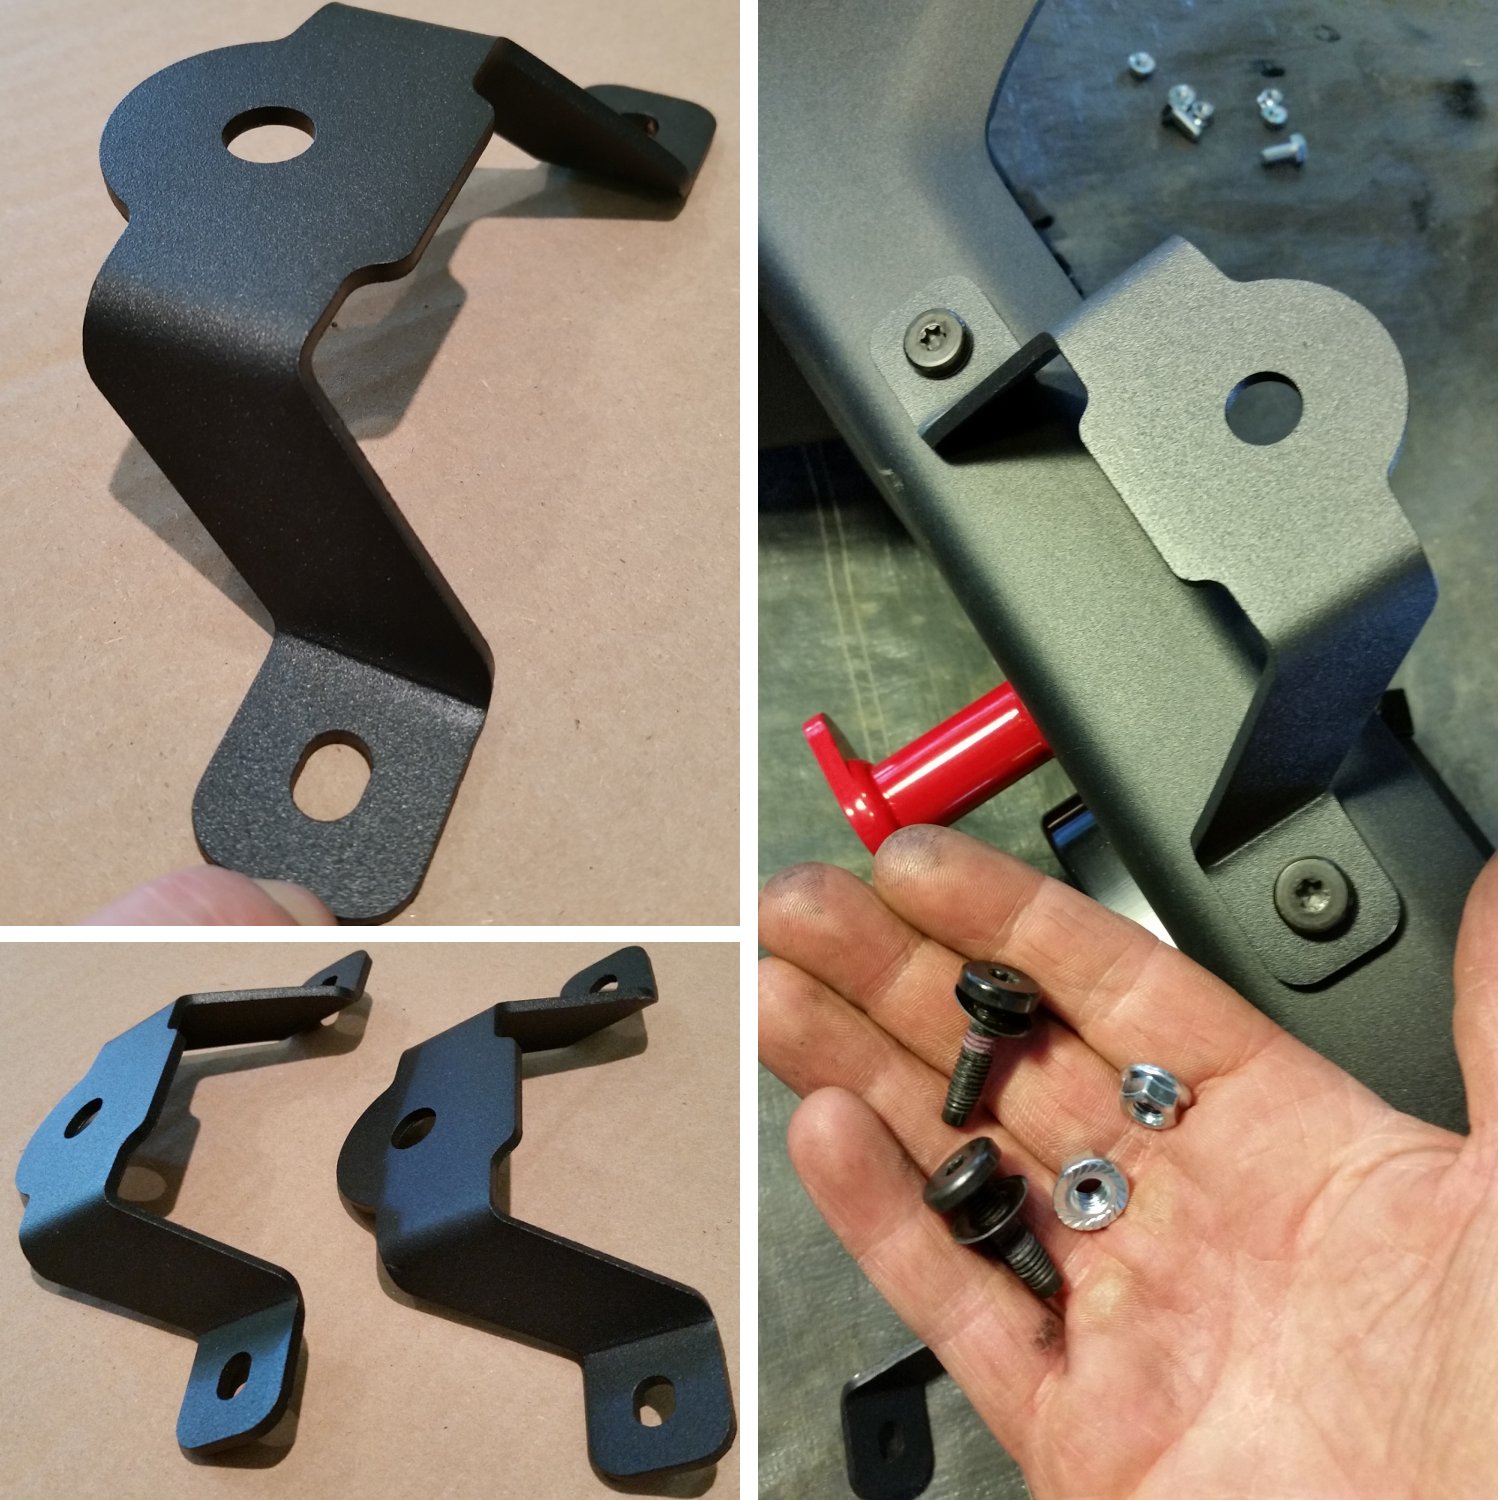 For such uncomplicated auxiliary light brackets, the Maximus-3 brackets are sharp and clean and go very well with our Rubicon X bumper. Their low profile and swept back design are super easy to install and require no drilling, using the factory bolts located front and center on our bumper. The gauge and design is thick enough to hold our large Lightforce RMDL170 170mm STRIKERS without any rattling on the rough trails. Once again, like all of the other components fabricated by Maximus-3, the finish is spot on to our factory finish of the Rubicon X bumper.
Maximus-3 also offers Peripheral Light Brackets that serve as mounting points for a pair of auxiliary LED lights or other compact round lights on the 10A/X & Hard Rock bumper end caps. These brackets can secure lights up to 5″ round or any other compact light with single stud mount. We have these on our wish list and they may be added at a later date.
Maximus-3 D-Ring Loops
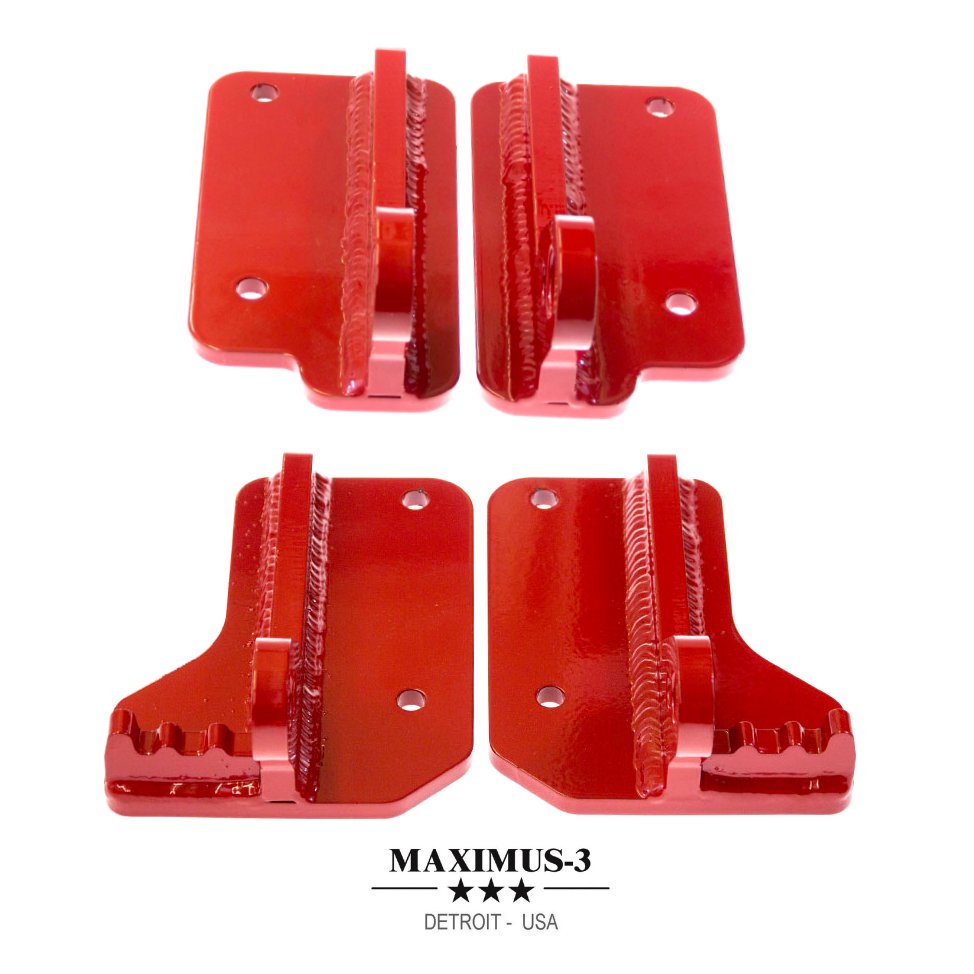
The D-Ring Loops mount directly and quite easily to the underside of the Maximus-3 winch mount. So easy in fact that it just made sense to add them during the installation of our Winch Mount. We did have to cut access apertures under the lower side of our bumper to allow the D-Ring Loops to pass through, but we were fine with that for the trade off of another pair of attach points. We also really like the additional red accents. We do want to note that these D-Ring Loops are designed to work with the Maximus-3 centered winch set-up for 10 A/X & Hard Rock bumpers.
Overall We Couldn’t be Happier
When we stepped back and had a first look at our transformed Rubicon X front bumper, we couldn’t have been more pleased. The installation went well, the components were well designed, and the overall look brought everything together. The entire package gave the bumper a singular appearance in both finish and design. Overall the cost was very reasonable for the entire package deal, and when broken down to component costs, any single component would be well worth the cost in terms of upgrades. We give Maximus-3 a big 5-star thumbs up for great ideas and another 5-star thumbs up for execution and design. Highly recommended to any Rubicon 10A, X or Hard Rock owner looking to upgrade their factory bumper without compromising the factory form.
Maximus-3 Contact Info
Maximus-3, LLC
2295 N. Opdyke Rd, Suite E
Auburn Hills, MI 48326
1-248-821-6654
sales@maximus-3.com
info@maximus-3.com
In this Article Series
- Maximus-3 Upgrades to Project Rubicon X
- Rubicon Bumper Removal
- Maximus-3 Winch Mount Installation
- Winch Install onto Maximus-3 Winch Mount
- Maximus-3 D-Ring Loops Installation
- Maximus-3 Hook Anchor & Hauser Fairlead Install
- Reinstall Bumper & Maximus-3 Classic Hoop Bar Install
- Thoughts, Analysis & Review of the Maximus-3 Classic Hoop, Winch Mount, D-Ring Loops, Hook Anchor & Light Brackets
For more information on Maximus-3 Products:
Maximus-3, LLC
- sales@maximus-3.com
- https://Maximus-3.com

Awesome article.
Great Review! This review was the article that helped me decide to but the very same components for my 10A. The installation writeup was VERY helpful with the photos and tips. I kept my tablet next to me while I did the isntallation and refered to it and the instructions frequently. So thank you for that! I mounted a Warn Zeon to the winch plate centered and installed the same D-ring hangers with red d-rings as you did and I love the look. I also have the classic hoop and feel it fits the Jeep perfectly. People think this is all one package, and are surprised to learn this is Maximus-3 products added to the Mopar bumper. Again, thanks for the writeup review and the install writeup. Both were very helpful especially the photos. Great bumper, great add-ons to the bumper!
I followed the instructions on the same year/model/color of Jeep although I used a Smittybilt winch and a stinger bar instead of the hoop. I found the instructions extraordinarily helpful. Detailed, logically organized, well written, objective and appropriately photographed. I am a novice at making significant modifications to my vehicles but this project gave me the confidence to proceed. I look forward to the postings of the other parts of the project.
I bought the Maximus-3 Winch kit and the same hoop almost 2 years ago for my Rubicon 10A and I love it. Like you I wanted to keep the factory 10A look but add the winch and a little more protection to the grill and a couple of Warn lights. I also wanted to center-mount my WARN 9.5cti and Maximus was my only option at the time. The whole setup has served me well through Clay Valley Dirt Park, Coal Creek and Windrock many weekends and a Jeep Jamboree trip out to Scottsdale, Arizona. I’ve used my winch hard many times and the Maximus winch setup has been great.
A friend and myself did the installation in a weekend and it wasn’t difficult at all. I did notice your Hoop mounted a little different than mine did, probably product changes over the years. I also have the light brackets and the Maximus rear tire carrier carrying my heavy spare 35″ BFG T/A KM2 along with a HiLift, CB antenna, backup light and camera, water and gas on long trips just in case. I like their tire carrier and how it take the weight of the tire off my door. I don’t think the factory spare tire mount on the door would have survived the couple years of wheeling with a heavy spare like that back there.
Very good install writeup and review and great photos! Bookmarked!
Your Maximus-3 review is good and thorough, but your comparison to the Mopar winch kit is factually off the mark. It seems that the reviewer has never actually seen or used the Mopar kit. There’s no need to debate the aesthetics of a centered mounted winch (Warn XEON) versus an off center mount (Warn 9.5cti), but the construction between the Mopar kit and the Maximus-3 are very different. My garage has worked with both, but feel that the Mopar is better given it’s heavier construction and better engineering. We just wish they also offered a centered version of the winch and bumper. We receive the Mopar kit in AEV boxes. AEV makes some of the best stuff on the market and we assume they or a sister company actually make the 10a/Hard Rock bumper for Chrysler. Contrary to this review, the Mopar kit is 1/4″ thick per Warn’s requirements for their largest winches versus Maximus-3’s 3/16″. It is also laser cut and includes a secondary bumper reinforcement plate that is 3/16″ thick. This plate mounts to the front of the both frame members inside the bumper and adds an incredible amount of strength to the flimsy 1/8″ stamped steel 10a bumper. The fairlead and bumper are bolted right to this plate which is bolted to the frame and the winch mount. I’m sure that the entire vehicle could hang from this 2-peice Mopar winch kit, but more importantly, the bumper reinforcement will help prevent bending and damage of the 10a bumper on severe off-center recoveries where the winch line would pull hard against the fairlead. The only real downside to the Mopar winch kit (other than perhaps requiring an off-center mount) is the weight for of all this steel. It dropped my AEV 2.5″ lift by approximately 1/2″ on the front of my JKU with a Warn 9.5 cti-s winch installed.