
Home stretch of the project!
Only a few more steps and we’ll be looking at the completed makeover of our Rubicon X front end! We still have yet to install the Maximus-3 Auxiliary Light Brackets, Hoop/Stinger Reinforcement Brackets, mount the bumper, reconnect the factory fog lights and reinstall the factory skid plate. And of course install and wire up our Lightforce RMDL170 ‘STRIKER’ 170mm Lights.
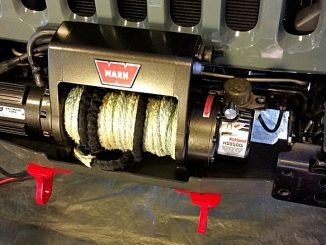
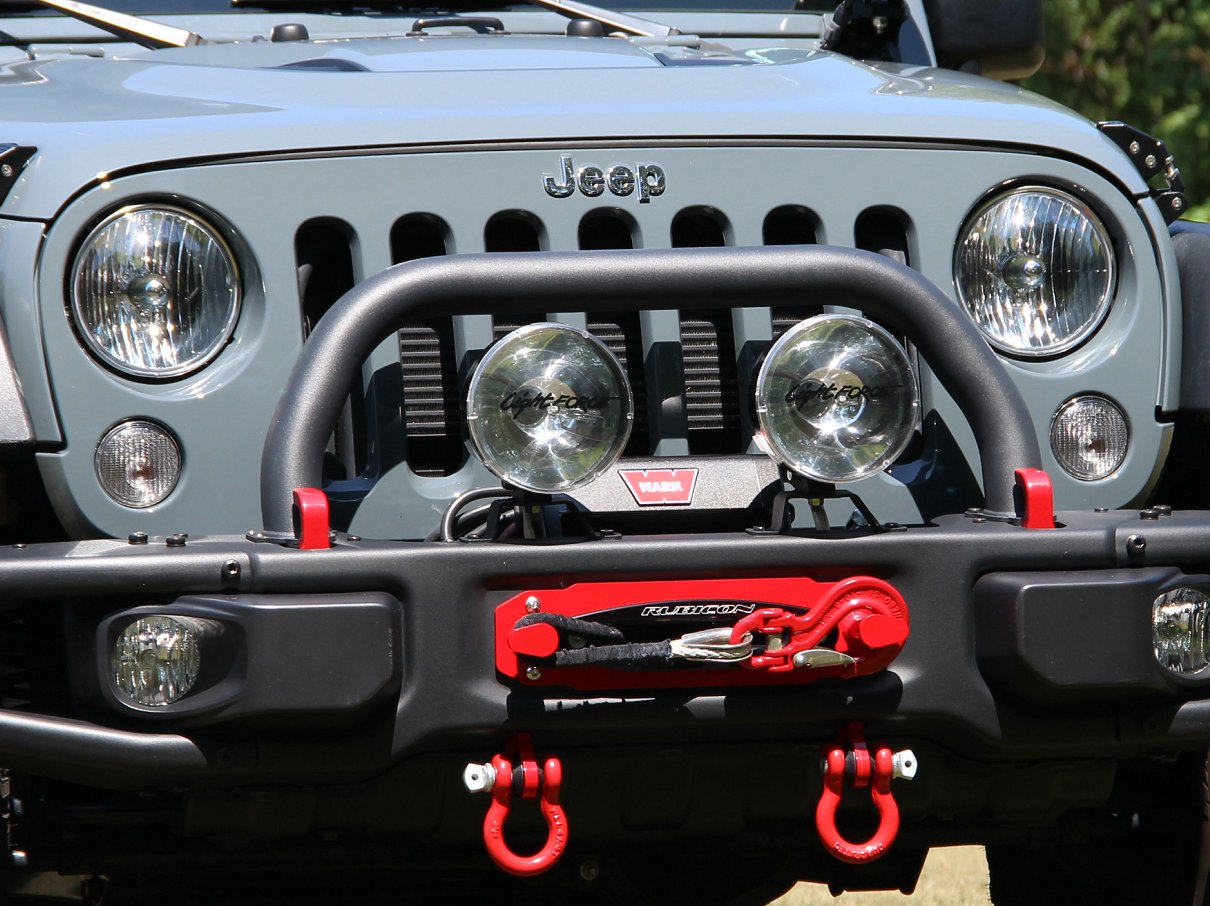
We also added a few items to our front end including a pair of red powder coated D-rings buffered by a set of rubber D-ring bushings and a red XD Half-link Winch Hook.
Installing the Hoop/Stinger Reinforcement Brackets
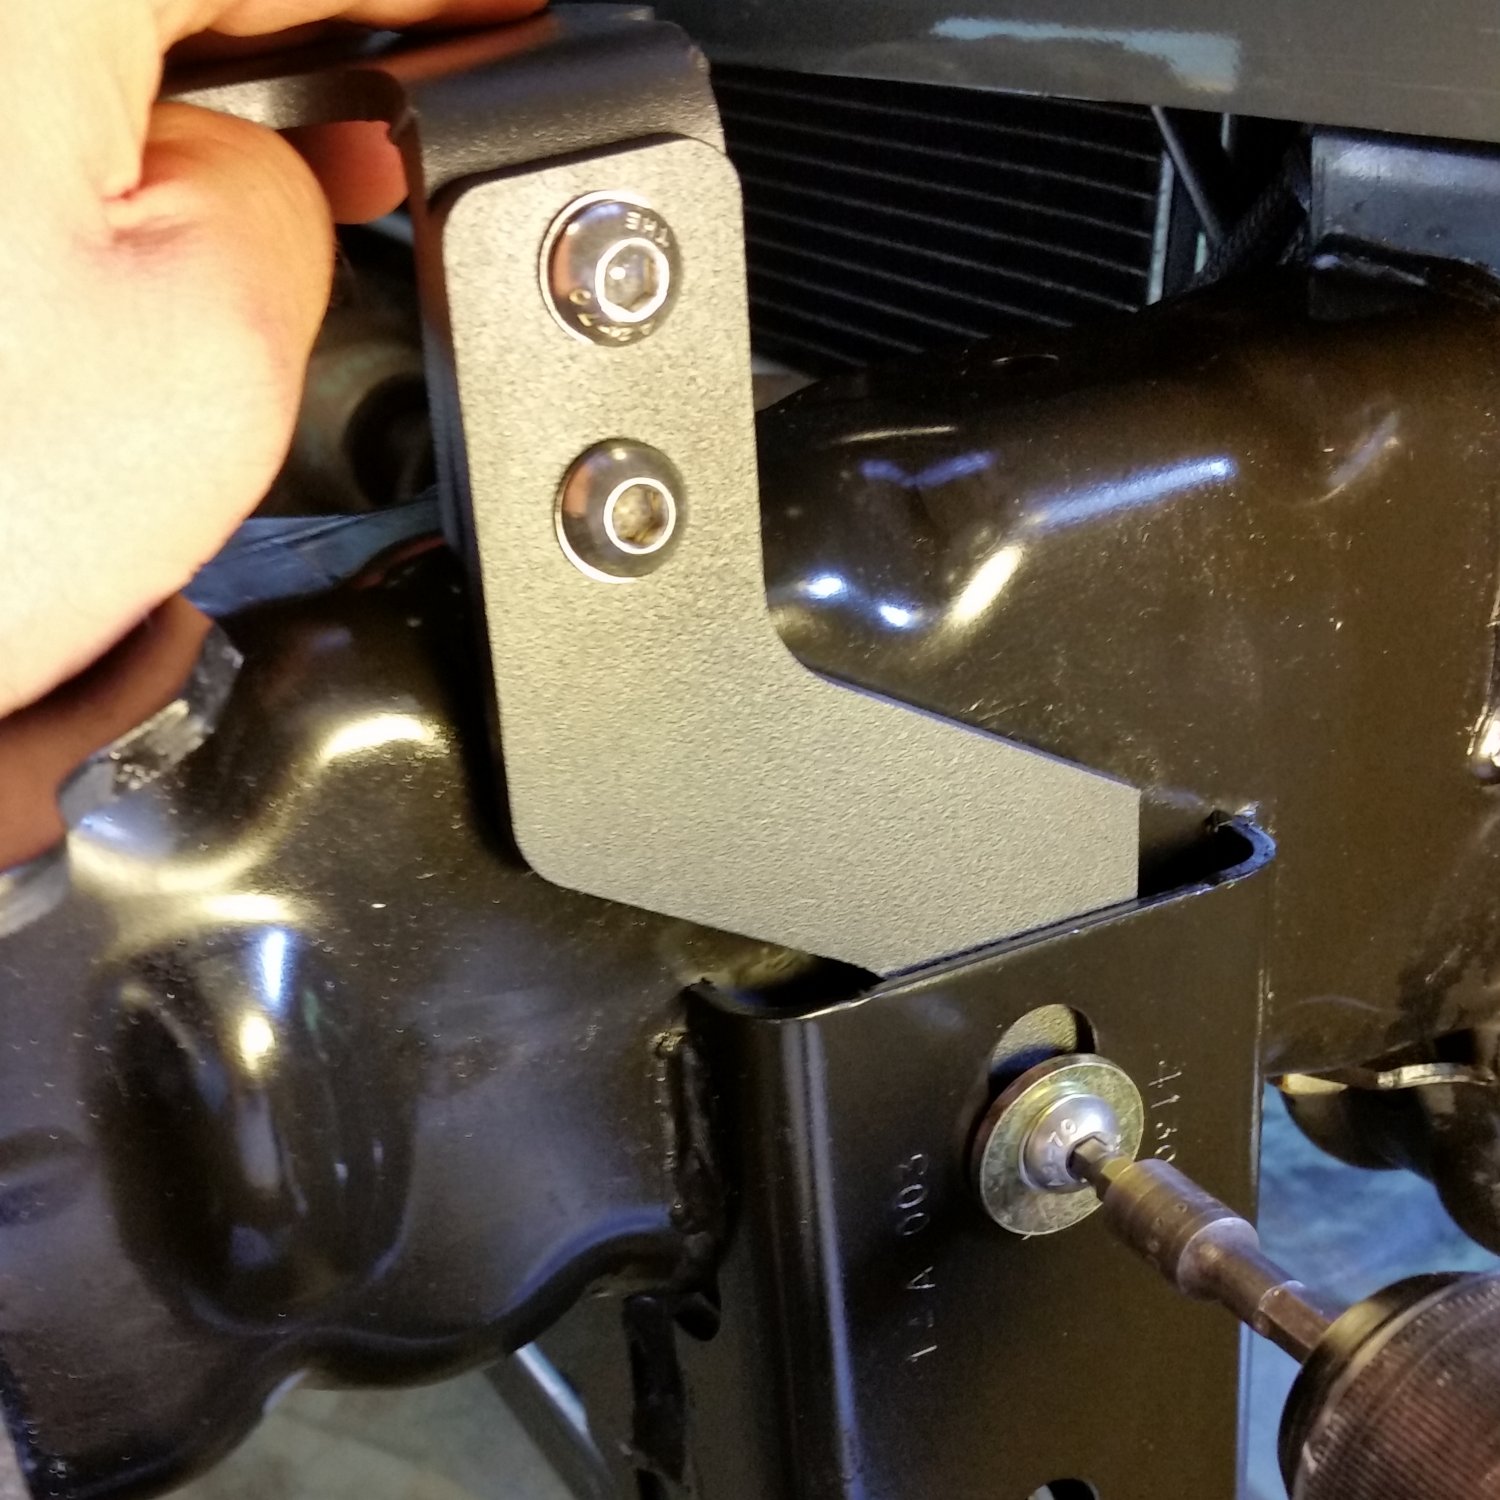
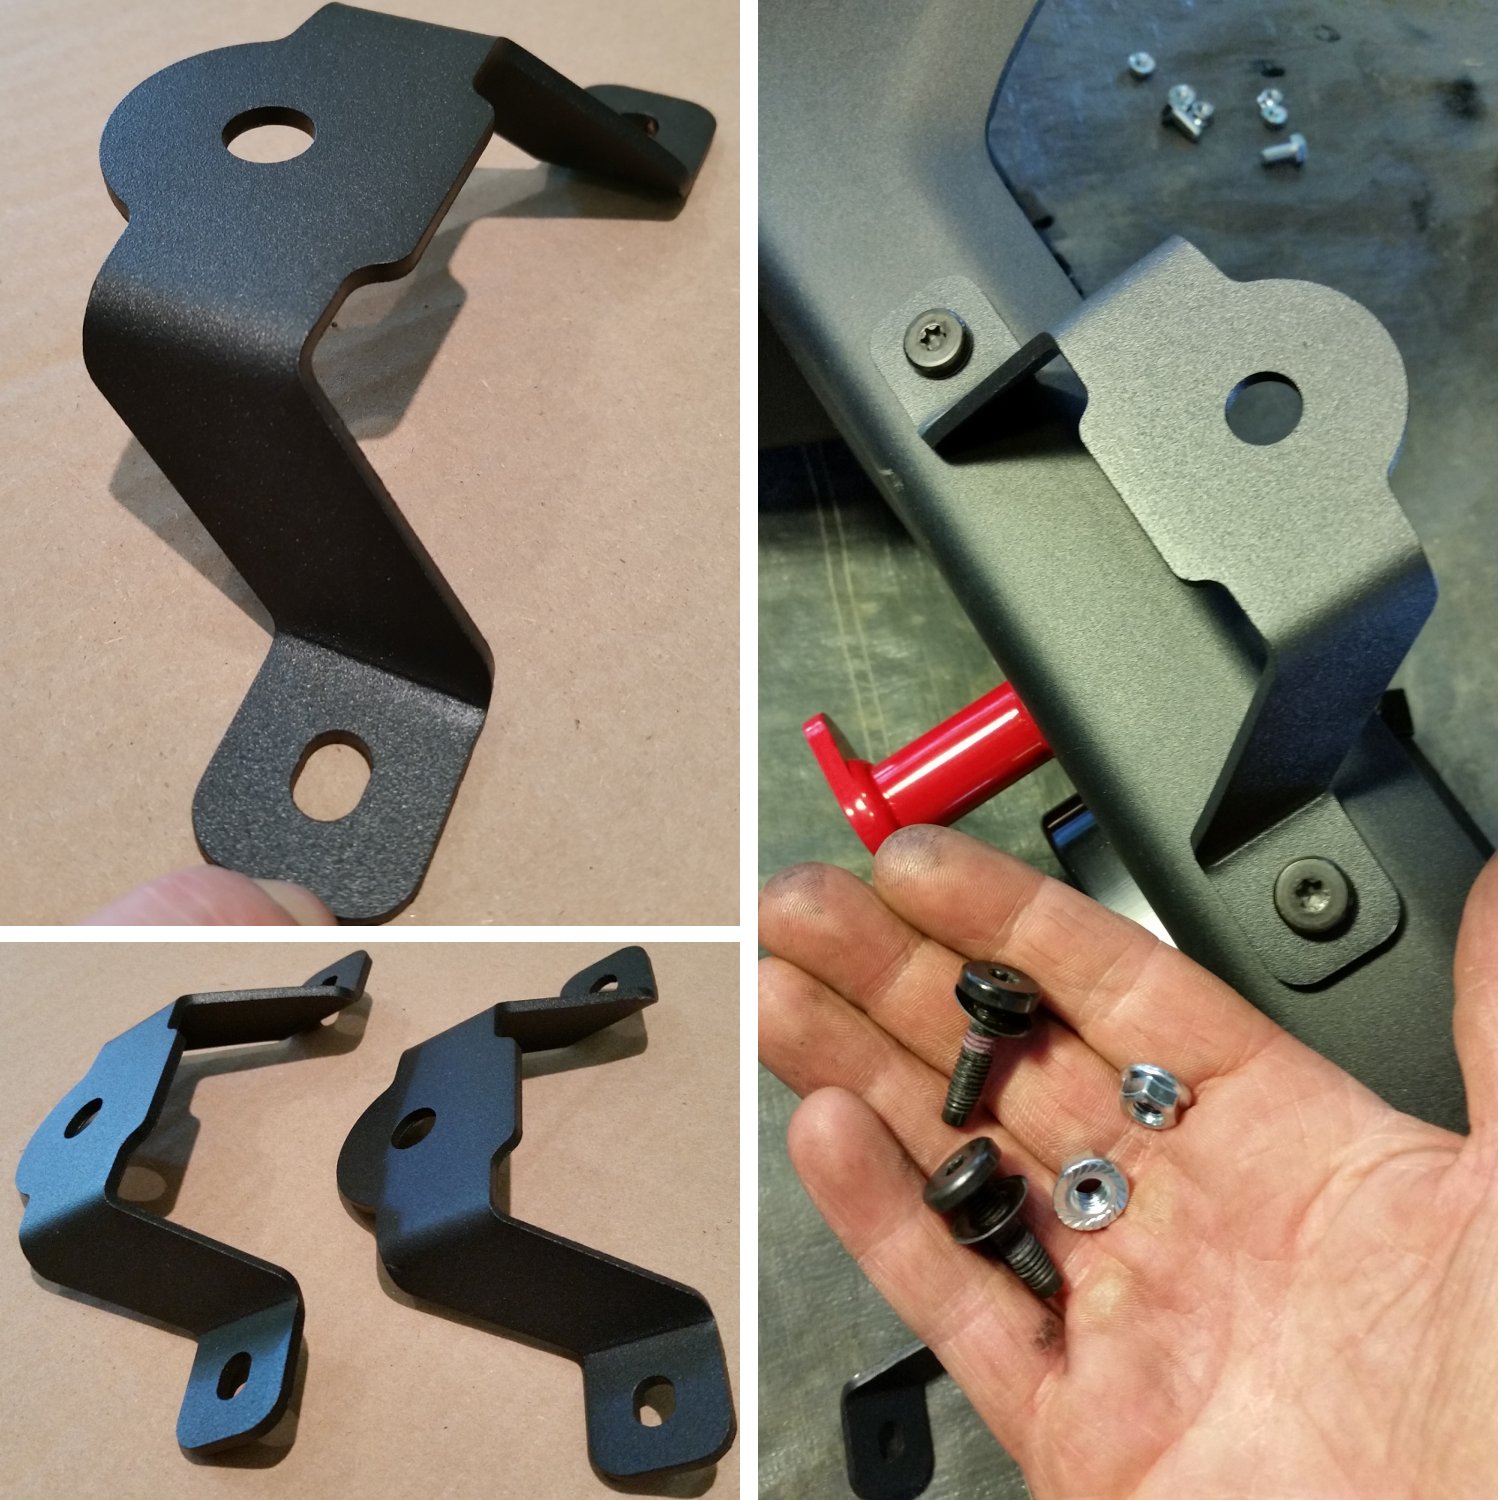
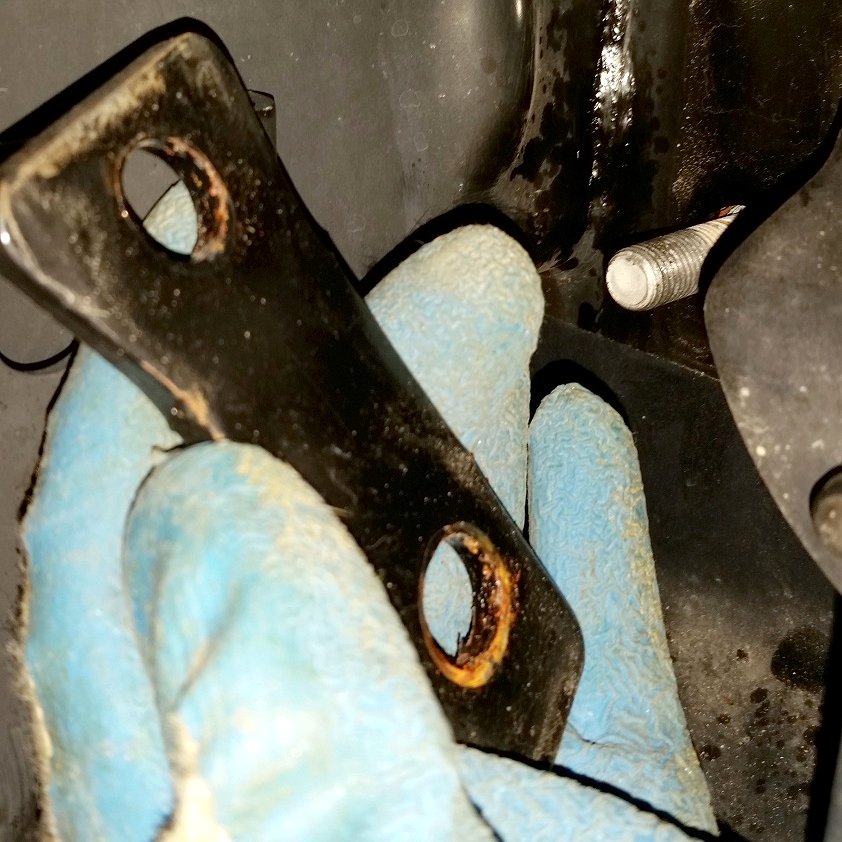
At this point Maximus-3 recommends installing the Hoop/Stinger Reinforcement Brackets due to the ease of access to the mounting location. It can be done later but it’s just easier to get them in place with the bumper off. The left and right side reinforcement brackets slide down into the mounting pocket that is outboard on the frame rail and get a M8 hex bolt and washer per side. Shown here is the driver side reinforcement bracket as well as our mistake in using a button head bolt instead of the Hex head. We later swapped the bolts out when we realized we needed those Button heads for topside of the hoop reinforcement bracket.
Installing the Maximus-3 Auxiliary Light Brackets
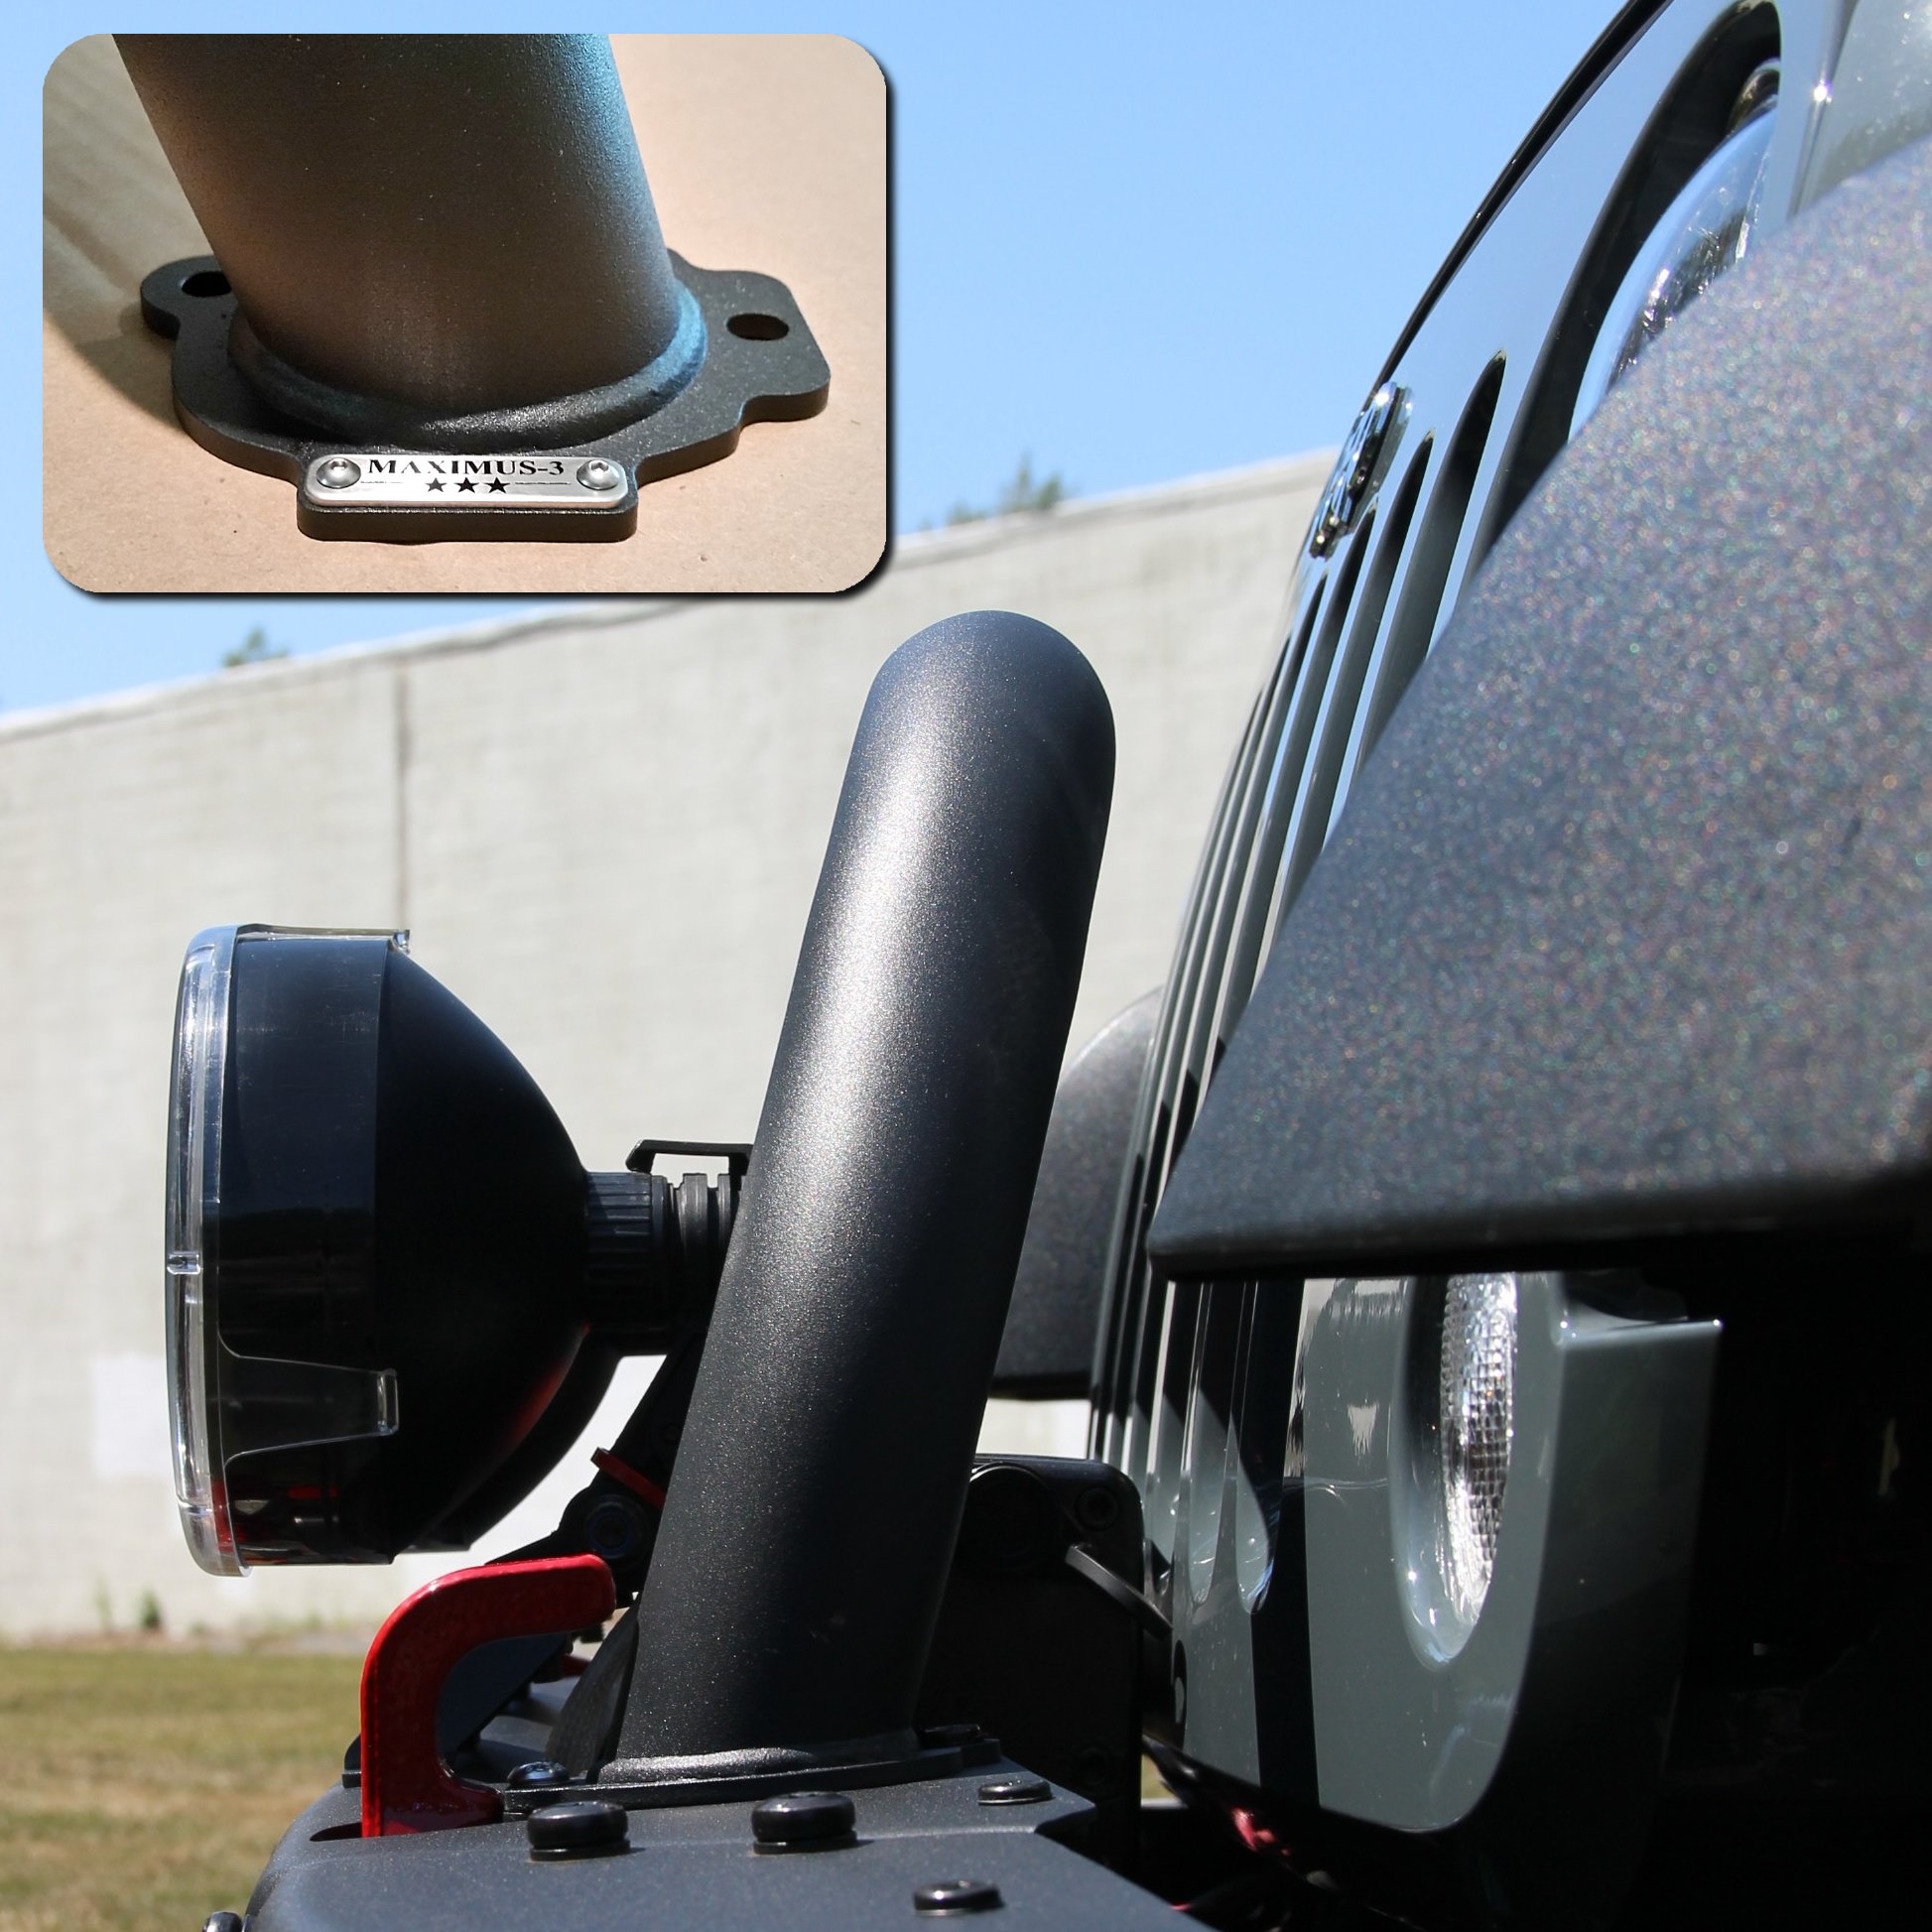
After a quick test fit of the bumper, we set it down one last time to install the Maximus-3 Light Brackets. These easily installed light brackets are designed to reuse the factory bolts on top center of the bumper and like the Maximus-3 Hoop and Winch Mount, are powdercoated to match the factory bumper finish. Reusing the factory M6 bolts and a pair of nuts provided in the kit, we installed the light brackets.
We really like the light bracket’s design angles. The brackets fit the bumpers appearance perfectly and locate the lights as close as possible to the winch without causing interference. Maximus-3 also has other light bracket options specific for this bumper including peripheral light brackets that mount on top of the wings left and right.
With the Reinforcement Brackets and the Auxiliary Light Brackets installed, it was time to reinstall the bumper and then move onto installing our Classic Hoop Bar.
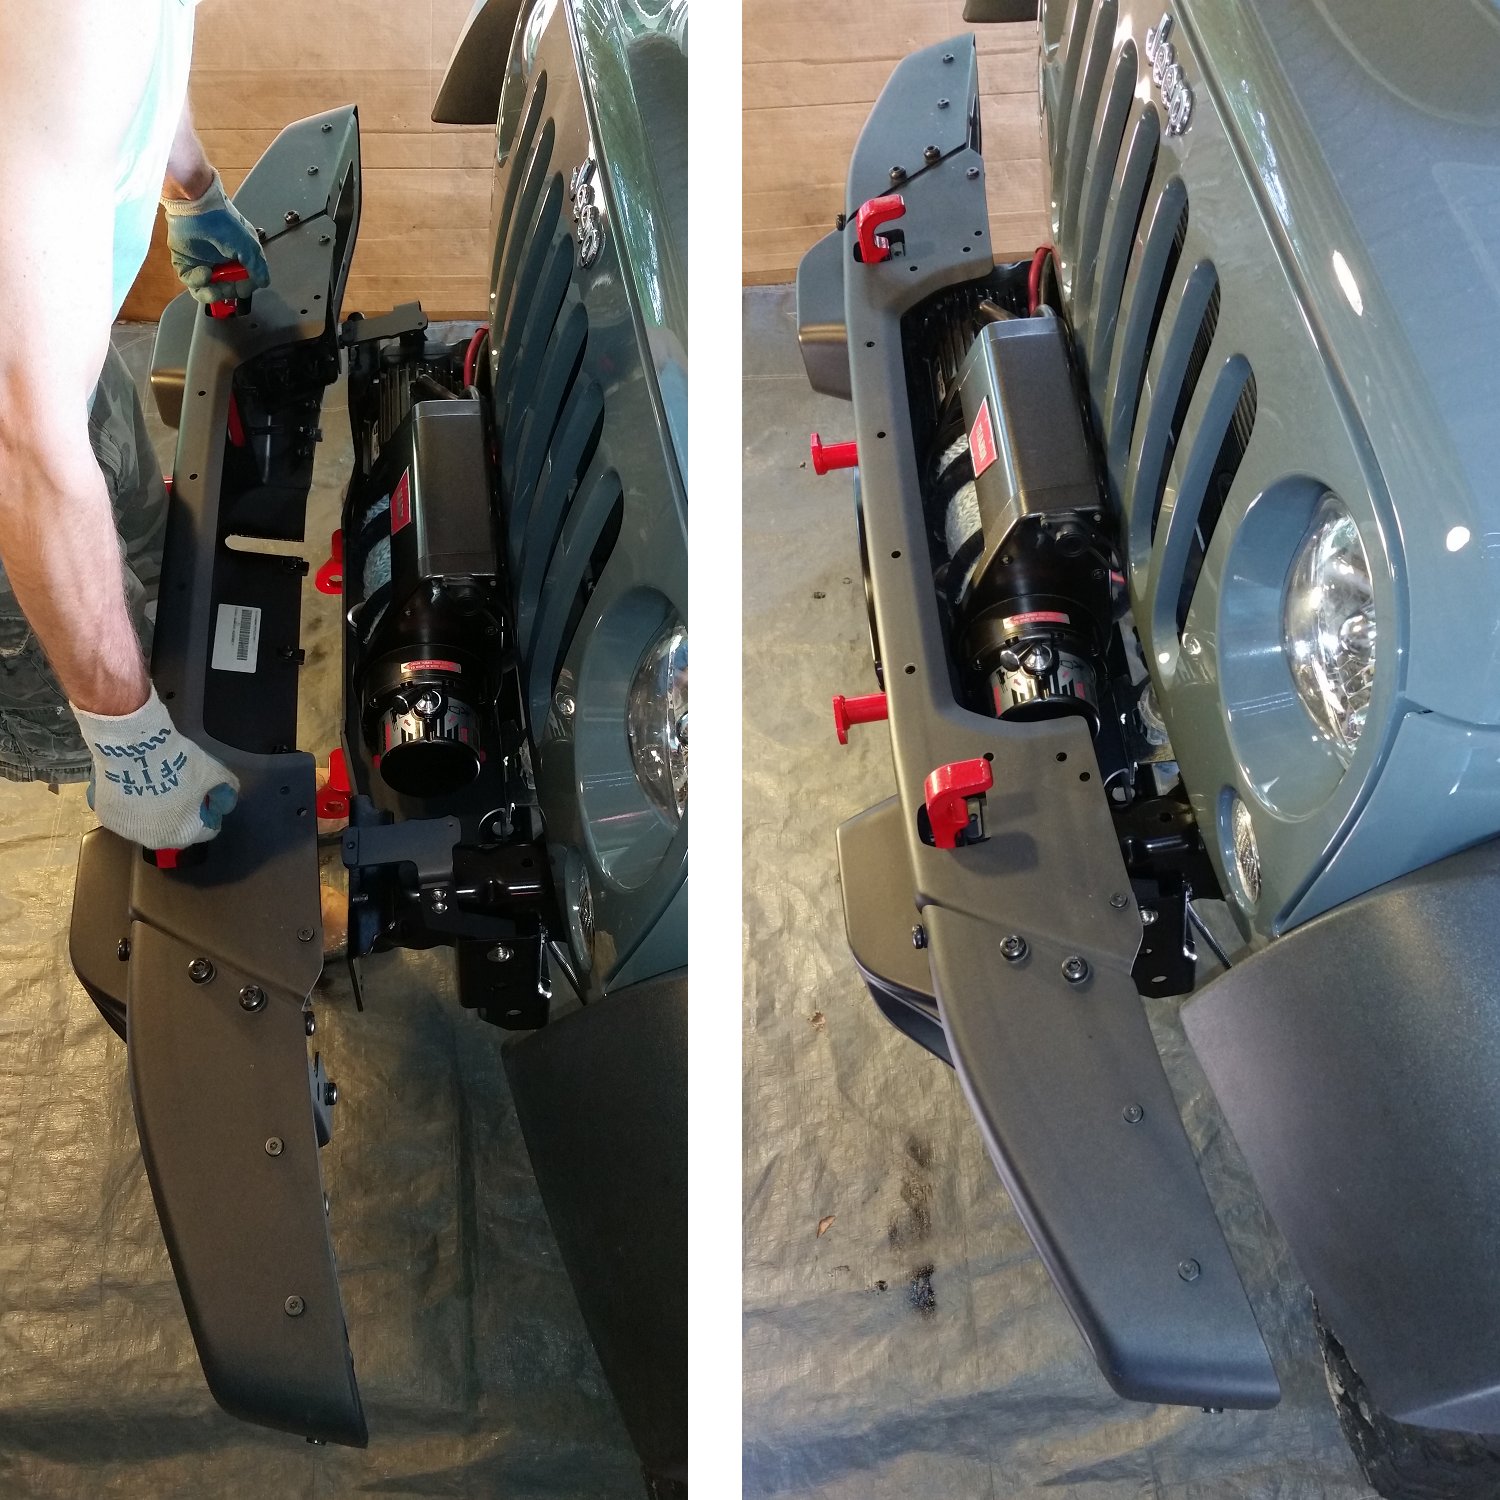
Lift the bumper and carefully slide the studs into the frame bumper flanges. We had to cut one stud shorter in order to clear our winch motor. In most cases that won’t be necessary.
Where we could, we installed the factory nut back plate, which reinforces the flange. We had one location behind the winch motor where we could not get the plate into place due to clearances, so we left it off (no big deal).
It was helpful to have a second person to tilt the bumper as the 8 factory bumper nuts are started by hand. Tighten and torque all 8 factory nuts. It took some clever use of extensions and socket angled adapters to get to all 8 bolts but we managed to tighten all 8.
Maximus-3 offers multiple styles of hoops for the Mopar designed Rubicon Special addition front bumpers. These include the Classic Style Bumper Hoop, the Moab/MW3 Hoop, the Stinger Hoop, the Stinger Starred Hoop, the X-Style Hoop, and the Low-Profile Style Bumper Hoop.
We opted for the Classic Style Bumper Hoop with a double bend angle towards center and an angled tilt that exactly matches the slope of the grill. Made from heavy gauge tubular steel, it’s a 100% bolt-on installation with included reinforcement brackets and hardware, and no additional drilling required to install on the factory bumper. Again, the powdercoat finish is a great match to the factory powdercoat making the hoop look more like a part of the Jeep rather than just another add-on accessory.
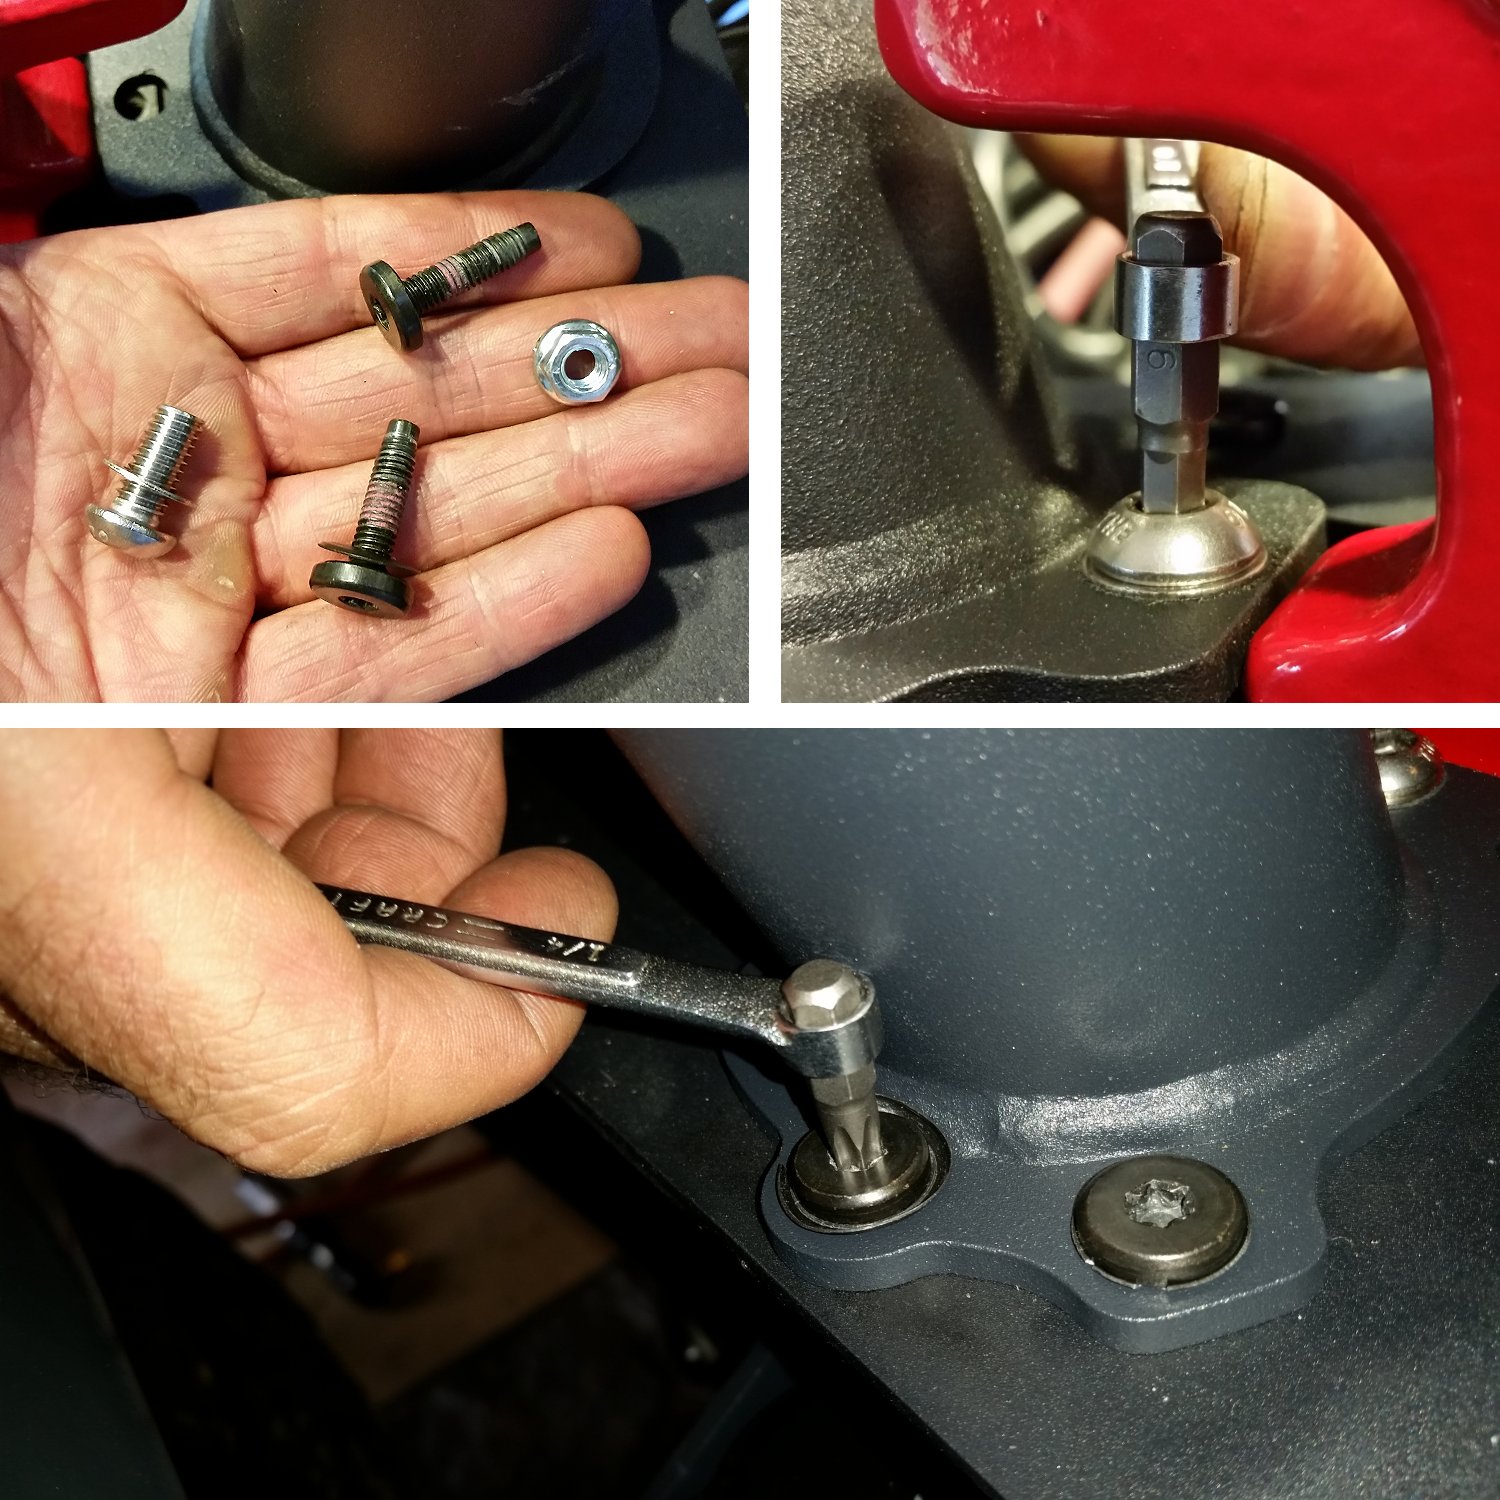
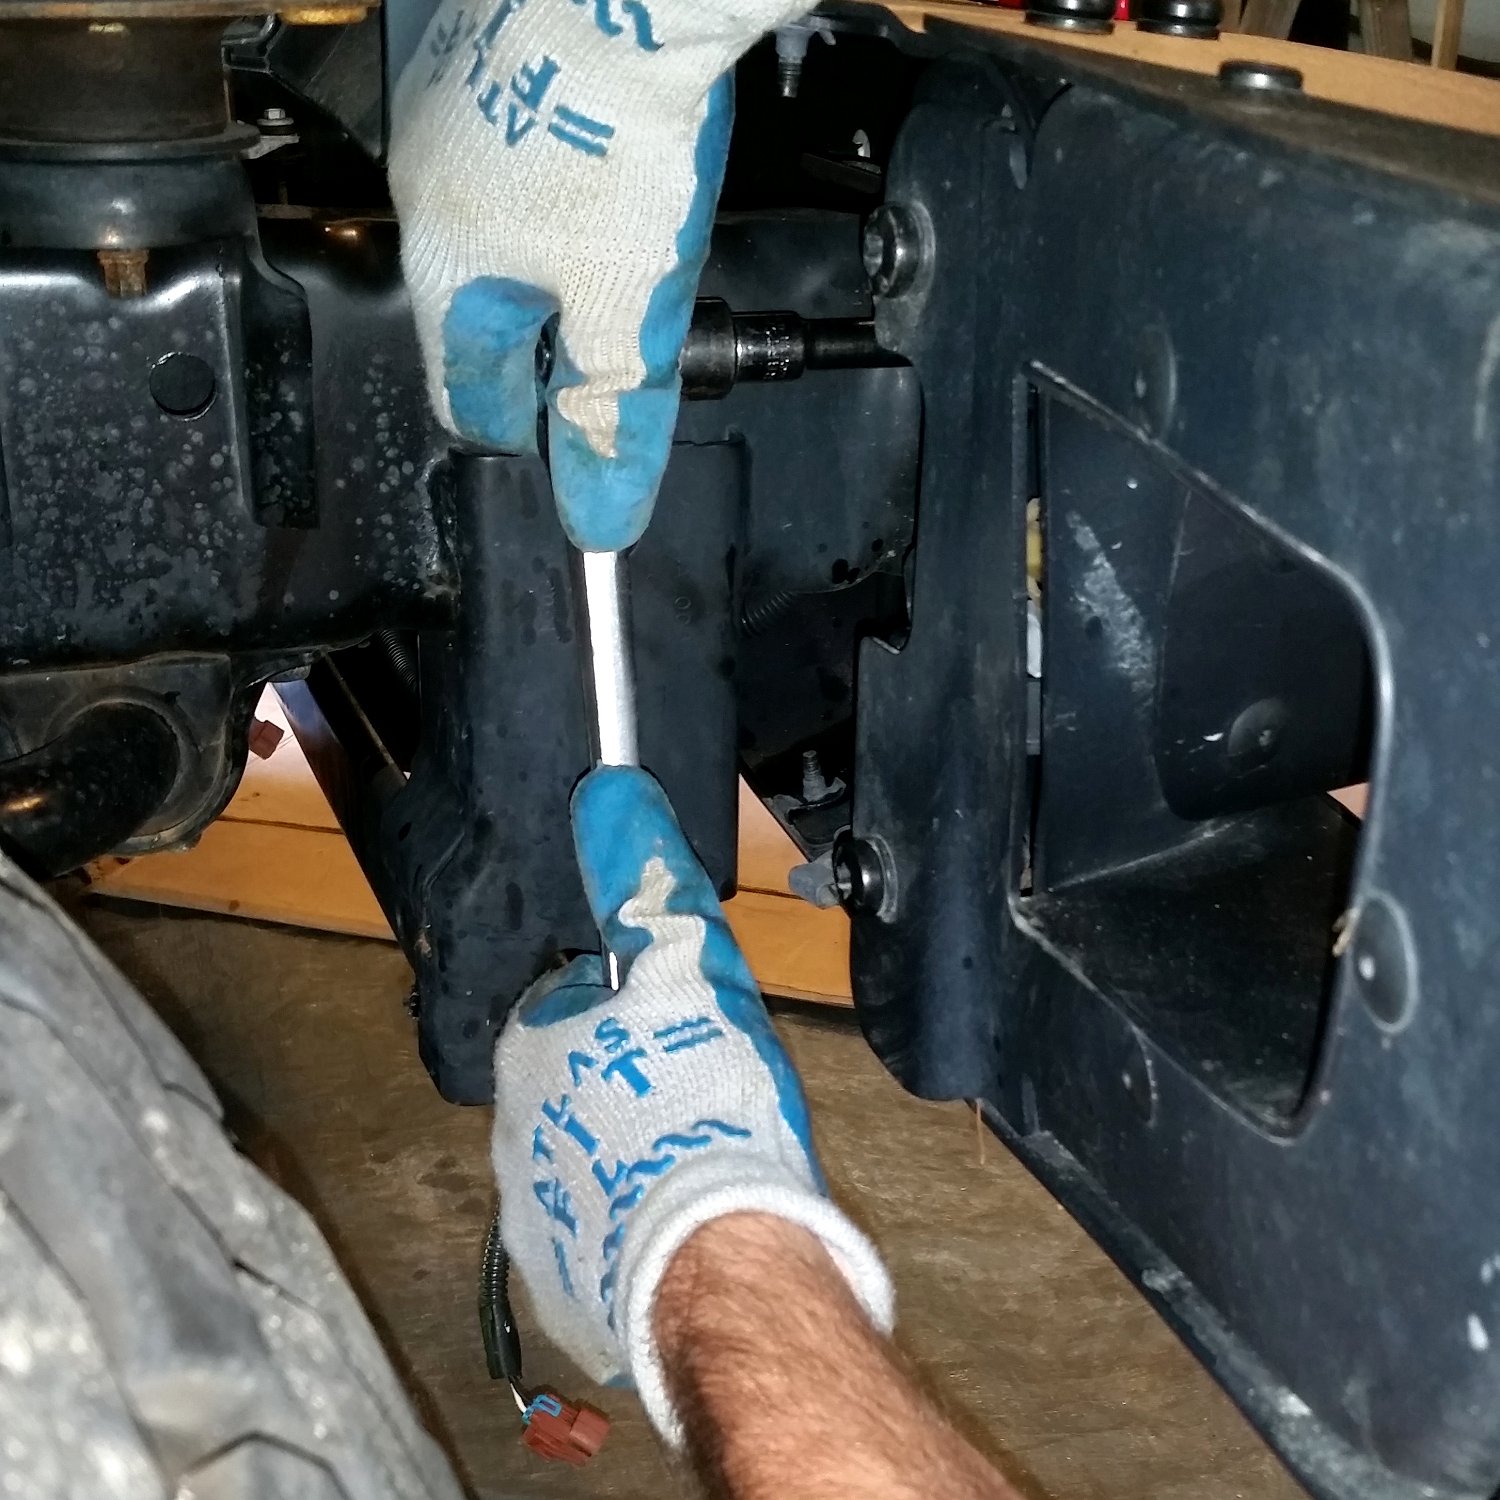
Installing the Maximus-3 Rubicon X/10A/Hard Rock Classic Hoop is a breeze. The Classic Hoop mounts to a combination of factory bolt locations and to the reinforcement brackets. Up to this point the Reinforcement Brackets have been left loose so they can be moved into place during the Hoop/Stinger installation. We placed the Hoop into position and installed a stainless steel M8 bolt and washer under each factory tow hook. At the rear two factory bolts per side, one into the bracket and the other bolts to the bumper backed by a new nut. In these tight spots we used a hex bit and Allen bit and small wrench to install the bolts.
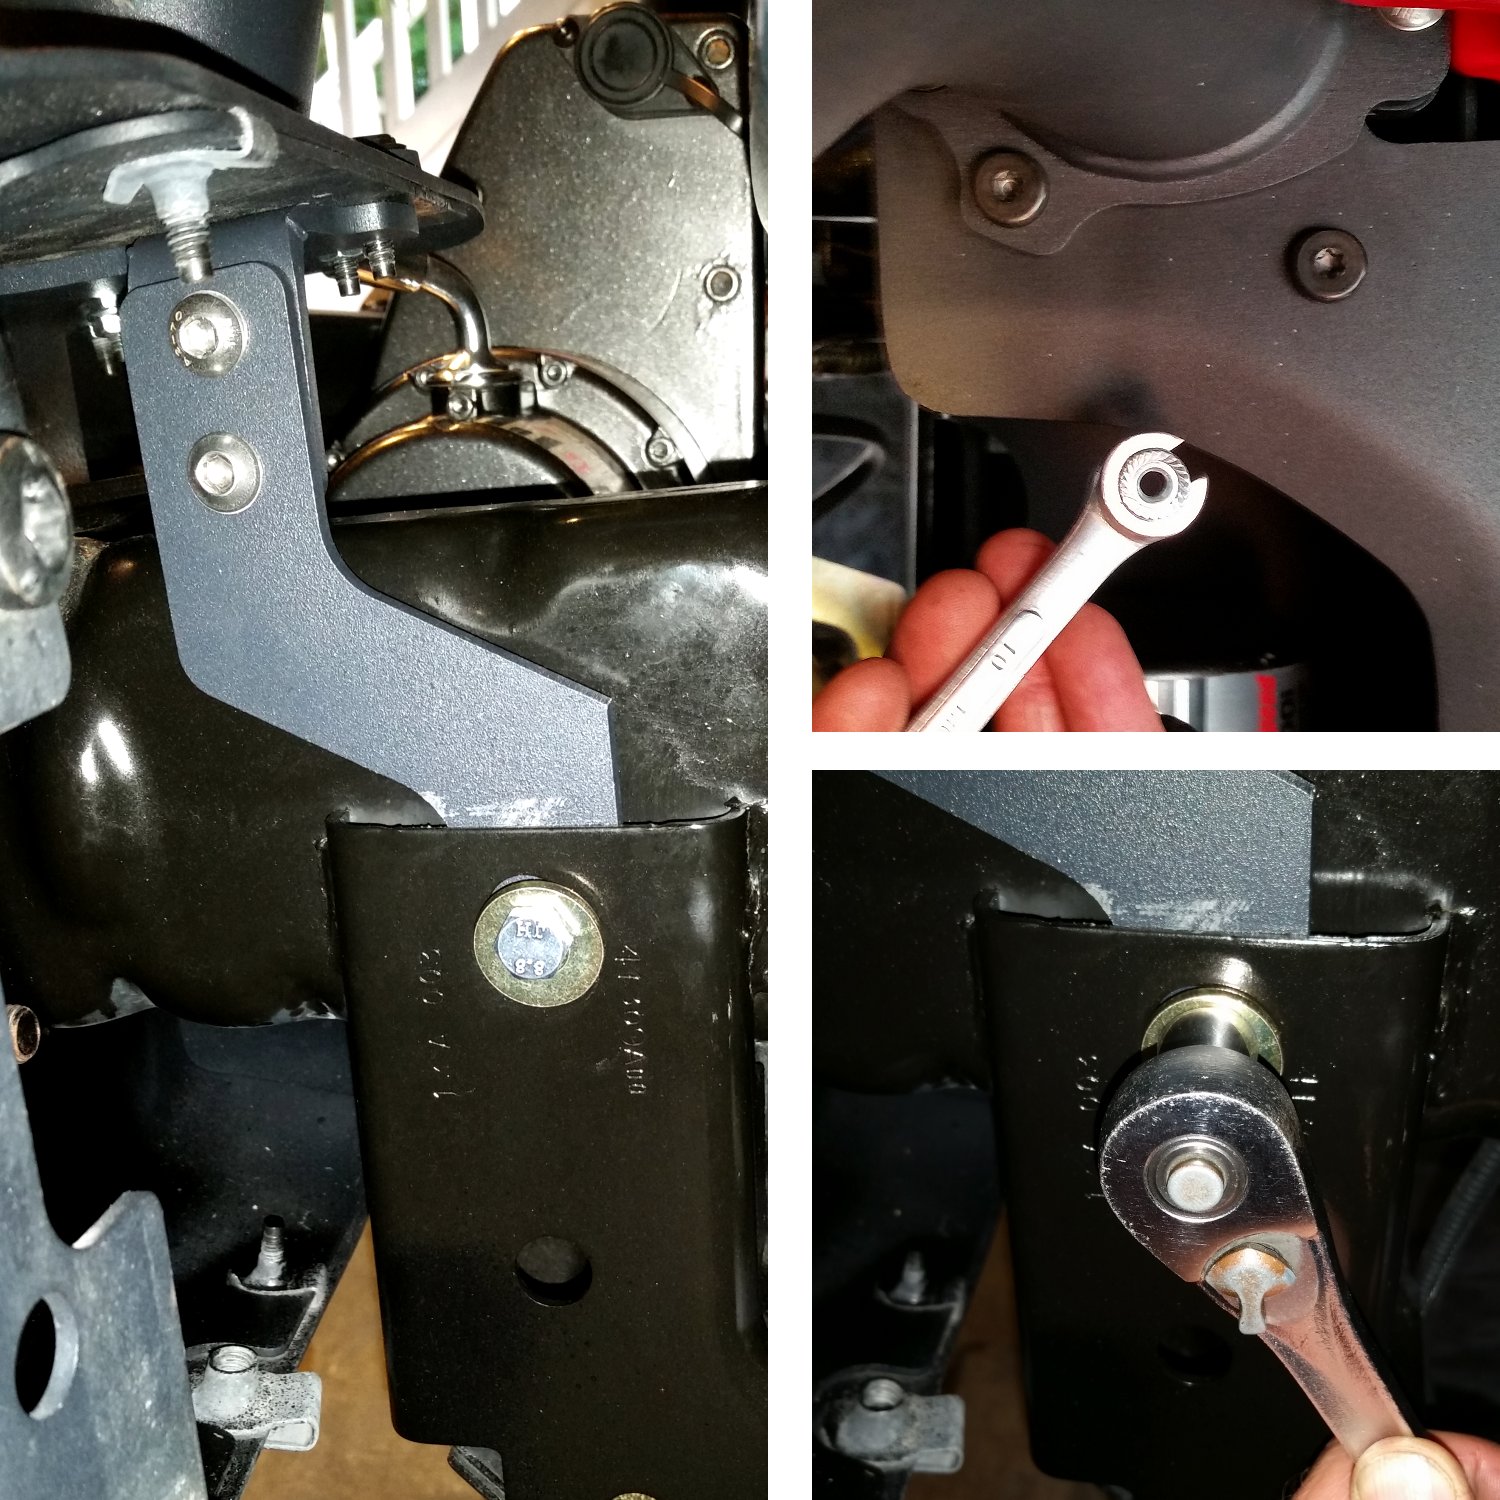
To prevent loosing our nut, we used a box end 10mm wrench to get the bolt under the topside of the bumper as the bolt was threaded down. Once all six bolts were installed, it was time to tighten the lower M8 hex bolt holding each Reinforcement Bracket to the frame.
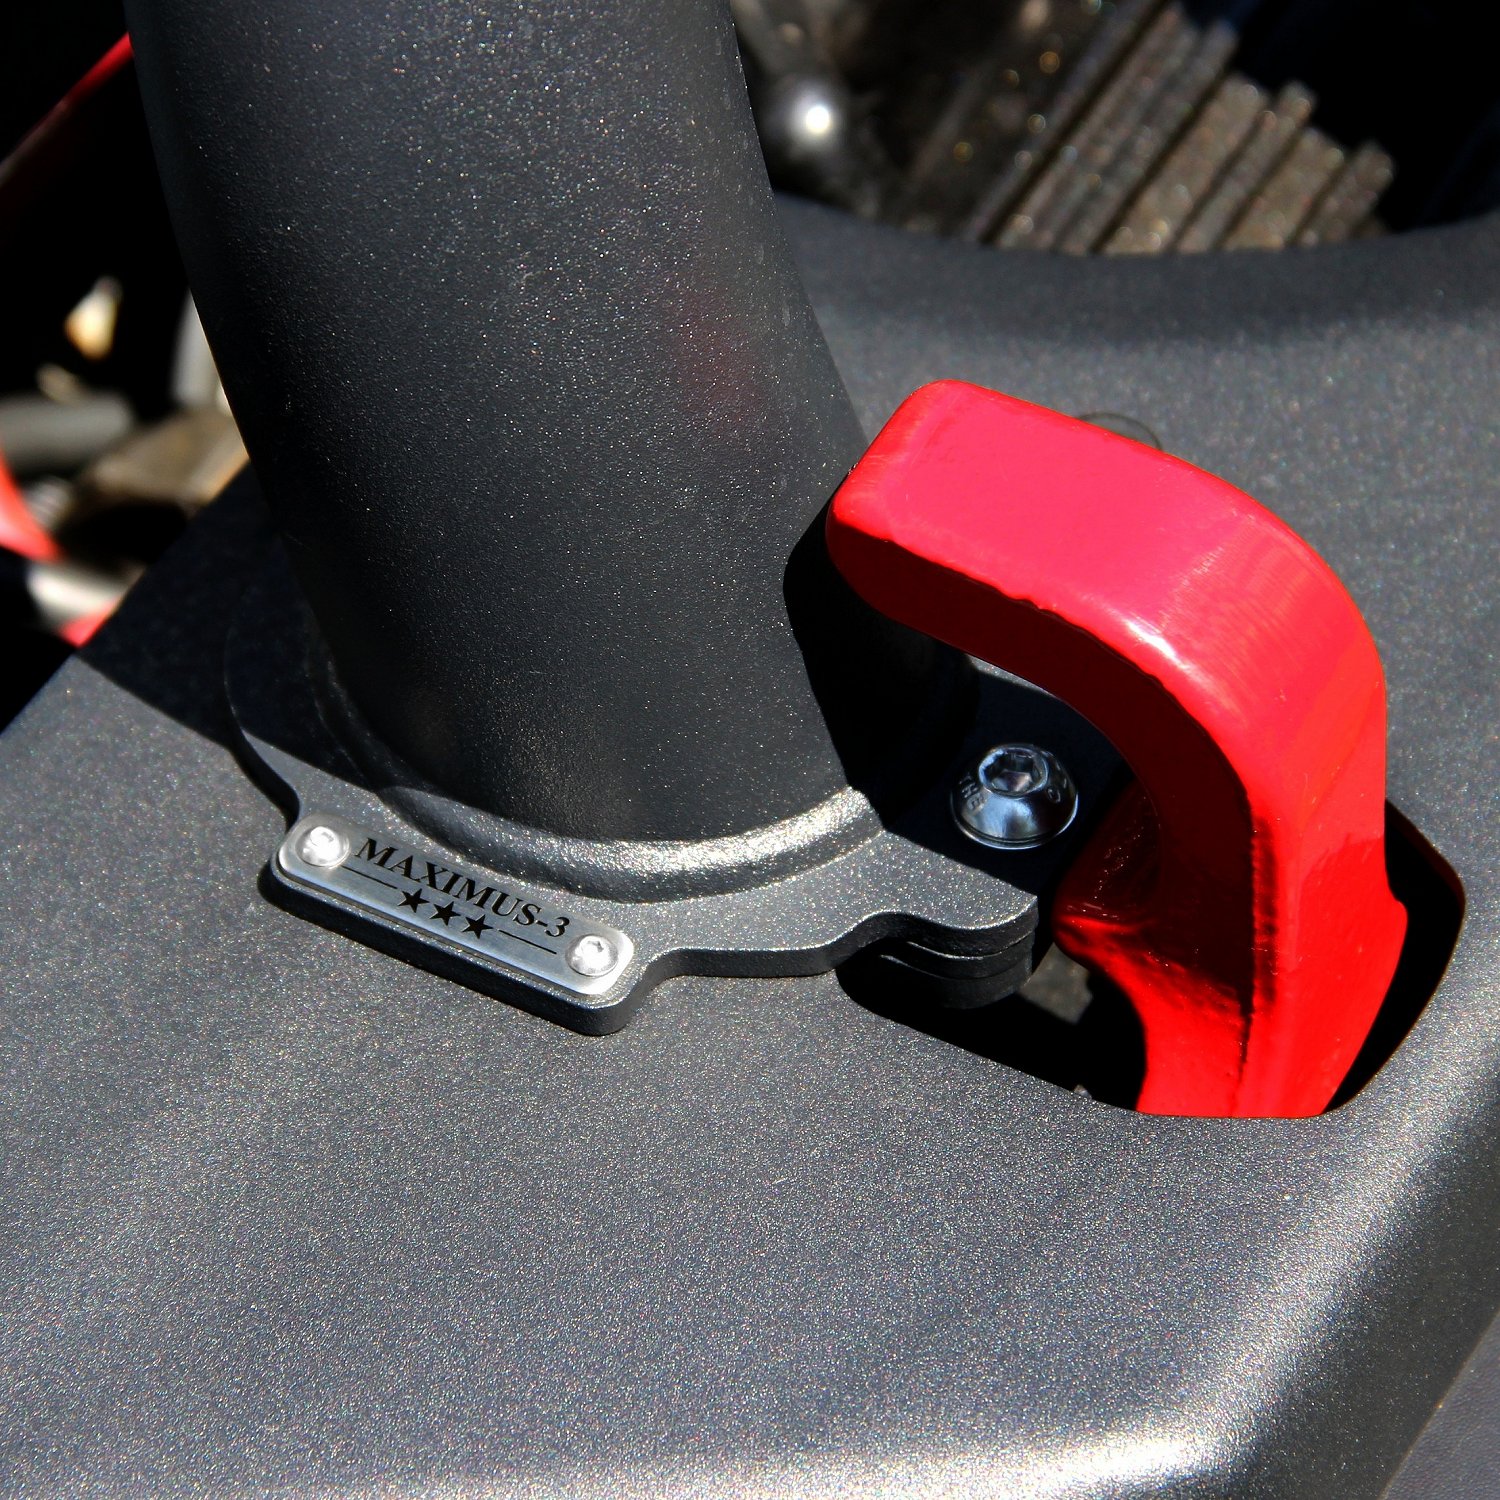
With the bolts installed we stepped back to check out the Hoop design. There is no doubt this is some sharp engineering backed by precision cut steel and welds so clean they almost don’t look like welds at all. The finish is a dead match to the factory bumper finish bringing the package together as a singularly designed front end. We also liked the finer detail of the Maximus-3 logo integrated into the design. Very Sharp.
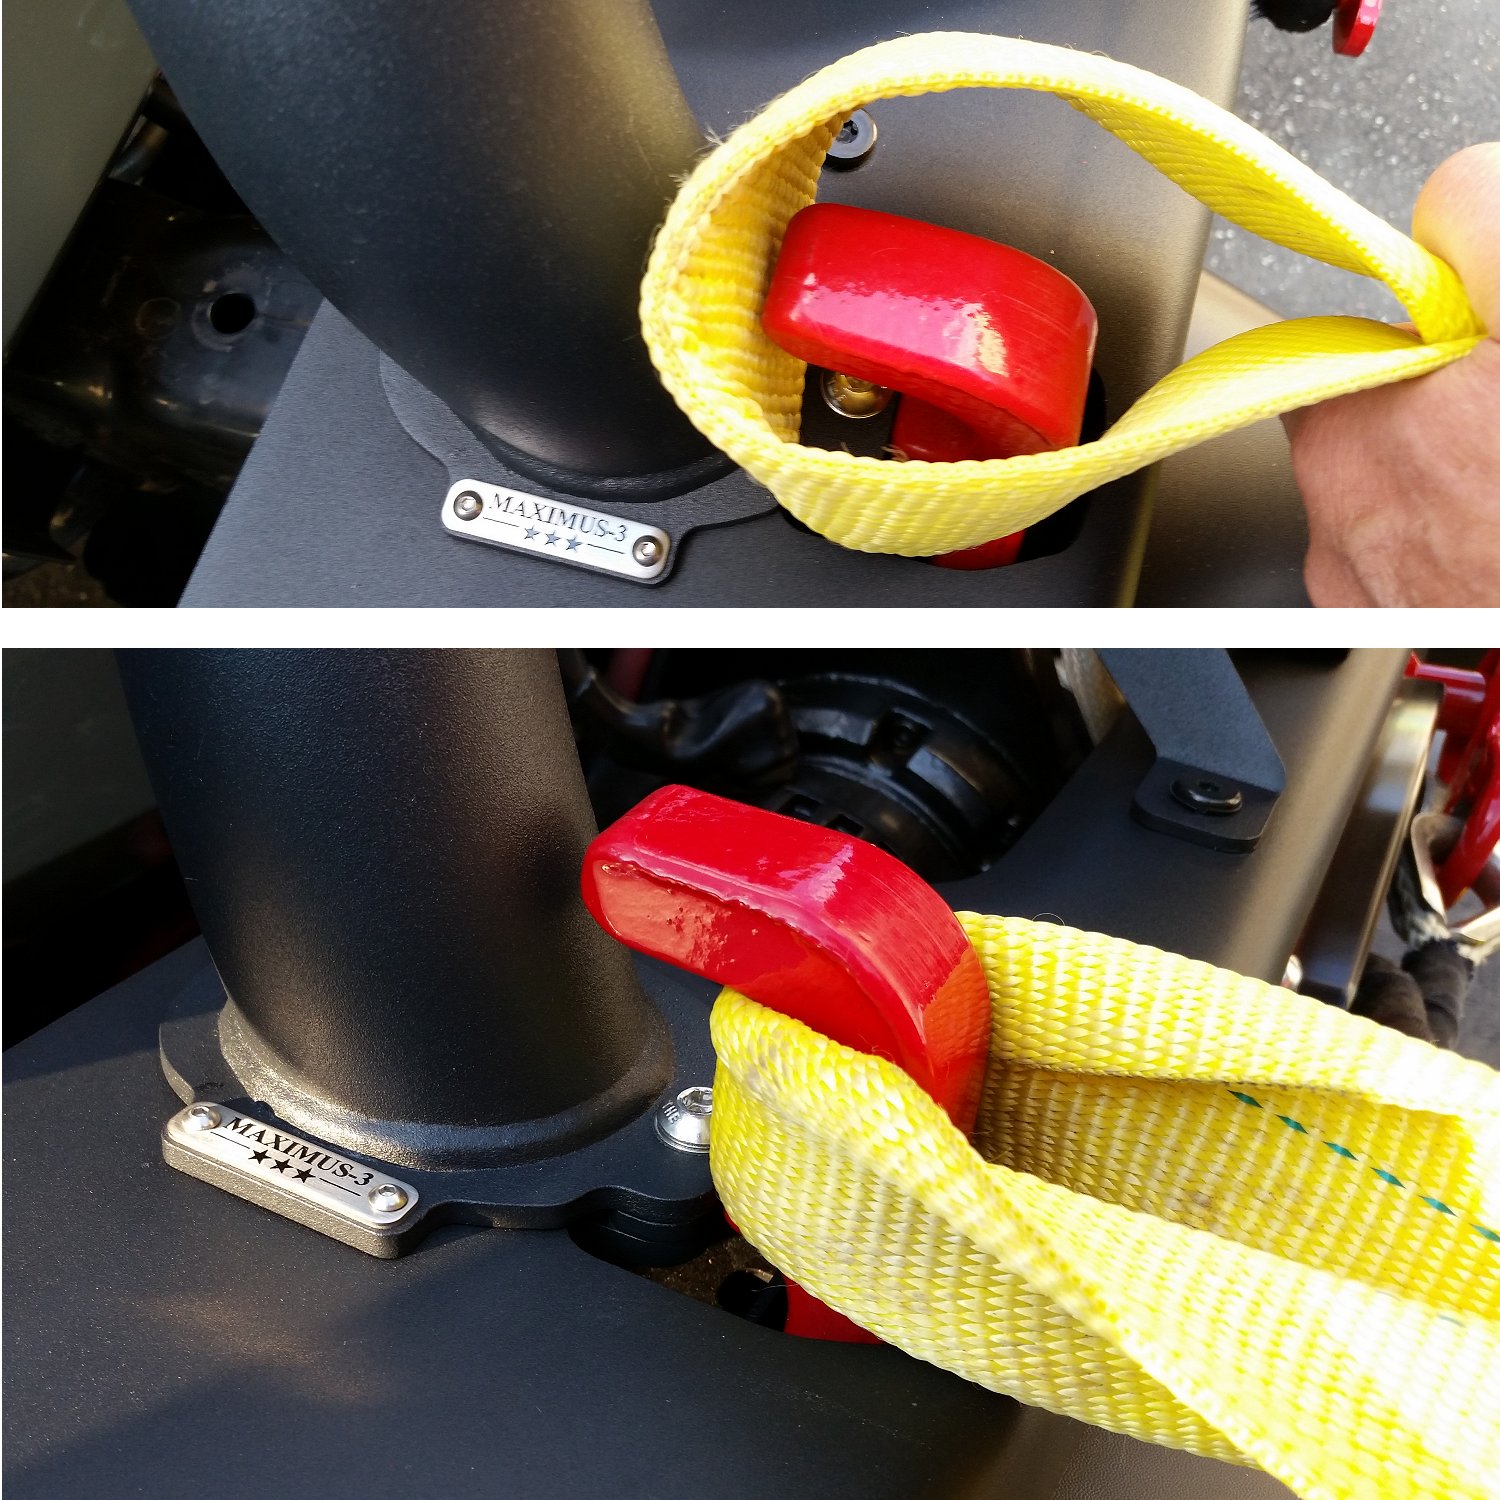
A while back when we were checking out photos of the Maximus-3 Classic Hoop, we had some concerns that clearance between the factory hook and the Classic Hoop would be too tight causing issues using the hooks. As it turns out clearance was just fine even with our big fat 30 foot 30,000lb strap, and the position of the hoop actually aids with recovery strap retention. With the hoop backing the open end of the tow hook, there is no chance of the strap falling off during use.
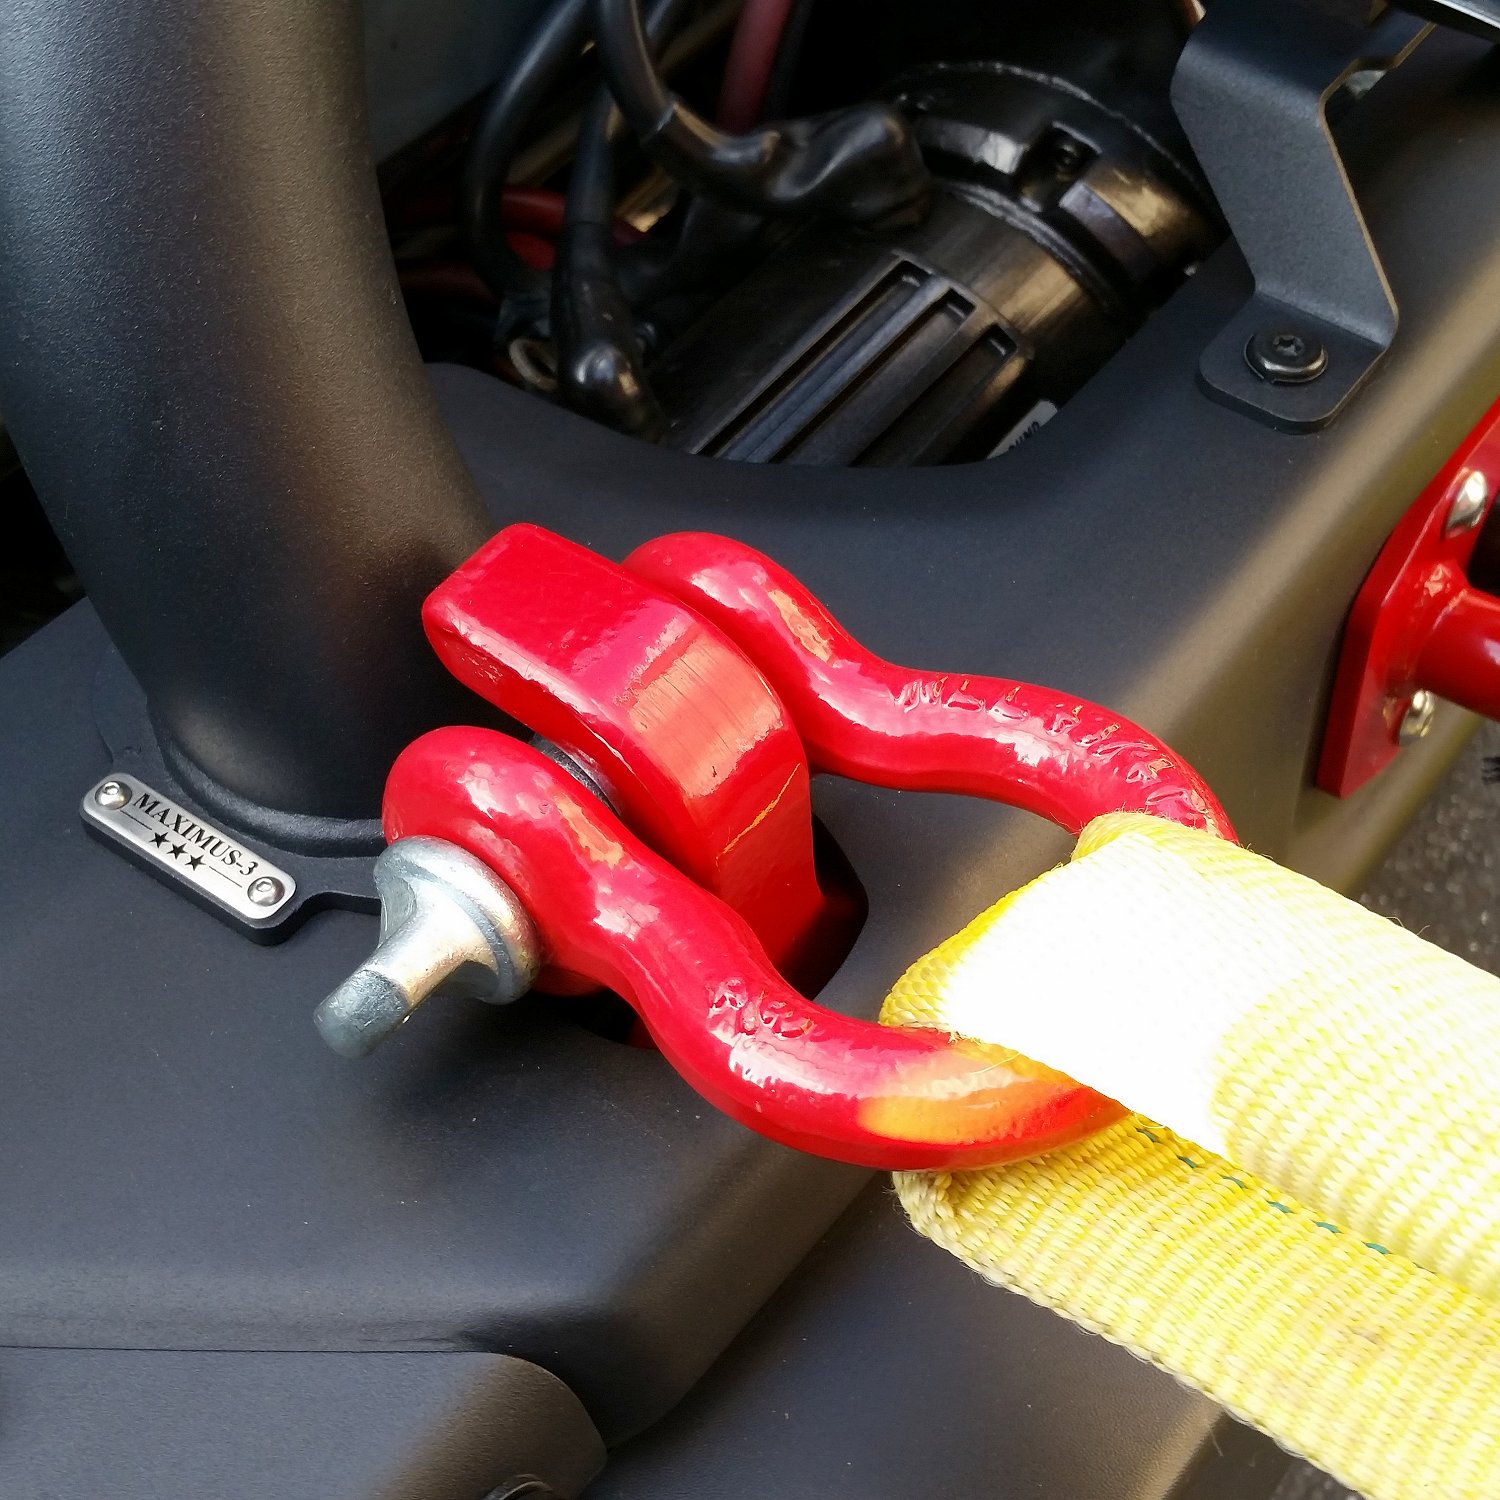
Taking one of our D-Rings off, we were pleased to see that the D-Ring now fits securely into the factory tow hook giving us more options for securing a strap or winch line to these upper attach points.
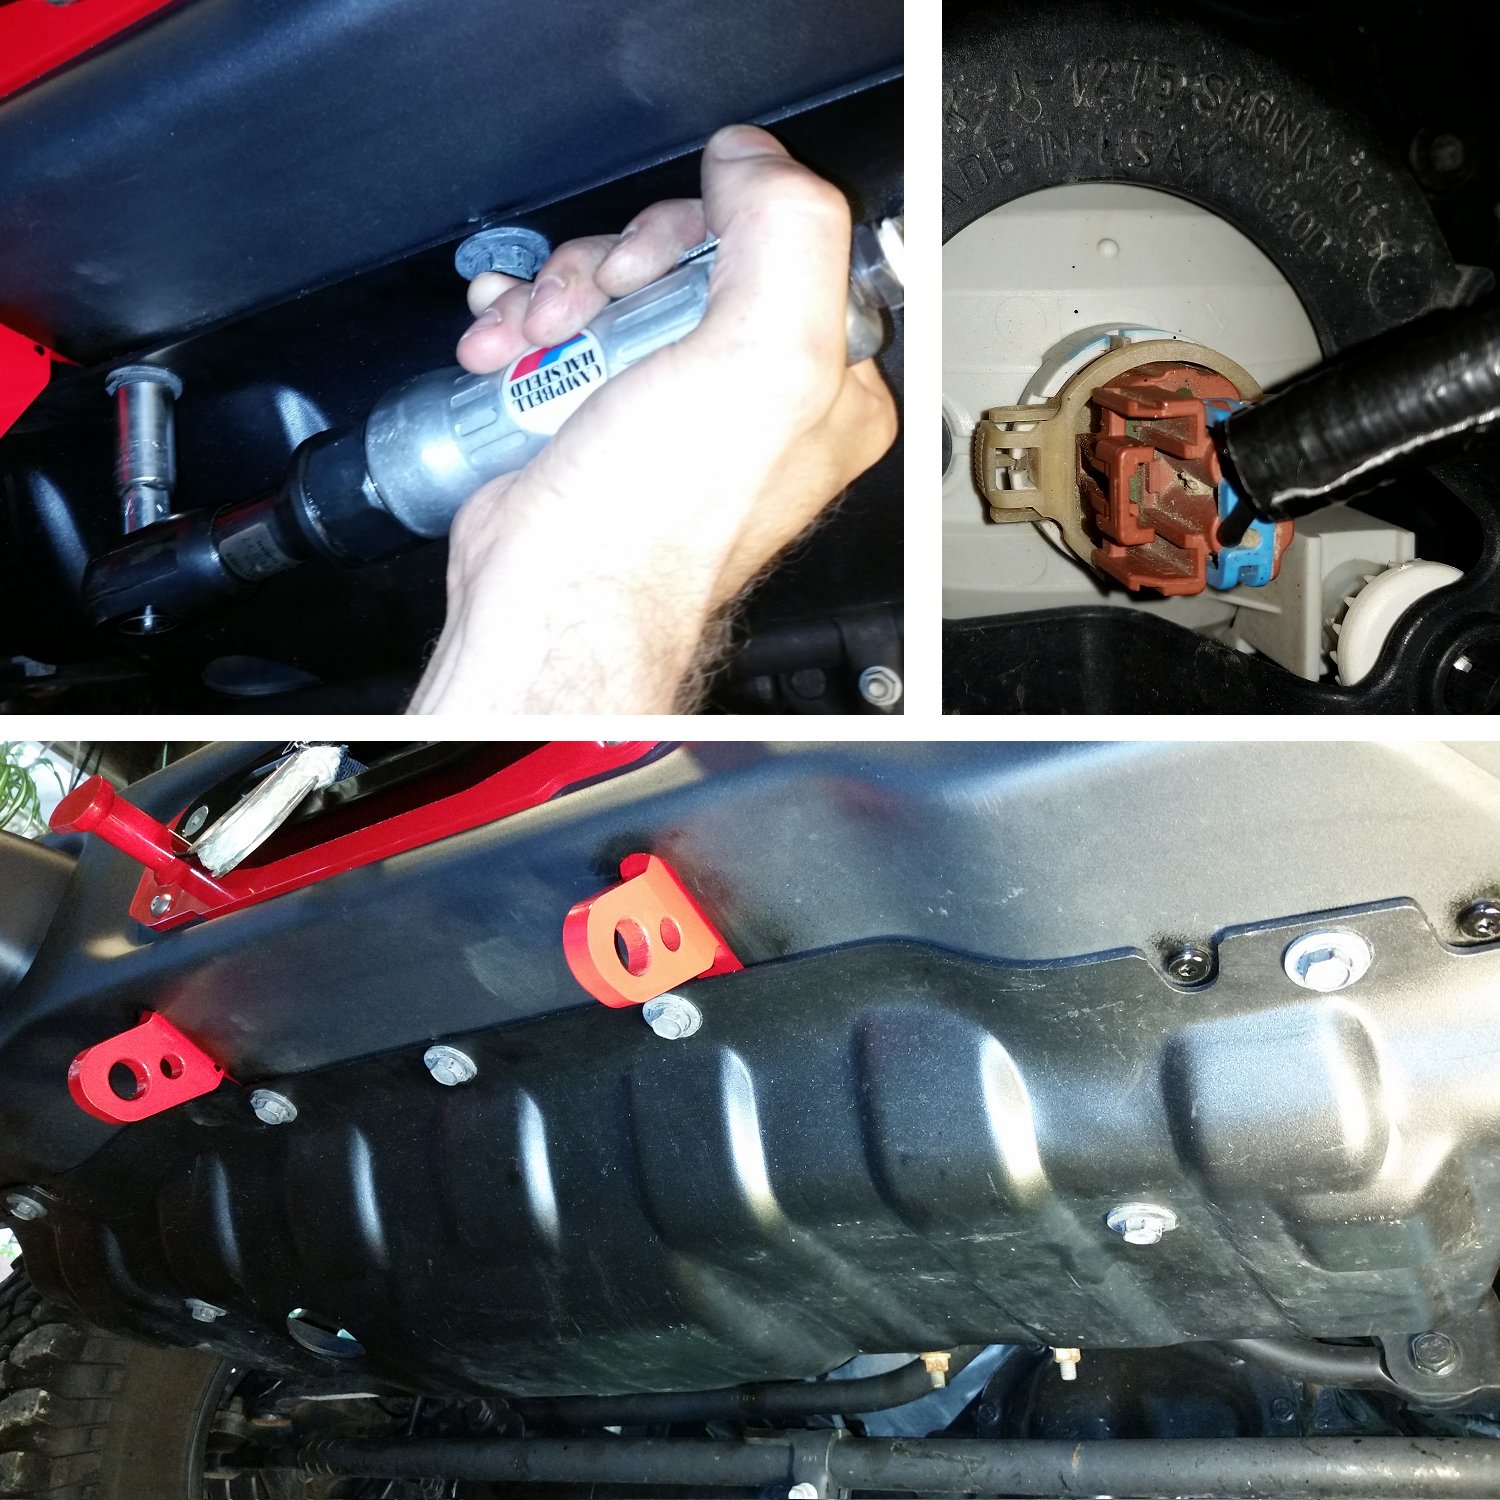
Last step for this round was to reinstall the skid plate with the 7 factory bolts. A little air makes quick work of that install. Then reconnect the fog lights. We later connected up our Lightforce RMDL170 Strikers to complete the enhanced appearance of our new bumper.

So what did we think?
With the project wrapped up and the front end transformed into a more complete recovery bumper, we were very happy with many aspects of this Maximus-3 Rubicon X (10A and Hard Rock) Bumper Module. For starters, it just looks damn good! Like we said earlier, the factory X bumper is a great looking, strong, utilitarian styled and functional bumper and we love that on a Jeep. Visually it was missing something that the winch and lights helped with but when we added the Classic Hoop, it just all came together in a sharp, sophisticated appearance without totally changing the factory X look. We assembled our thoughts on the next page in our Review and Analysis of the Maximus-3 Bar/Hoop, Winch Mount, Auxiliary Light Brackets and D-Ring Loops.
Review and Analysis
In this Article Series
- Maximus-3 Upgrades to Project Rubicon X
- Rubicon Bumper Removal
- Maximus-3 Winch Mount Installation
- Winch Install onto Maximus-3 Winch Mount
- Maximus-3 D-Ring Loops Installation
- Maximus-3 Hook Anchor & Hauser Fairlead Install
- Reinstall Bumper & Maximus-3 Classic Hoop Bar Install
- Thoughts, Analysis & Review of the Maximus-3 Classic Hoop, Winch Mount, D-Ring Loops, Hook Anchor & Light Brackets
For more information on Maximus-3 Products:
Maximus-3, LLC
- sales@maximus-3.com
- https://Maximus-3.com