
Project Jeep CJ-7 – Suspension
Making Shackles
Turning a Mistake into New Tools!
Shackles are one of those simple leaf sprung suspension components that can easily be upgraded to do a couple of things for a leaf spring suspension. First and probably most notable is it can lift the vehicle a little, adding extra clearance for tires or increasing your break-over height allowing the vehicle to clear a little more. Secondly, it can help to improve flex by giving the springs more travel between compression and extension of the leaf springs. Additionally swapping shackles for upgraded shackles is a good time to consider greasable shackle bolts and polyurethane bushings, which will improve flex and improve the ride of the vehicle on and off-road.
Shackles are also one of those components that are simple enough in design that someone with a few tools and a little know how might consider making instead of buying.
I had a few reasons for considering longer shackles.
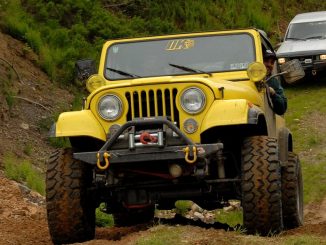
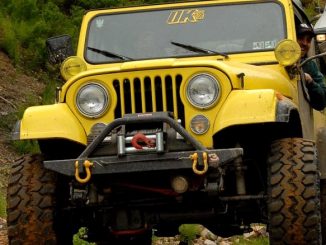
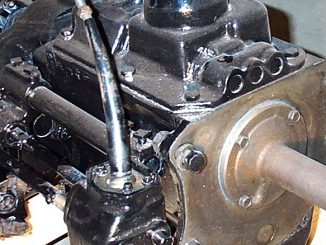
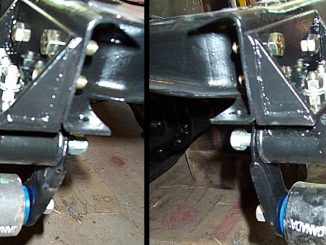
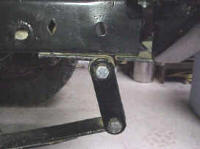
First reason was height. My current shackles were stock stamped steel CJ shackles (pictured below) at 4″ hole center to hole center. My suspension is a 3½ inch lift BDS YJ leaf springs. With 33″ Super Swamper SSR MT tires, I would get a little rubbing at full articulation, minor but still, I’d like to clear all corners.

Second reason was to put a shackle on the Jeep that was a little more stout. The stamped steel seemed to be a little weak, although I’m sure they would take quite a beating.
With a Spring off-road trip into the mountains only a couple weeks away, I though I might save time and simply order a set of shackles. Talking to the sales person (whom I’ve known for years) I ordered shackles 1½ inches longer than what I had. For some reason the delivery of the shackles was delayed. When they finally did arrive, they were exactly the same length as what I had, totally defeating the reason for ordering them in the first place. Needless to say, I sent them back. Actually a friend dropped them off since he lived near the vendor.
The Offroad Trip into the mountain came and went. The Jeep did fine with the shorter shackles but I still wanted a longer set. Without a pressing deadline, I decided to make a set that would be, for the most part, the same as what I wanted to buy. The only thing I figured I needed as far as tools go, was a better drill press.
A trip to a local farmers market to a cheap tool store yielded this bargain drill press (pictured below). The best part about it is that the drill press cost only a little more than those shackles I bought and returned. For about 150 bucks, I got this 16 speed, ¾ Horsepower, full sized drill press with an adjustable deck. It even had a built in light. Not a bad deal at all.
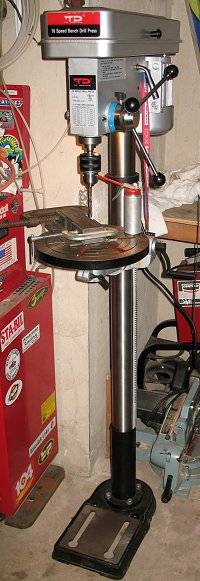
It came in a big heavy box with some assembly required. After putting it together and testing it out, I was quite pleased with it. So now it was time to fabricate some shackles.
The first thing I did was acquire some steel. I’ve said it before and I’ll say it again, if you plan to do any fabrication of anything on your 4×4, find a metal shop that will either sell you cheap pieces of stock steel or allow you to look though their scrap dumpster.
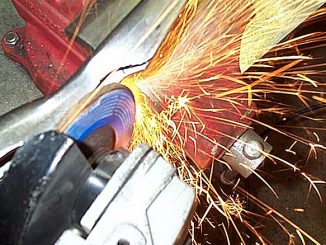
The steel I needed was 4 pieces of 2 inch wide by 3/8″ thick slabs at 7½ inches long. I had them cut it to length, although an angle grinder with an 1/8 inch cutting wheel for steel with rip right through it if you get a full length that needs cutting.

The new shackles were going to be 5¾” (hole center to hole center) with an overall length of 7½ inches. I marked the hole locations at 5¾” center to center and hit them with a center punch.
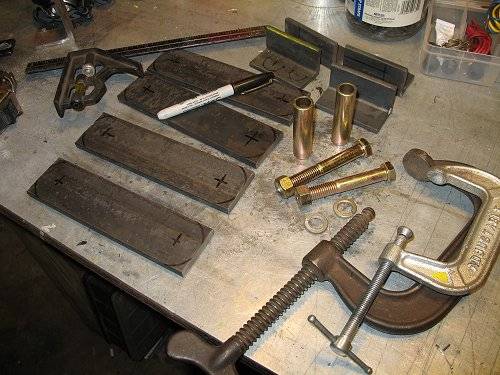
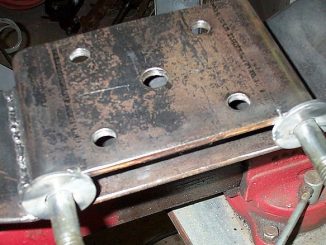
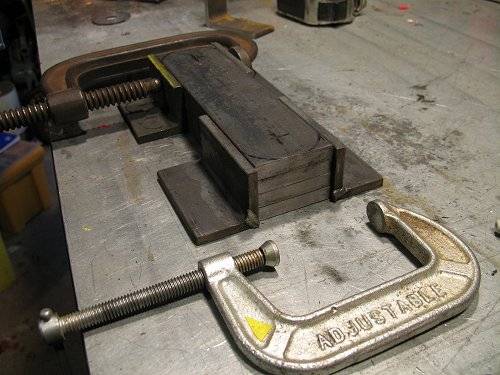
Since I was going to drill these holes out with a drill press and I wanted all the holes to be equal distance from each other, I clamped them together using angle iron and C-clamps as pictured below.

Drilling
When you use a drill, you always want to wear eye protection. The last thing you want is a piece of metal fragment in your eye.

Clamp The Work Piece Down
Another tip is to clamp your work down while you drill it. DON’T try to hold your work with your left hand while you press the drill with your right. That’s a recipe for a broken wrist. A nice big C-clamp to the drill press deck would do the trick.

Oil The Drill Bit As You Go
As you drill, apply oil to the hole and bit. Even back out now and then and squeeze some more oil down the hole. That will do several things. First it will help the drill bit cut the metal. Second, it will keep the bit cool. Third it will reduce the chances of the bit binding in the hole. It will also help your bits last longer.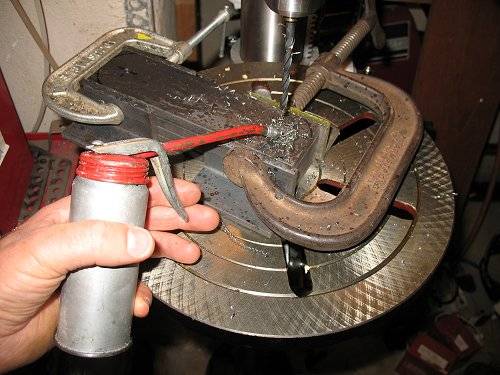
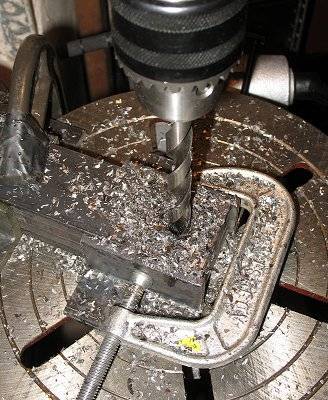
Drill A Pilot Hole First And Then The Larger Hole
I drilled two sets of holes, a ¼ inch pilot hole (to guide the larger drill bit) and then the 1/2 inch hole. Check your shackle bolts to determine your actual size of bolt diameter.
Shaping The Shackles
After the drill was complete, I needed a better shape to the shackles. Now, you could just bolt the shackles on the vehicle as is squared off but then if you actually take it offroad, the squared edges can catch on obstacles. No to mention they would look kind of cheap. 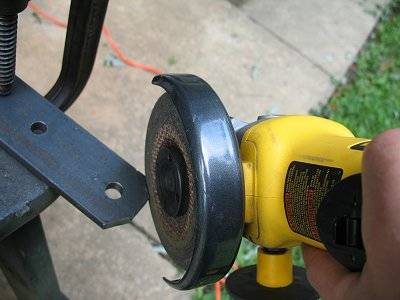
Using an angle grinder, I hacked off the corners. Keep in mind that the bushings are going to ride on the surface of the shackle so you might want to take a large 2 inch washer and draw a half circle along the edge so you know how far to cut and grind.

Once I hacked off the edges, I ran a 1/2 inch bolt through all the shackles and bolted them together.
Then I clamped the shackles to the work table to start grinding on them.

You might want to consider doing the grinding outside if you work out of a garage. When sparks fly, they can ignite all kinds of stuff in a garage. So play it safe and do the grinding outside.

Use a thick grinding wheel on an angle grinder that is made for metal.
I kept running the wheel over the surface creating a nice curve around the end.

The next step was to clean up the sharp burrs on all the edges. For this I clamped my belt sander to the work table upside down and cleaned up the edges.


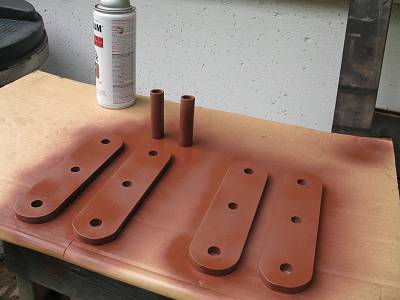
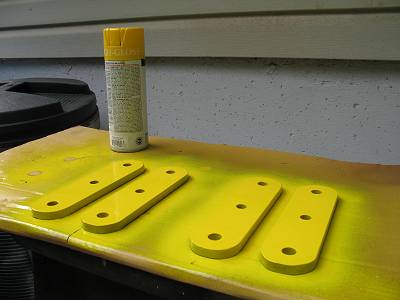
A good coat of primer, then paint and they were ready to sit for a while to dry.
The center hole was to later decide if I wanted to insert a center tube for stability. Just in case I painted up a tube I would use for the center tube.

Installation
After the shackles had dried for a few days, they were ready to be installed.
First I secured the vehicle with wheel chocks on the forward side and the back side of the wheel on the opposite end of the vehicle while jacking up the end I was working on. I figured while jacking the vehicle up, I could do it two different ways.
One way I could jack up the front or back of the vehicle and place tall jack stands under the frame and allow the axle to droop, taking weight off the shackles.
Or I could use the strength of the bumper and jack the bumper up while leaving the wheels on the ground. That way I could lift until the shackle bolt slid out easily. I chose this method. I took great care as not to allow the jack from slipping off the bumper and make sure the vehicle would not roll while doing the shackle work.
When the bolts slid out easily, I put the new shackles on top bolt first. Then jacked the vehicle up another 2 inches until the bottom bolt could slide through.
Overall the shackles came out great. I toned down the color a little bit (to black) because the yellow was just too much. But performance wise, they do just as well as any other catalog bought shackle and in the end I have a drill press for all those other projects!
Other things to consider when replacing shackles.
Shackle Kits

Obviously you can get kits to do the job. Many kits come with such things as greasable shackle bolts and new Polyurethane Bushings.
Greasable Shackles
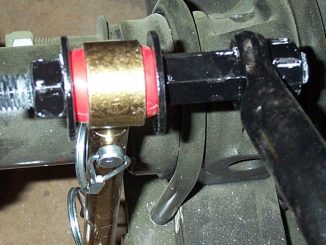
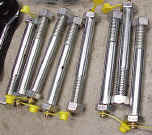
Greasable shackles are basically shackle bolts with a hole drilled down the center and a grease fitting on the bolt head. Half way down the shaft of the bolt, a small hole comes out the side, allowing pressed in grease to come out of the bolt into the tube. The tube should have a small hole in it allowing grease to come out of the tube, and behind the polyurethane bushings. The grease will improve ride on and off road.
![]()
Polyurethane Bushings
If you make shackles, it’s wise to replace old bushings with new polyurethane bushings for a better ride on and off road. 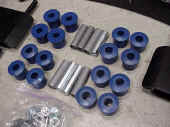
Using Shims
There’s only so much lift you can get out of a shackle without altering the suspension angles for the worse, in particular the drive shaft angle. The angle change will depend on a few things like how long your leaf springs are and what your pre-existing angles are. Although it’s not recommended, shims can correct angle changes. However most shims are aluminum. Aluminum compresses over time and can actually loosen up the u-bolts that hold the axle to the leaf springs. Shims have actually been known to break in half and spit out of the axle leaving a very dangerous condition. Additionally you should never use shims on the front axle because if they ever come loose or come out completely, you could loose control of the vehicle.
![]()