
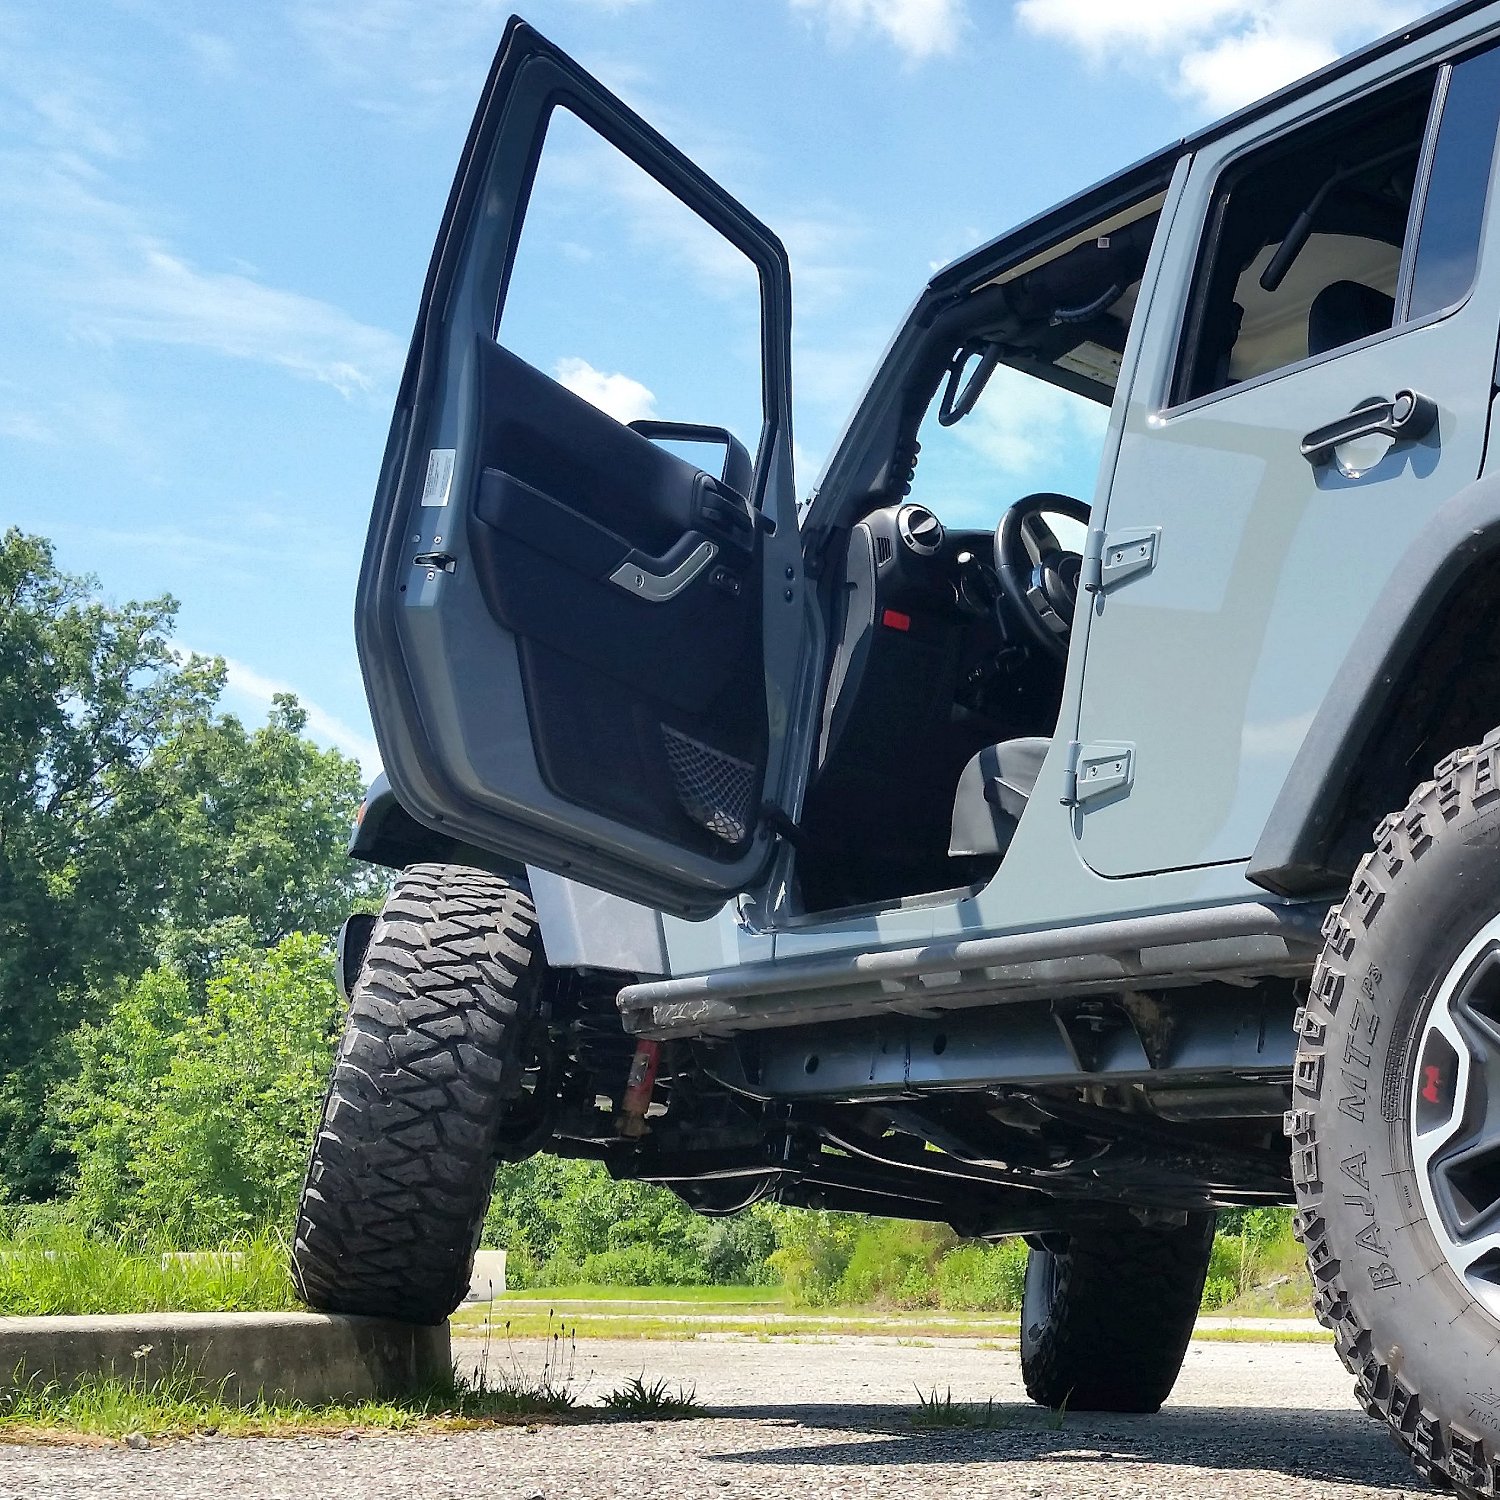
If you’re a Jeep JK owner you know the technique. Sometimes when you open your door and you’re not getting out immediately, the foot goes down to hold the door out from coming back at you or you’re hooking it under the door to stop it from smacking onto the car next to you. It’s a thing that Jeep owners have been accustomed to since the days of the aftermarket hard tops built for the first post-WWII CJ-2A’s to roll off the assembly line. Today with the explosion of Jeep Wrangler JK’s on the market, Jeeps are everywhere, enjoyed by every type of driver in every situation, with doors swinging wildly out of control in parking lots! Well, maybe not quite that bad but you get the idea.
Now think about the last time you had to control that open JK door, on a hill, in the wind, with your hands full. Wouldn’t it be nice if the Jeep JK doors had a multi-position door check like every other car and truck on the road? And what if that door check had a disconnect so when you wanted to do the Jeep thing and take off the doors, you could easily?
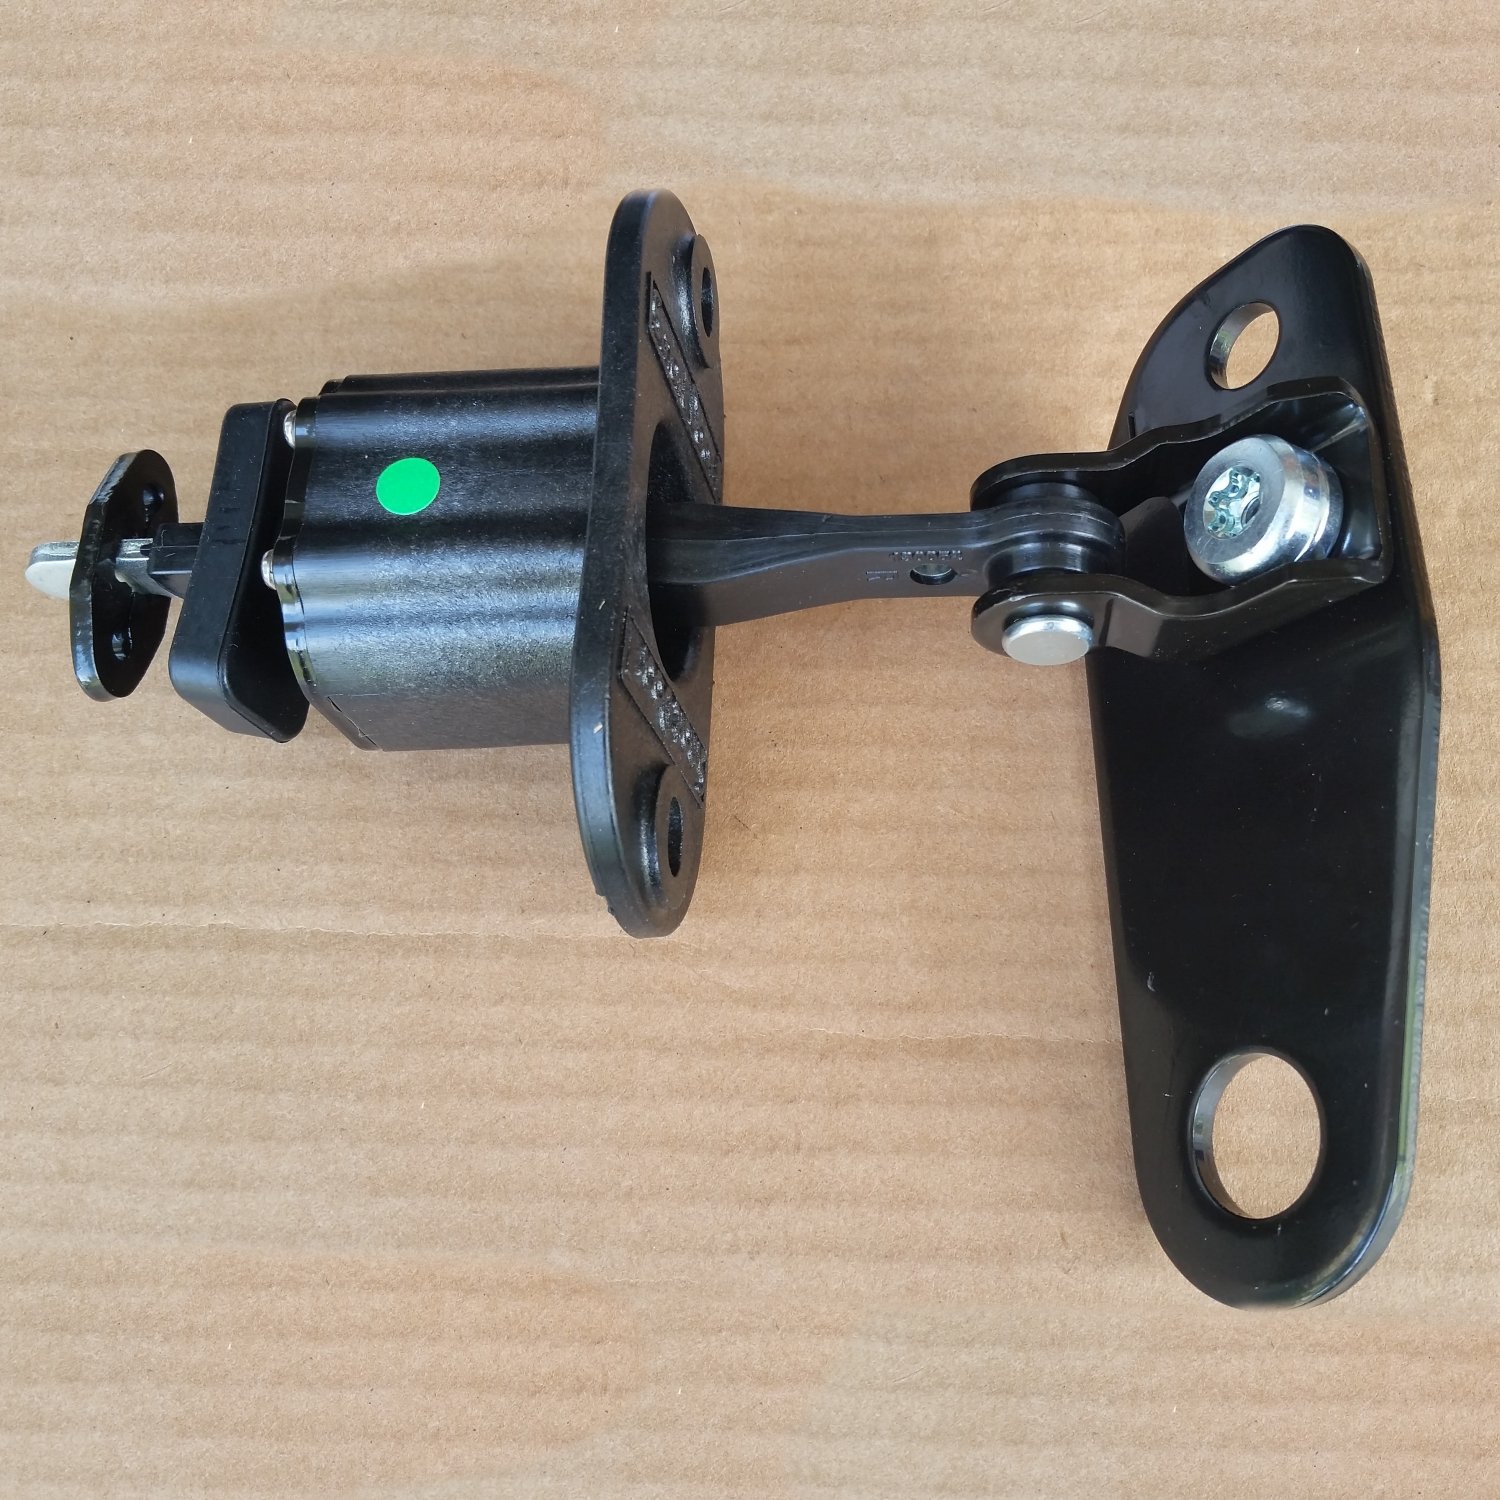
It was at the Bantam Heritage Jeep Show that I opened a random Jeep door on a vendor’s show Jeep and realized how nice it would be to have these on my own JK. After installation, I have to admit it did take some getting used to. There’s a positive side to how easily a JK door freely pops open. But I quickly got used to these Smart Doors Door Checks and really appreciate a door that doesn’t flop around like a loose shutter in a windstorm. As a side effect, the doors now feel more solid and close more positively. The 3 positions they lock into feel like the right places for the size of the doors. Removing the doors is still easy since they quickly disconnect using a T-50 Torx bit.
The following is a quick recap of the rather easy installation.
Tool and Supplies Needed for the Install:
- Socket wrench, 13mm socket
- 7/32″ Hex bit or Hex Driver
- Drill
- Center Punch, Hammer
- Allen Wrenches: 3mm, 5/32″
- T50 Torx Socket
- 1/8″ (3mm) drill bit
- 5/16″ (8mm) drill bit
- 2″ Bi-Metal Hole Saw
- Tape, Scissors
- Paint or primer (seal up the drilled metal, won’t be seen)
- Silicon Sealant
- Bungee and pillow or blanket
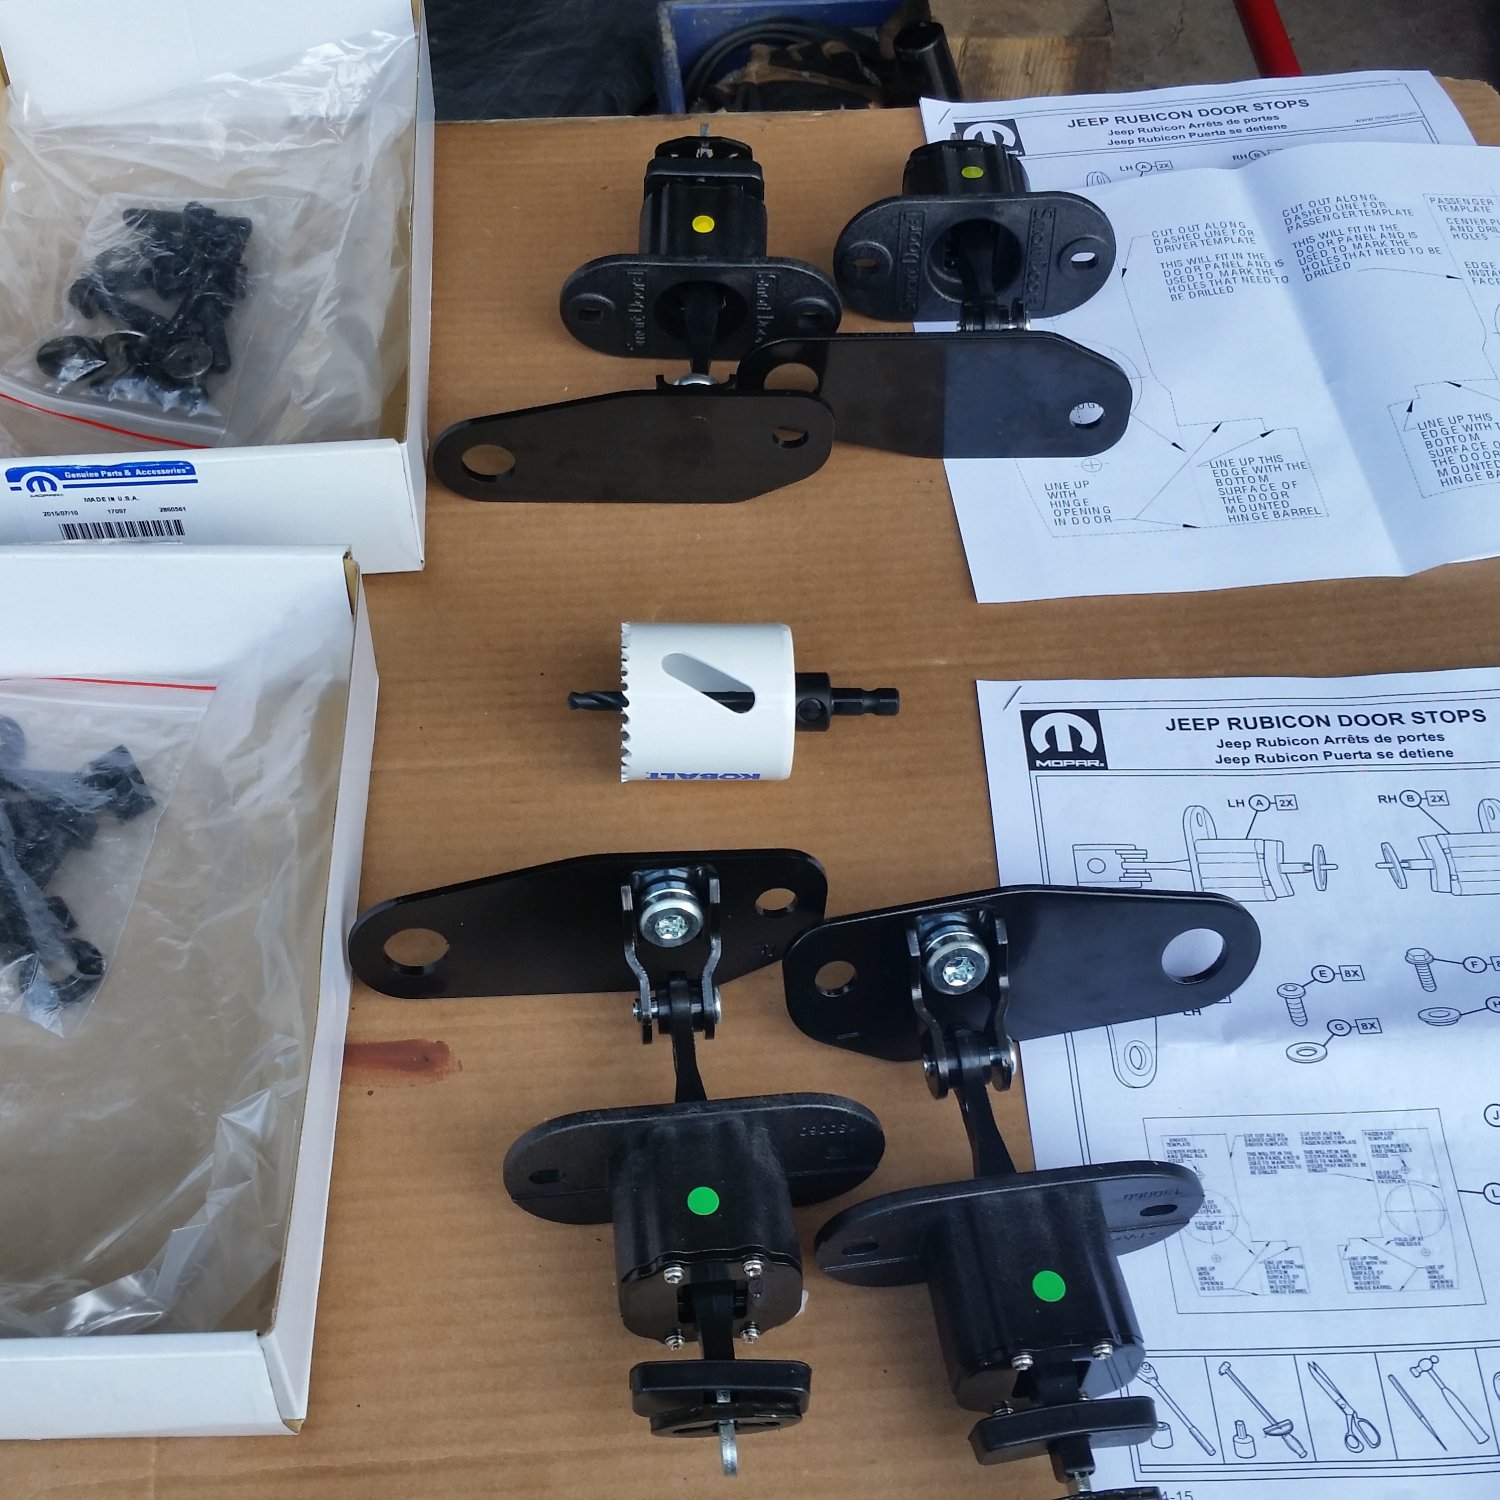
Remove the T50 Torx nut from the set that you are about to install.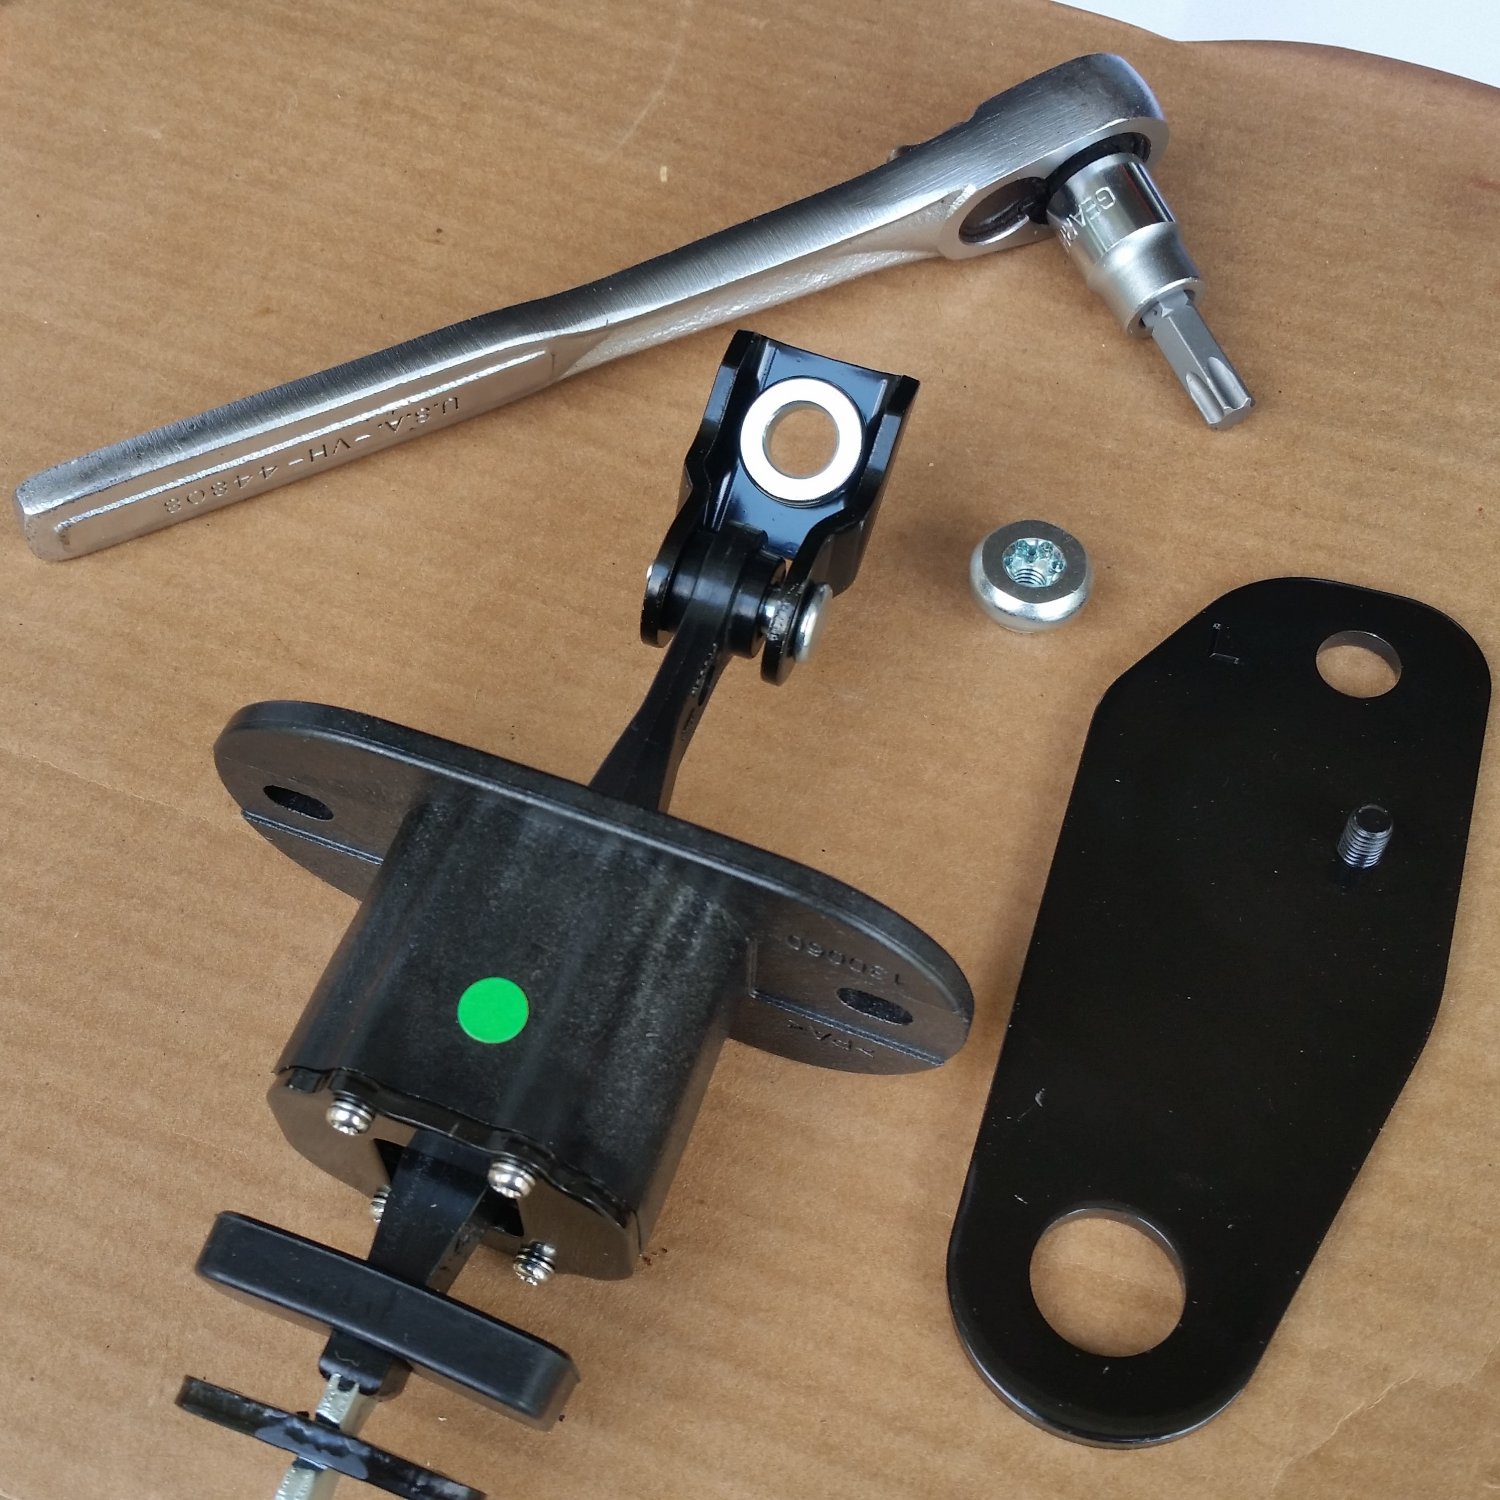
Cut out the included templates along the dotted line. These will be used to locate and mark the holes that you will drill in the door. These are very important for proper alignment so cut carefully.
Ok, time to get started…
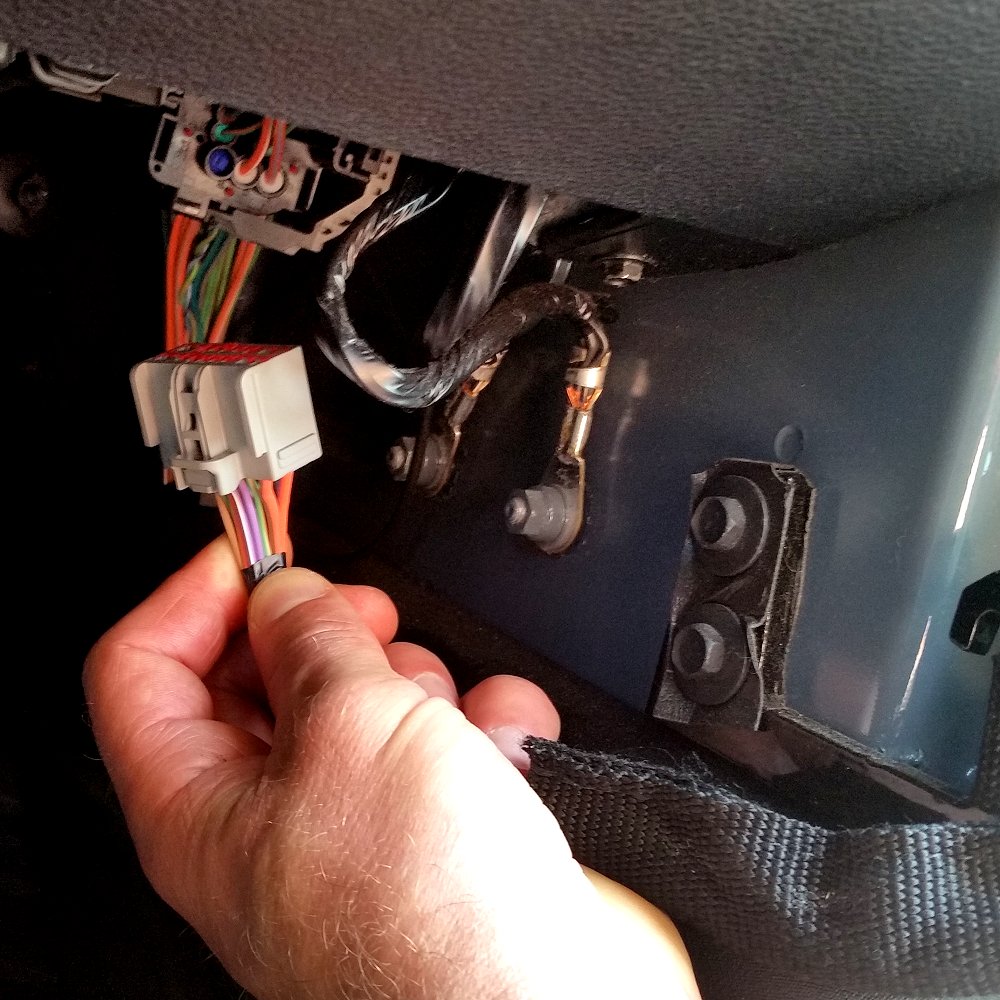
1. Remove the factory fabric door strap and disconnect the electrical connector. Place a pillow or rolled up blanket against the body and fully open the door so it is resting against the pillow or blanket. Secure the door with a bungee.
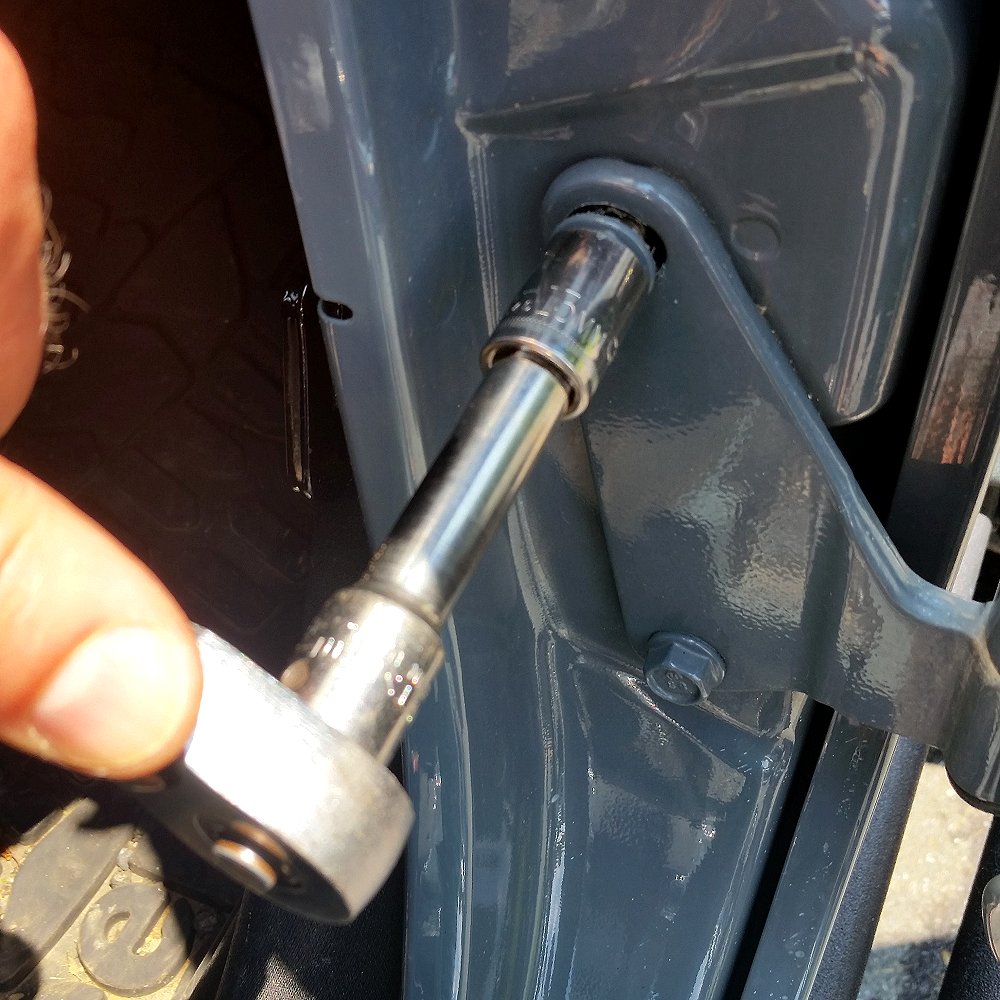
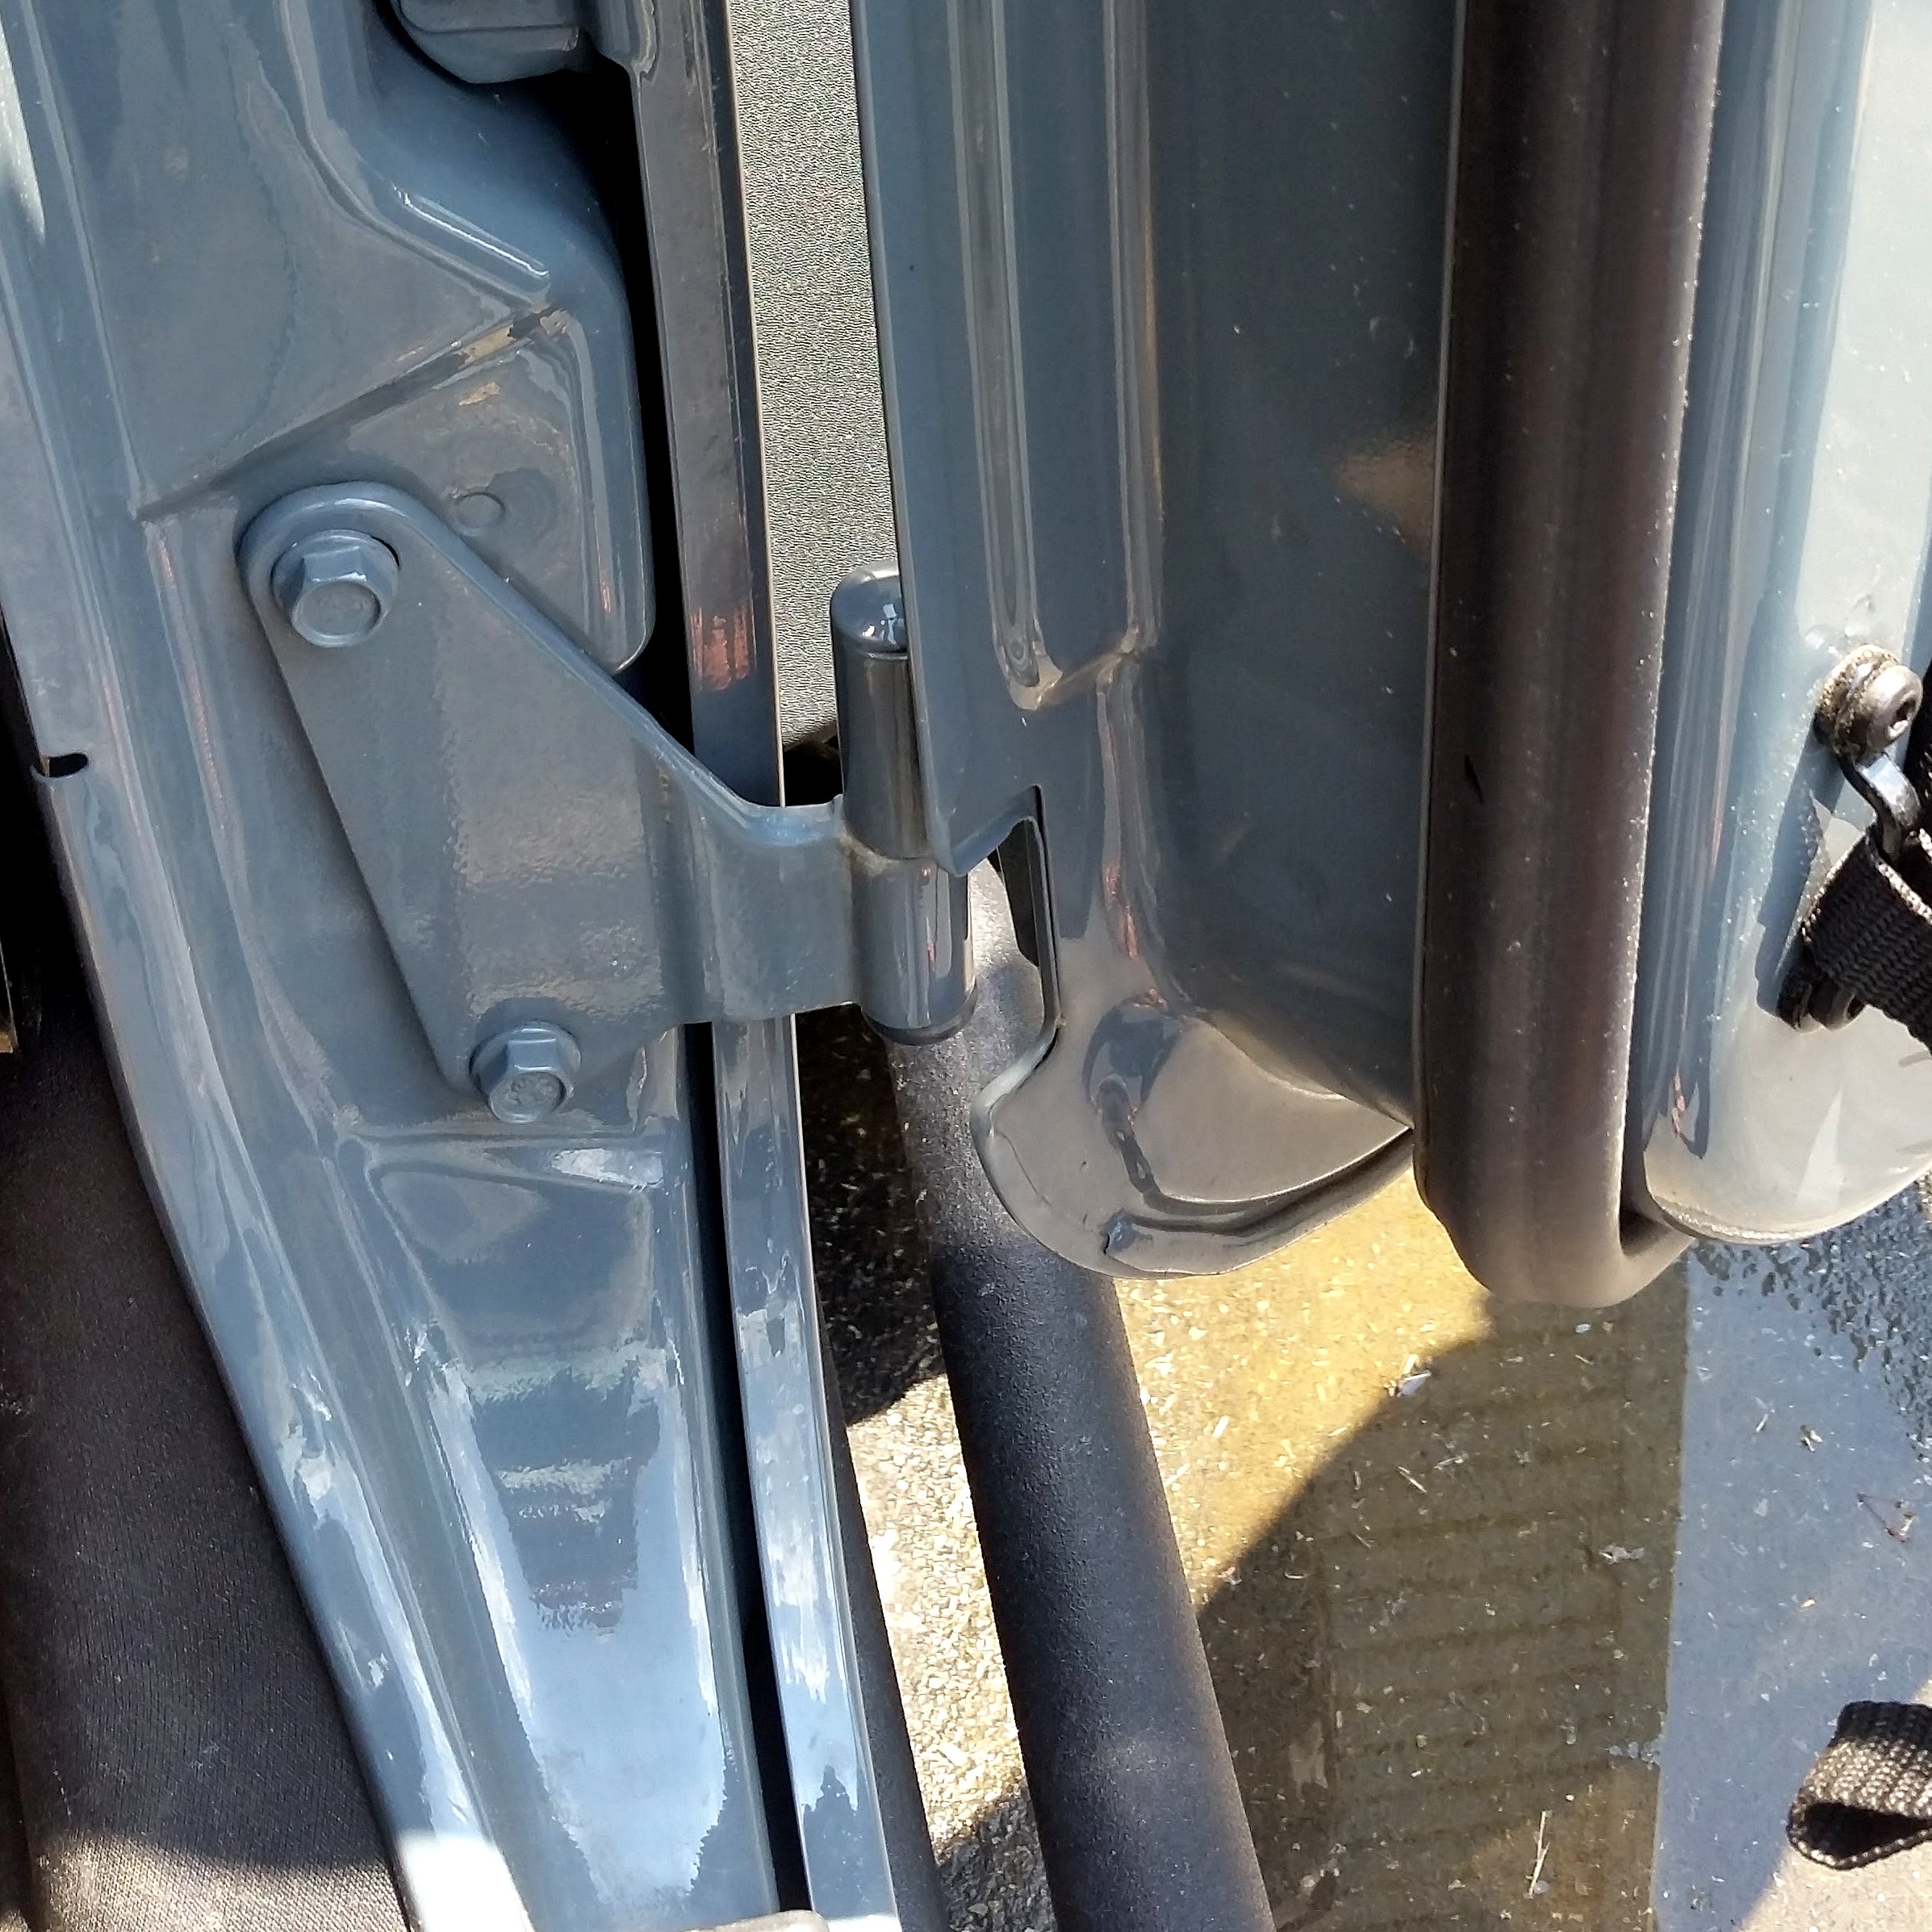
2. Remove the upper bolt that secures the factory lower door hinge to the body.
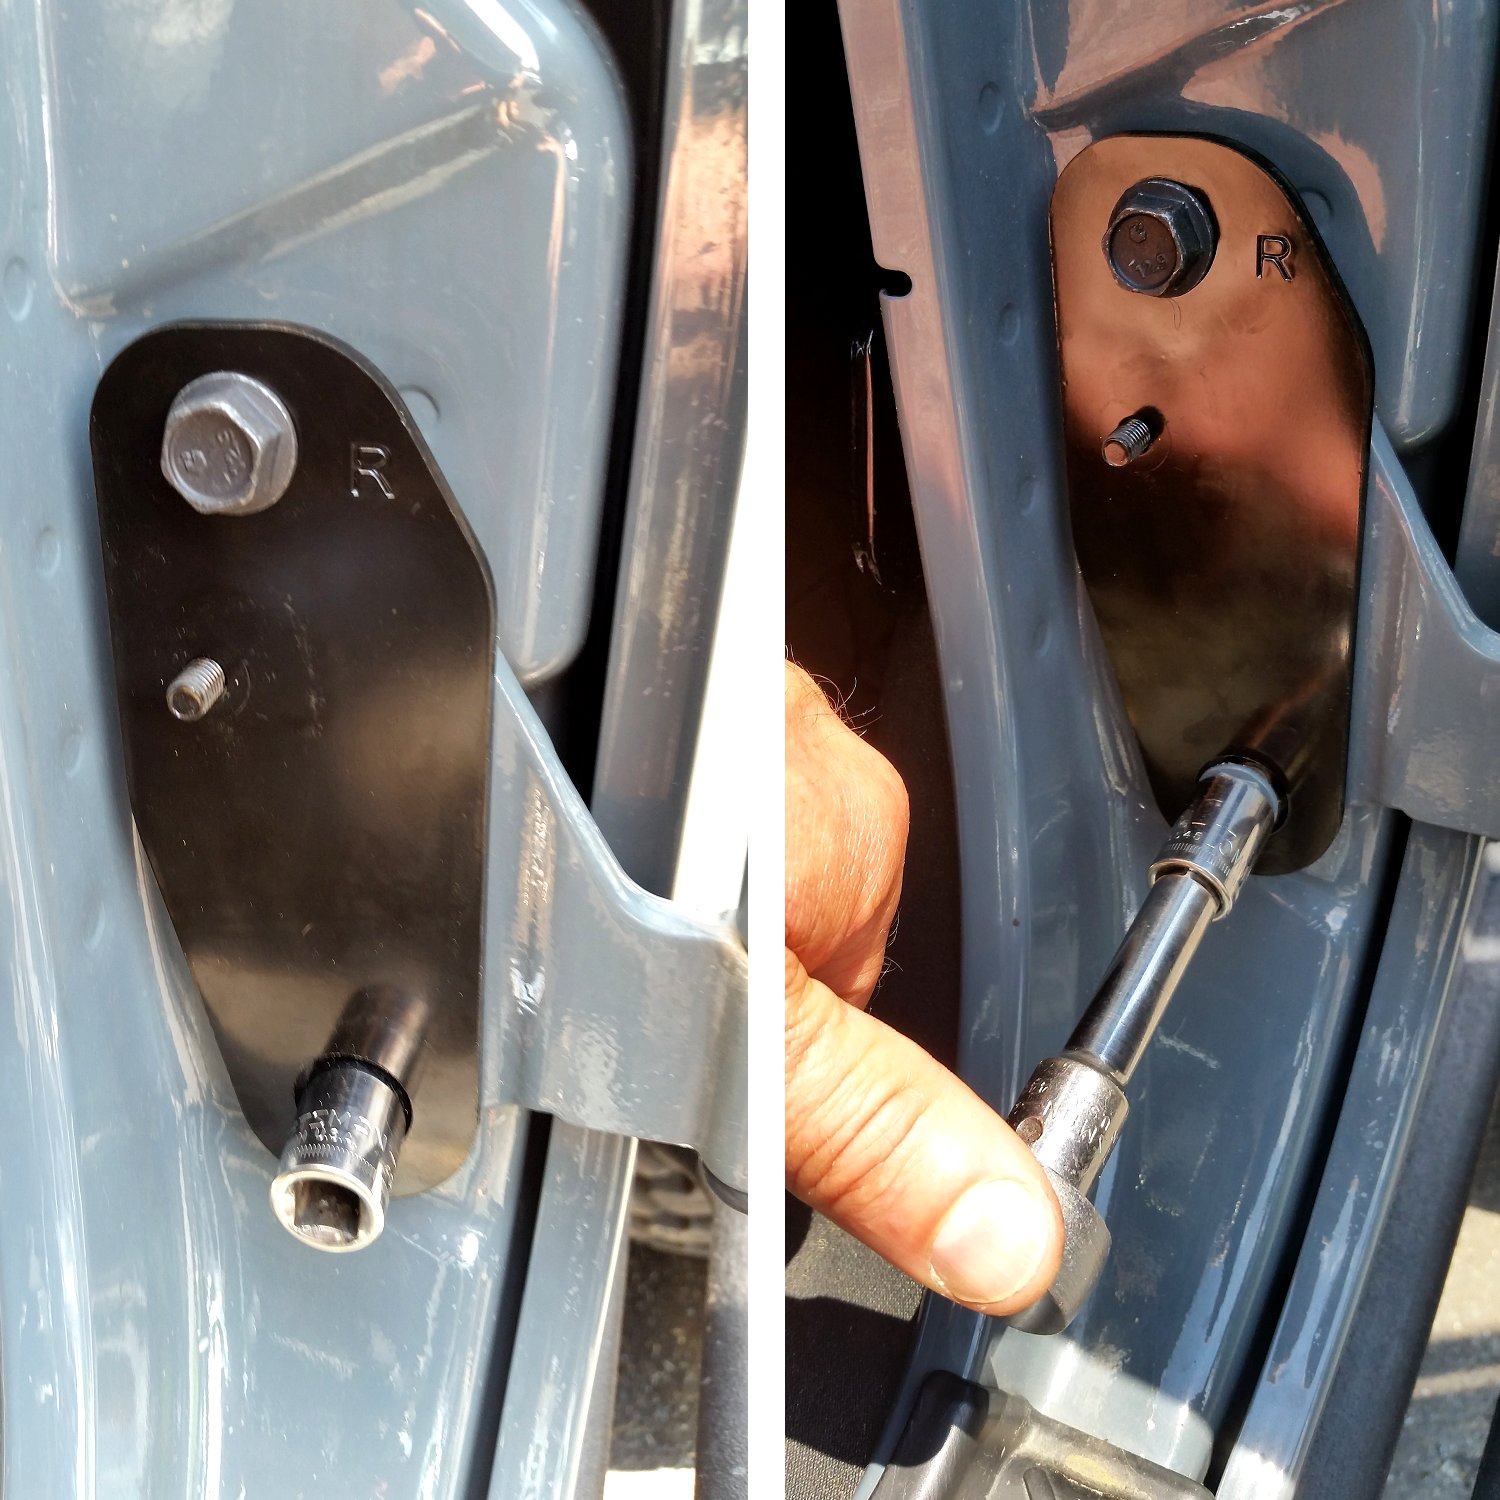
3. Hold the supplied hinge place in position and secure the hinge plate with the new longer 13mm replacement bolt. Use a 13mm socket to center the hinge plate over the bottom factory bolt while tightening the upper bolt.
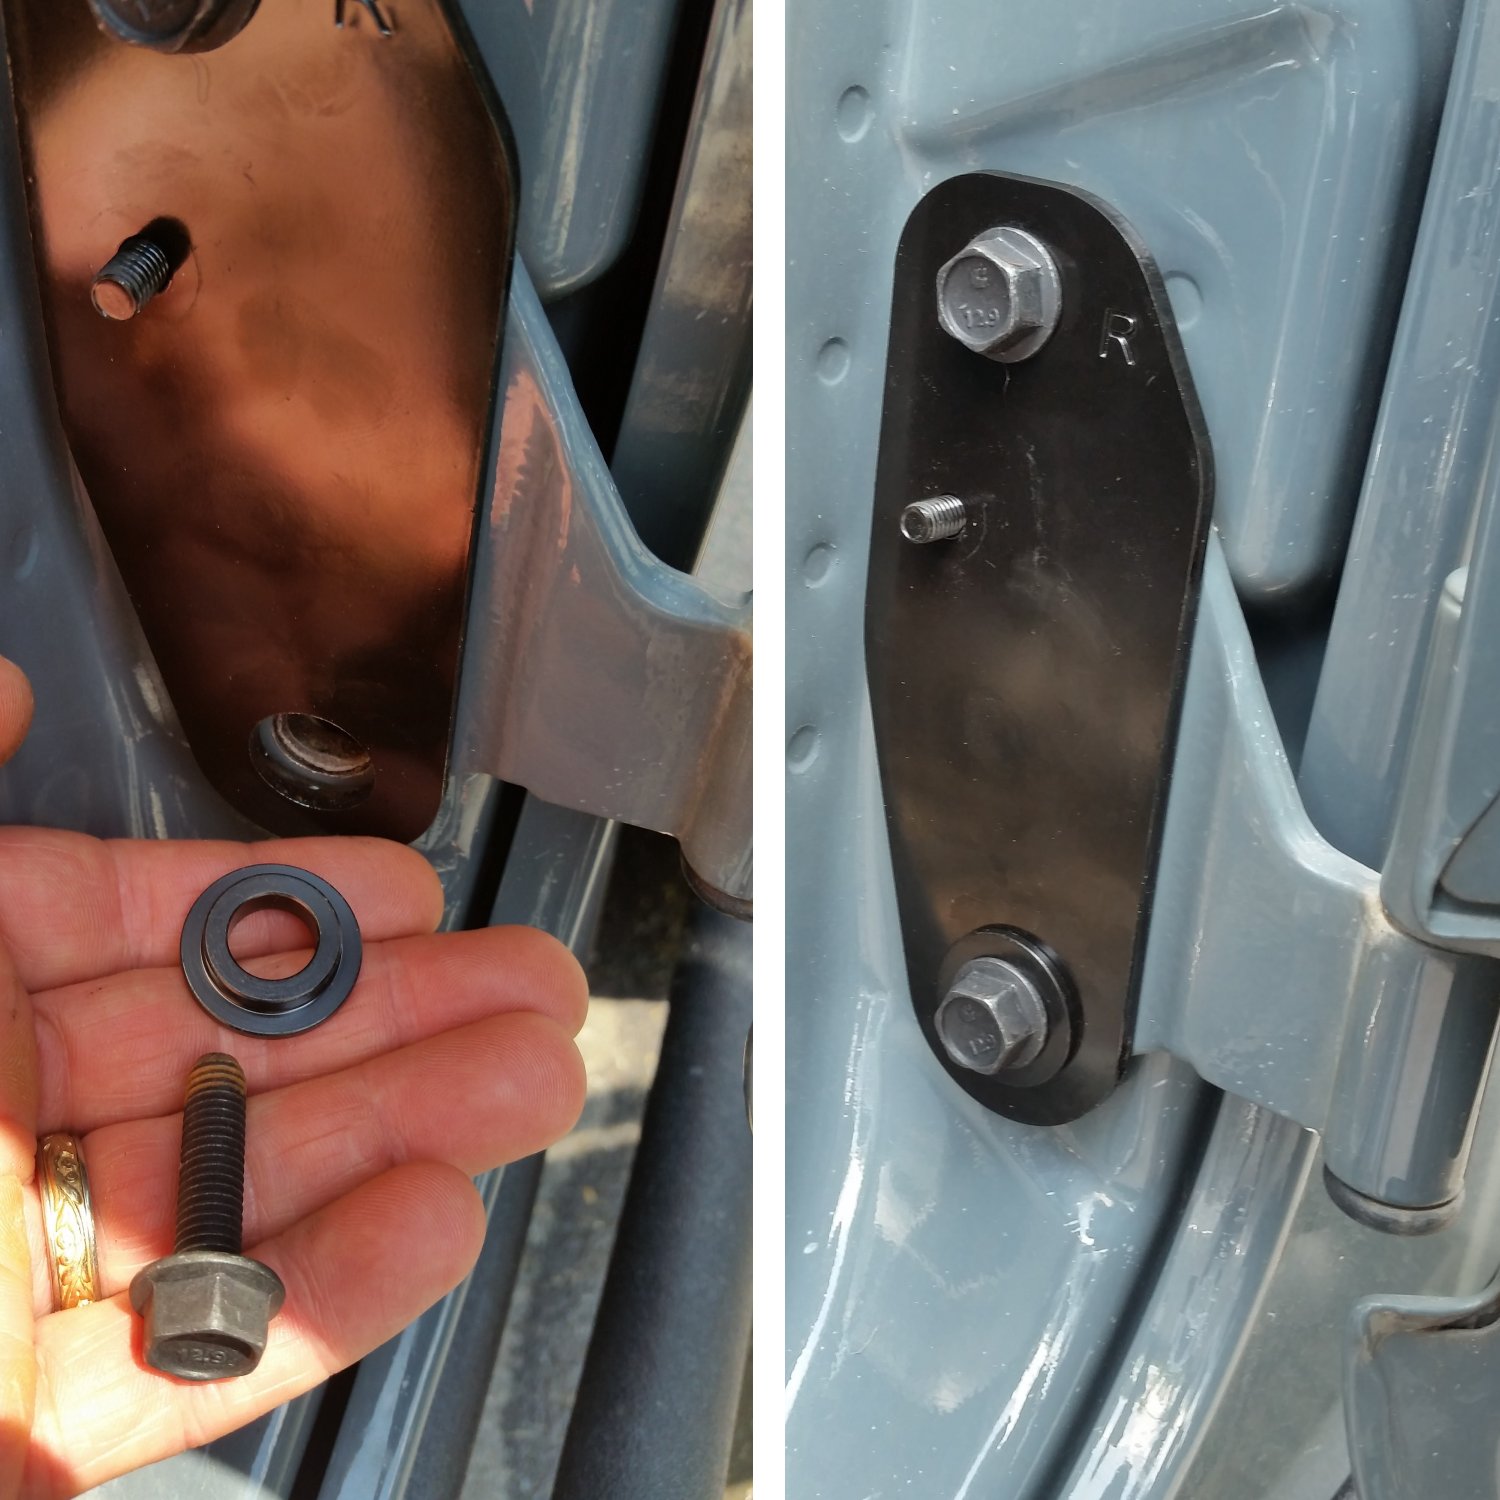
4. Next remove the lower factory bolt and then replace the bolt with a new, longer 13mm bolt and the supplied washer. Secure the bracket by tightening the bottom bolt.
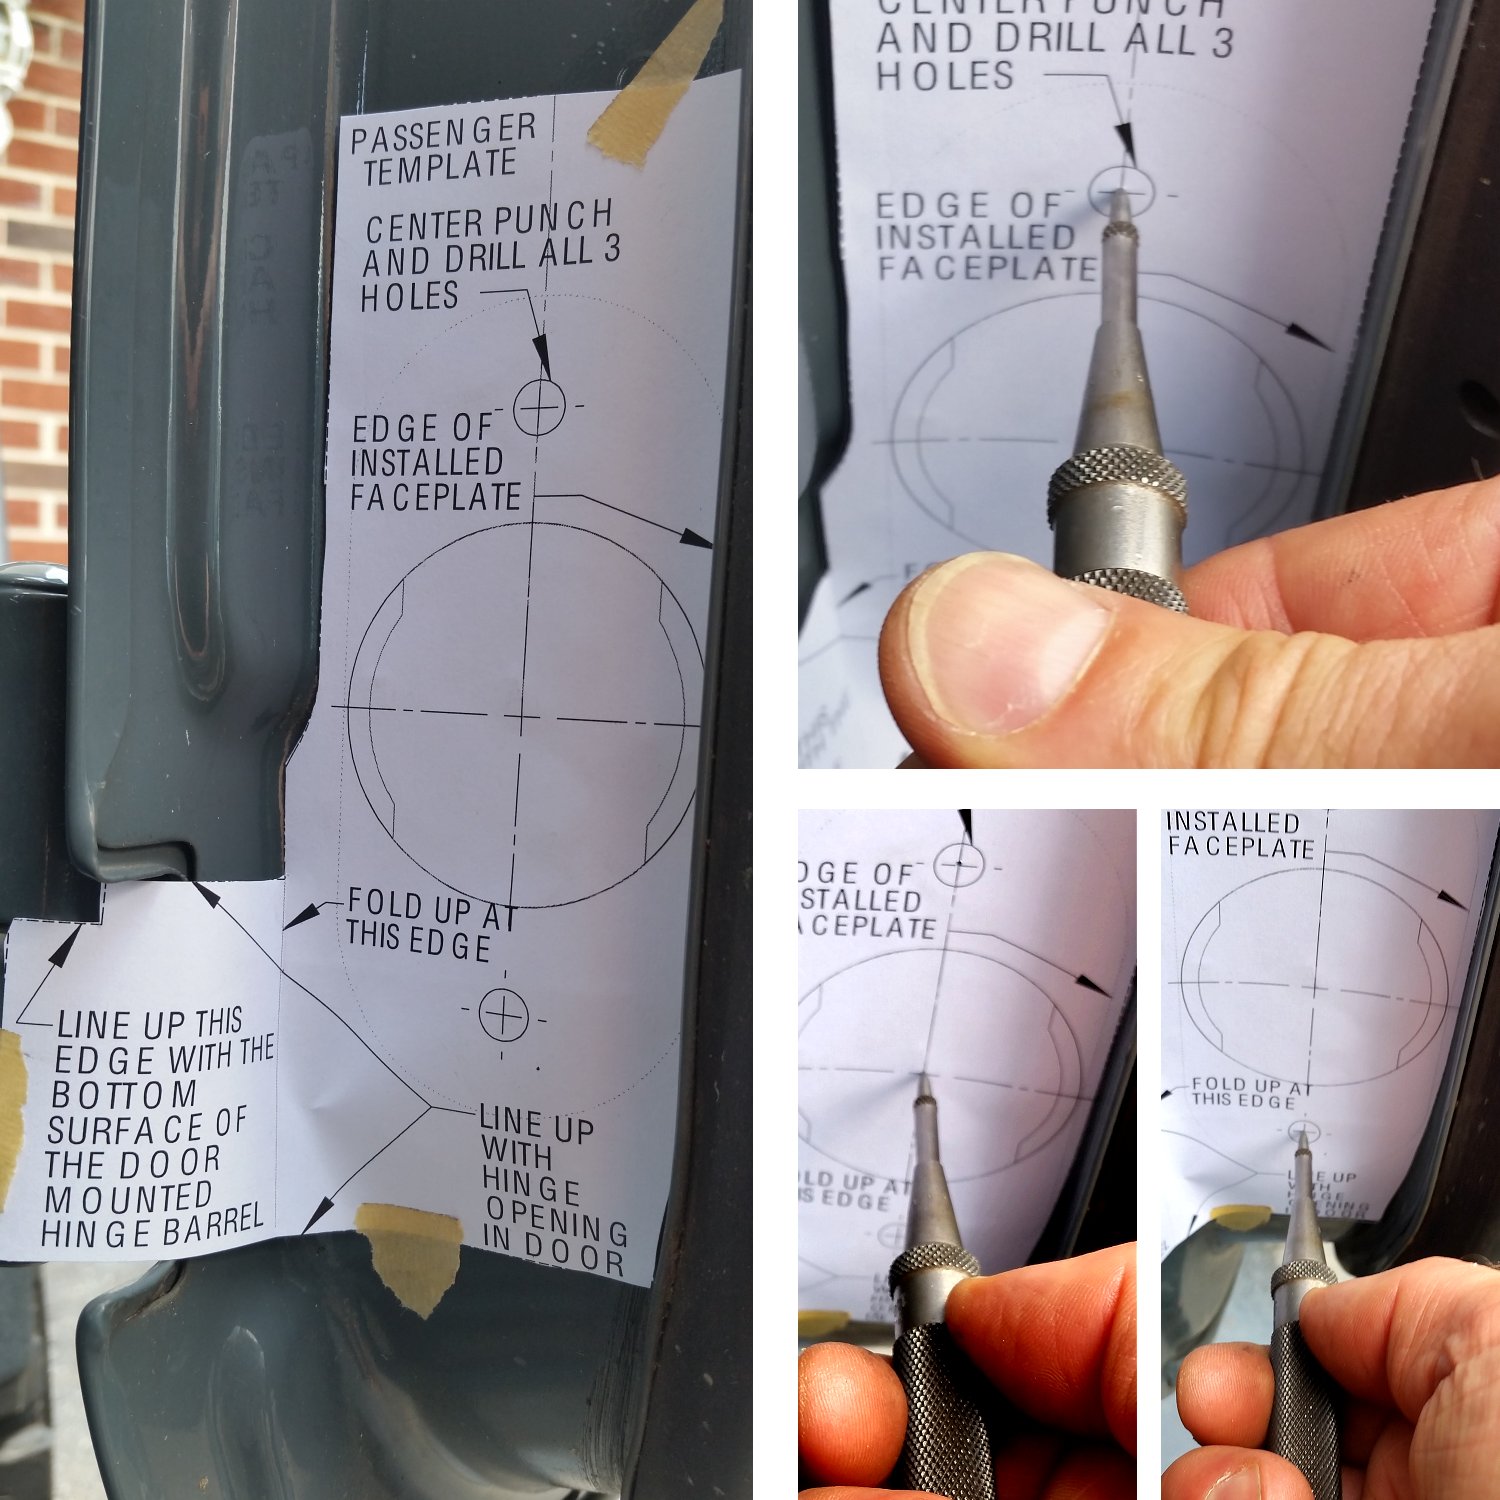
5. This next step is the most critical step in the process. You’ll be marking the holes that will be cut into the door. Always remember: Measure Twice, Cut Once (or drill in this case). Align and tape the template to the inside of the door in the correct positions of the template. Using a center punch, mark all three drilling positions. ALWAYS DOUBLE CHECK that everything lines up before drilling. Then remove the template.
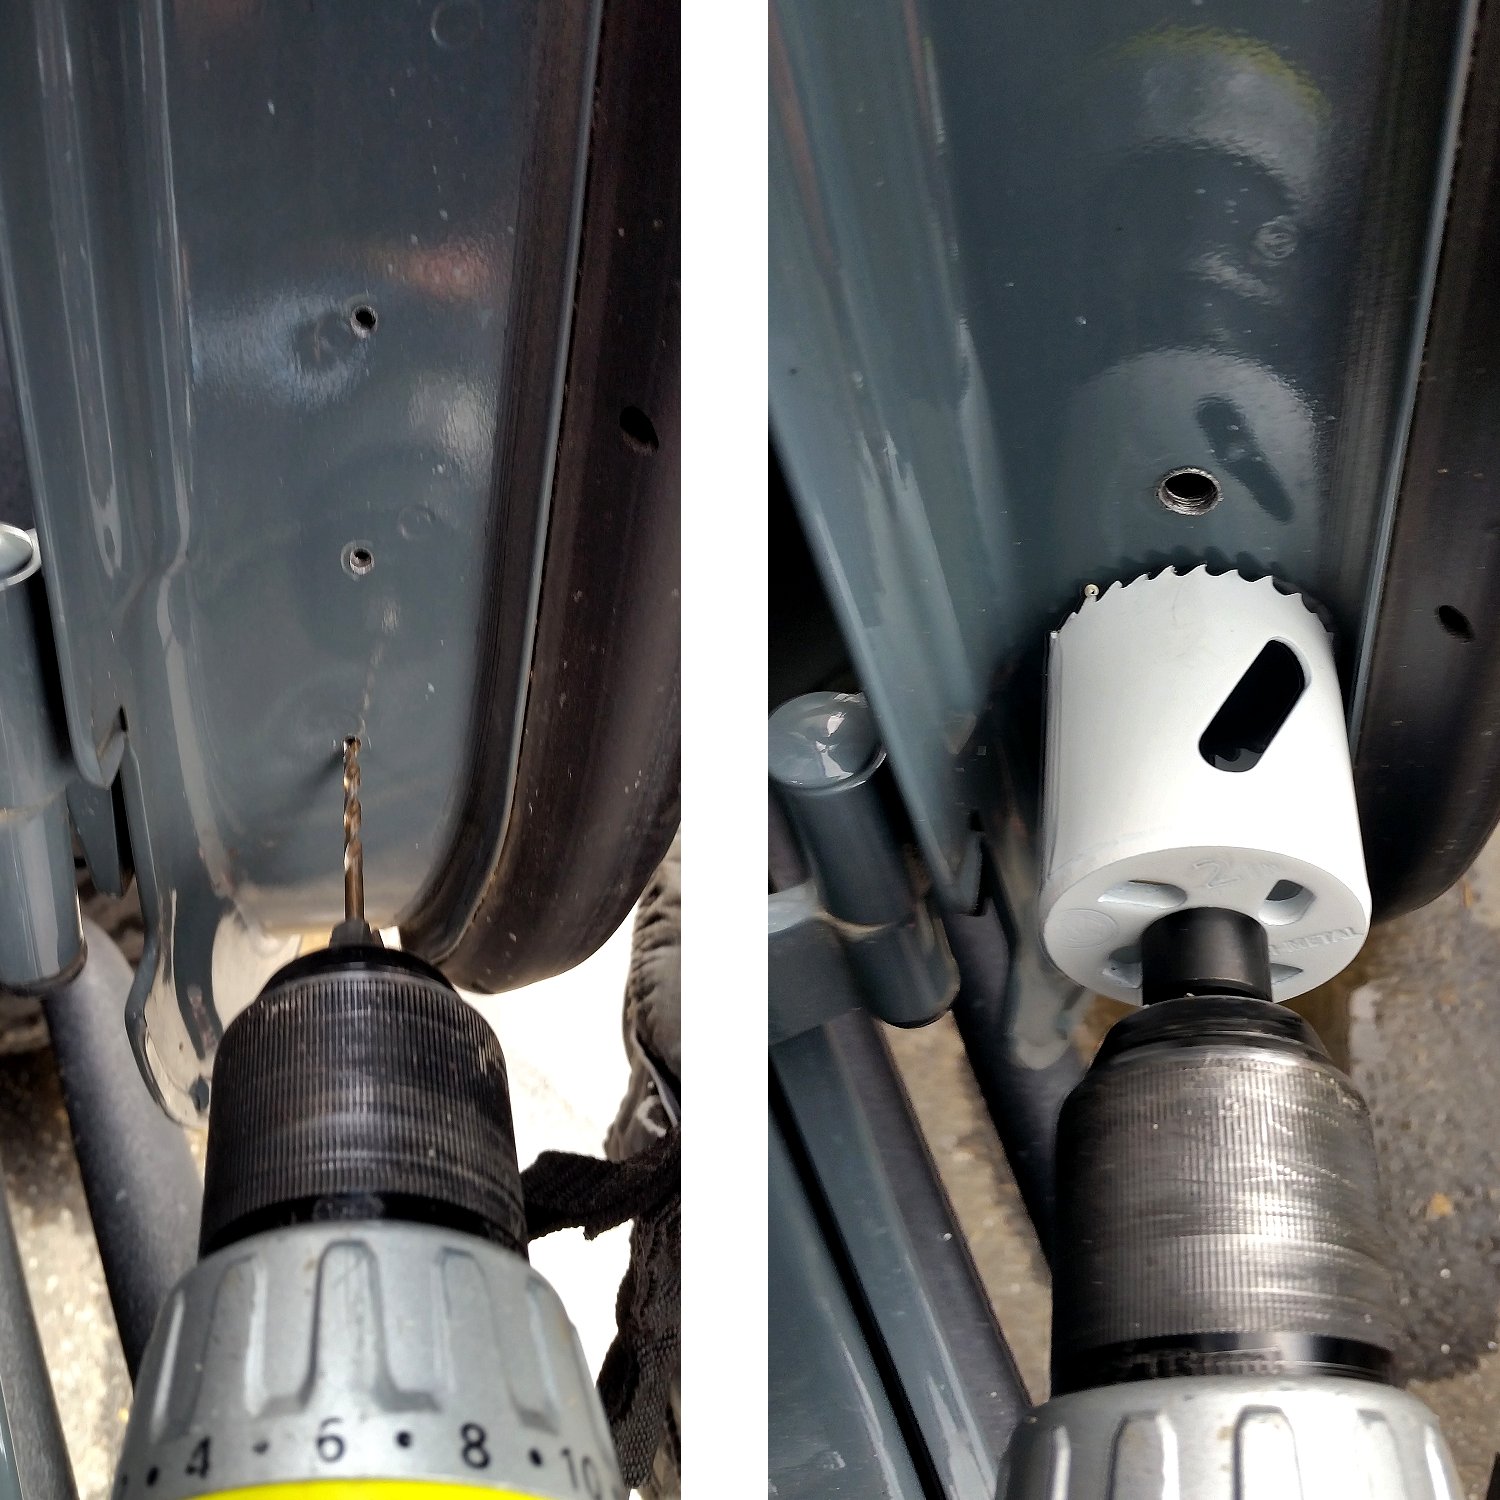
6. Using a 1/8th inch drill bit, drill out a pilot hole in each of the three. After drilling the three pilot holes, drill out the top and bottom holes with a 5/16″ bit. Once again, make sure that everything lines up to the bracket plate, and then drill out the center hole with the 2″ bi-metal hole saw.
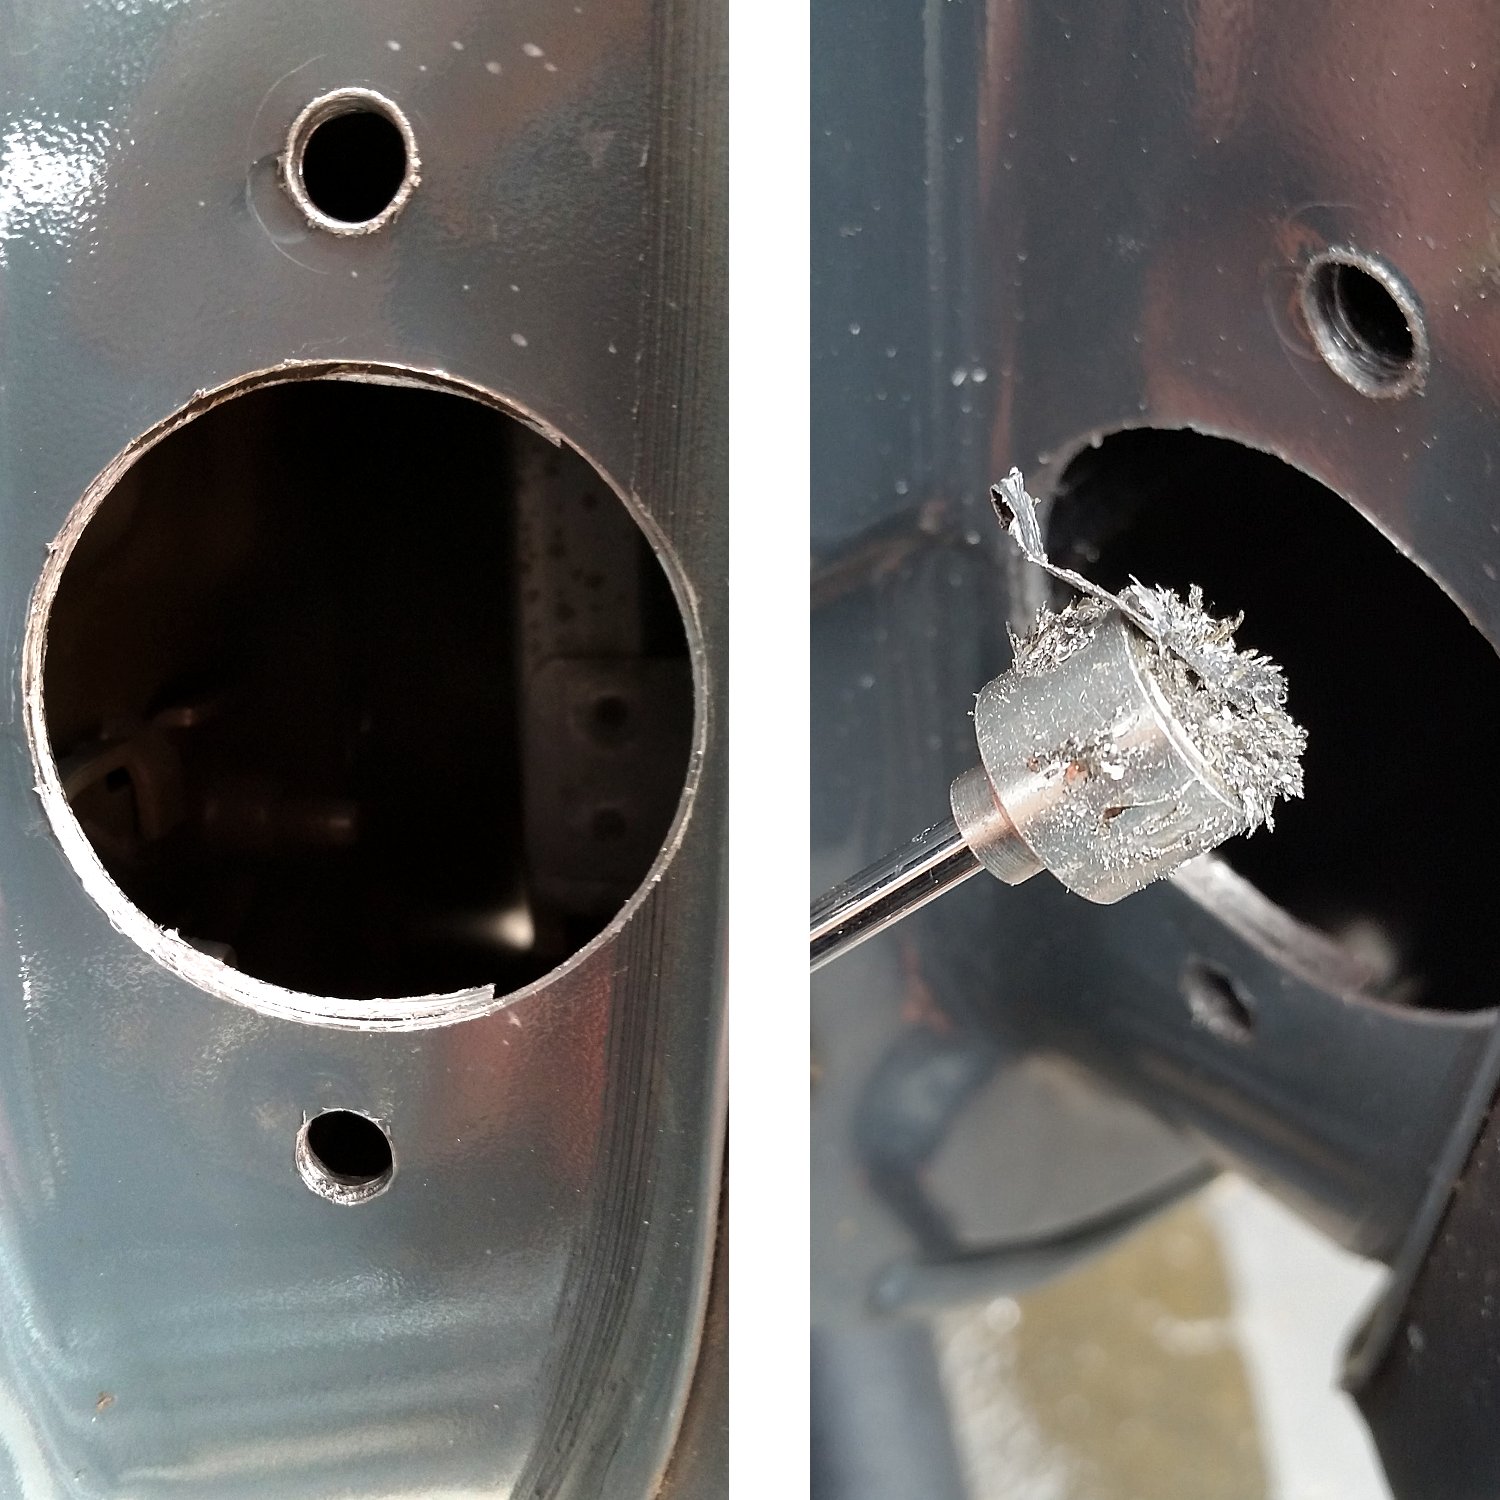
7. The finished holes should look like this. You’ll want to collect as much of the metal shavings as possible from inside the door to prevent rust from occurring. A magnetic telescoping tool works well. Clip-on nuts will be going on over the small holes, in through the 2″ hole so you may need to file a little metal off the inside of the 2″ hole as I did so the clip-on nuts can center over the holes.
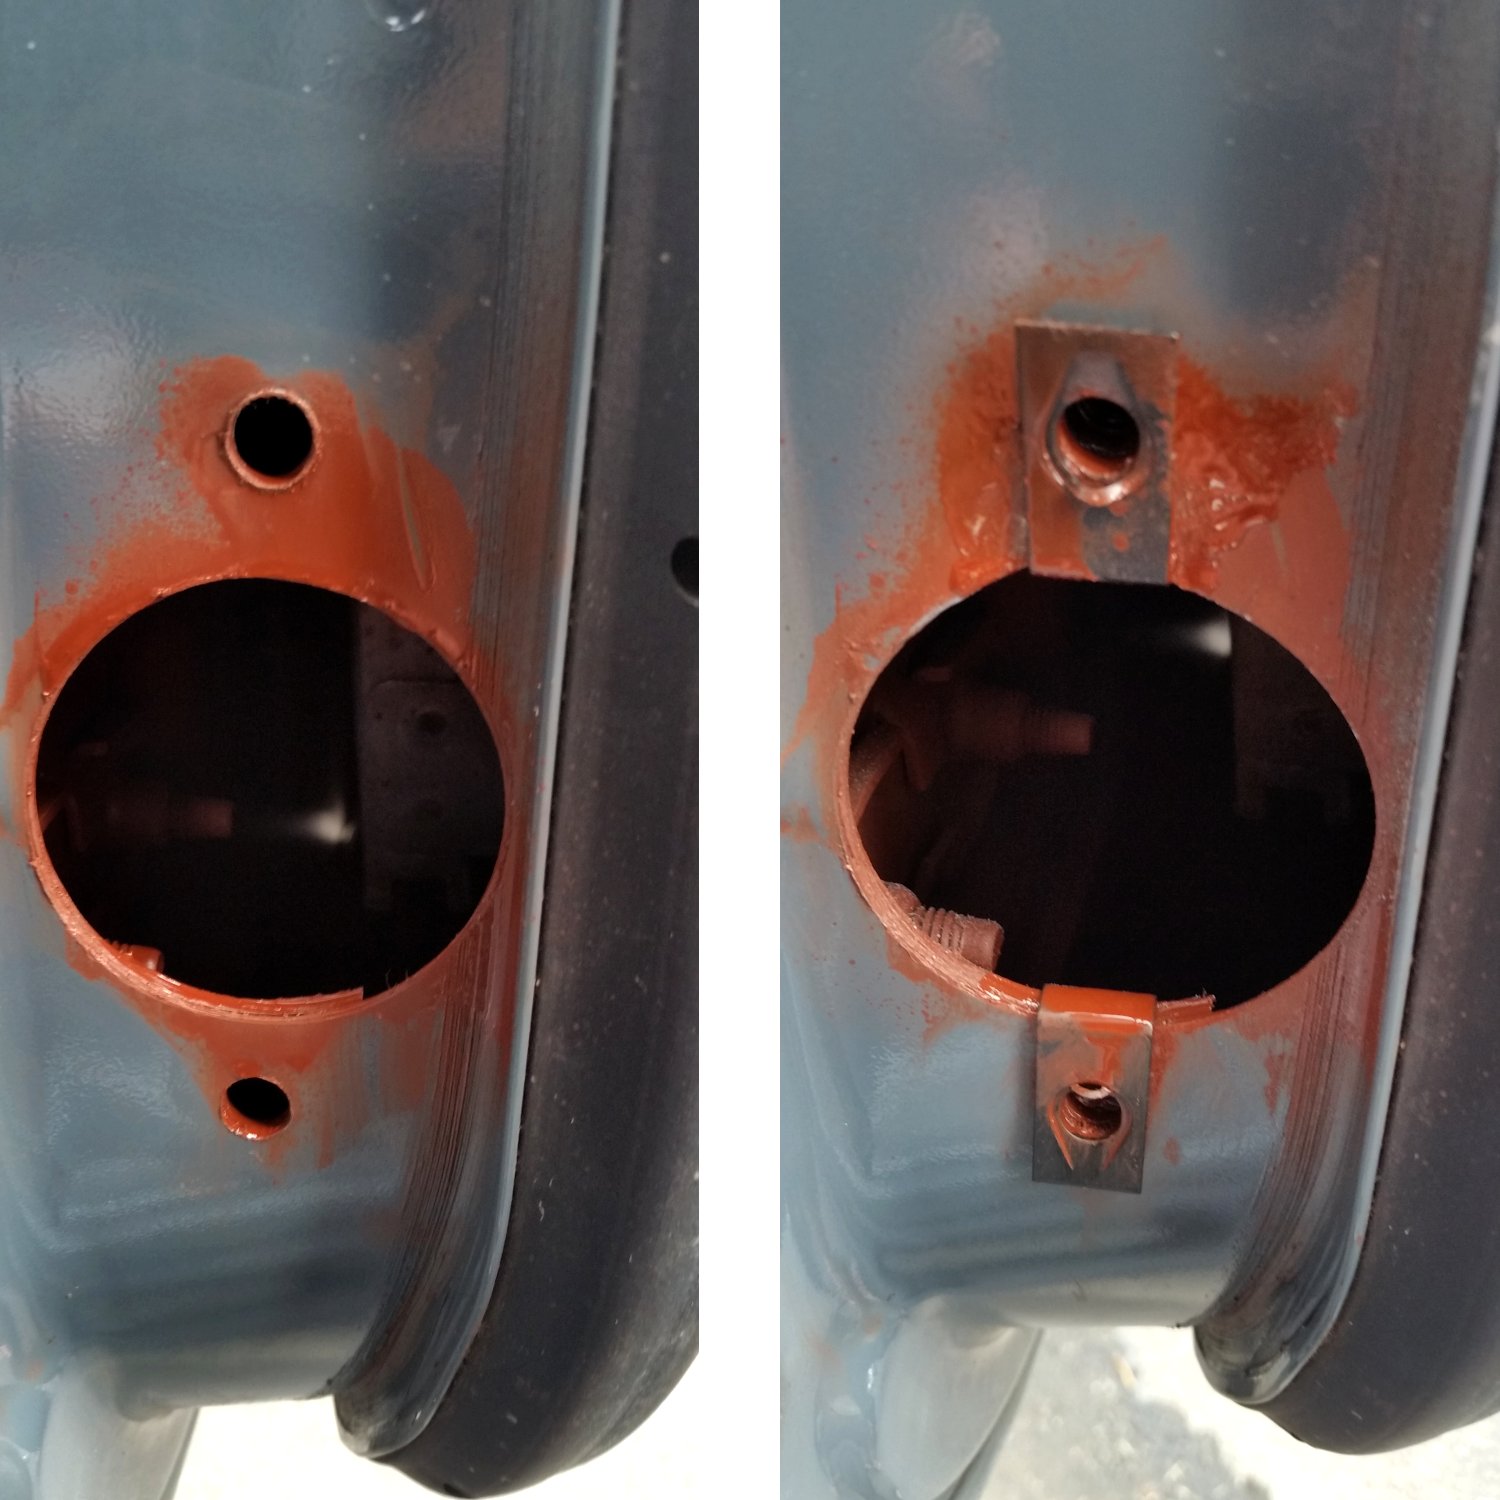
8. Next, you’ll want to seal the bare metal up to prevent rust. I used heavy primer. This area will be covered by the Smart Door Check Strap so you won’t see this primer area. Insert the Clip-on Nuts through the 2″ hole and over the small holes. Careful not to lose them in the door! Tie a string to it if you think you’ll loose it! I added a little more primer over the clip-on nuts.
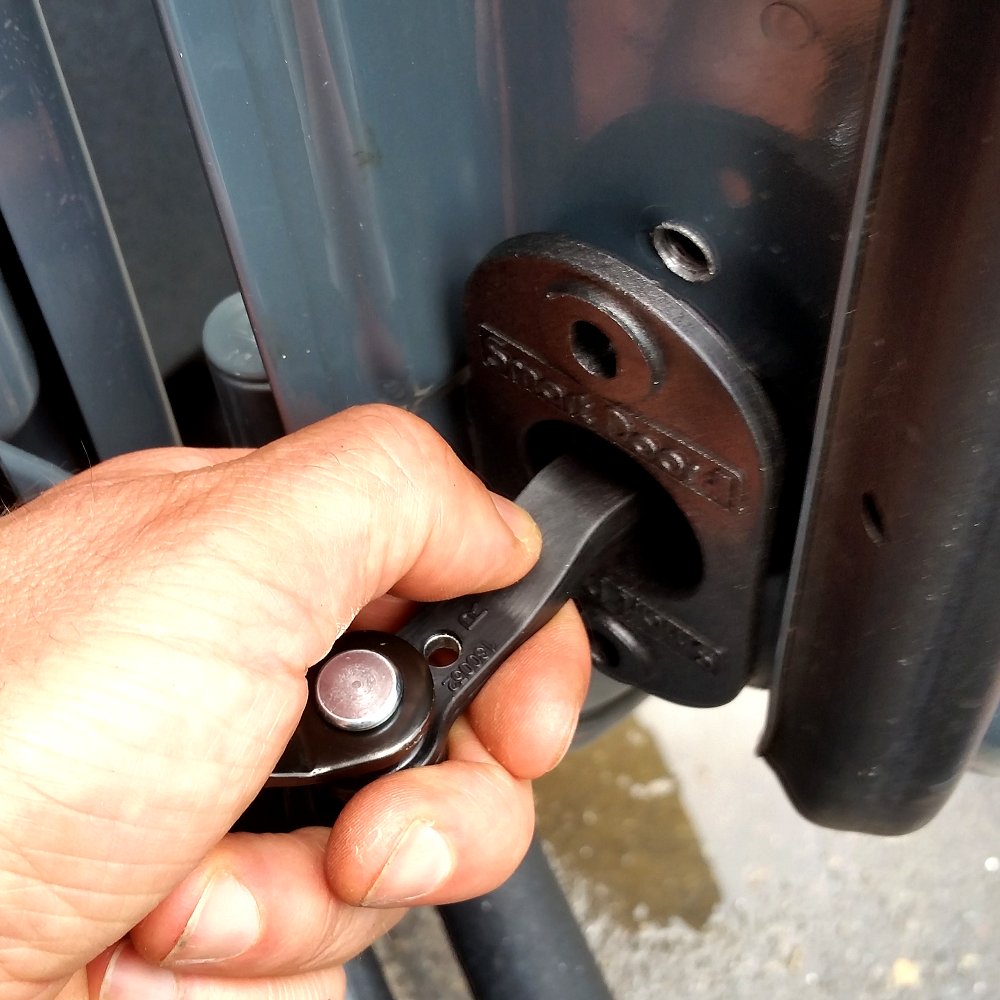
9. Insert the Smart Door Check Strap with the “L” or “R” facing up.
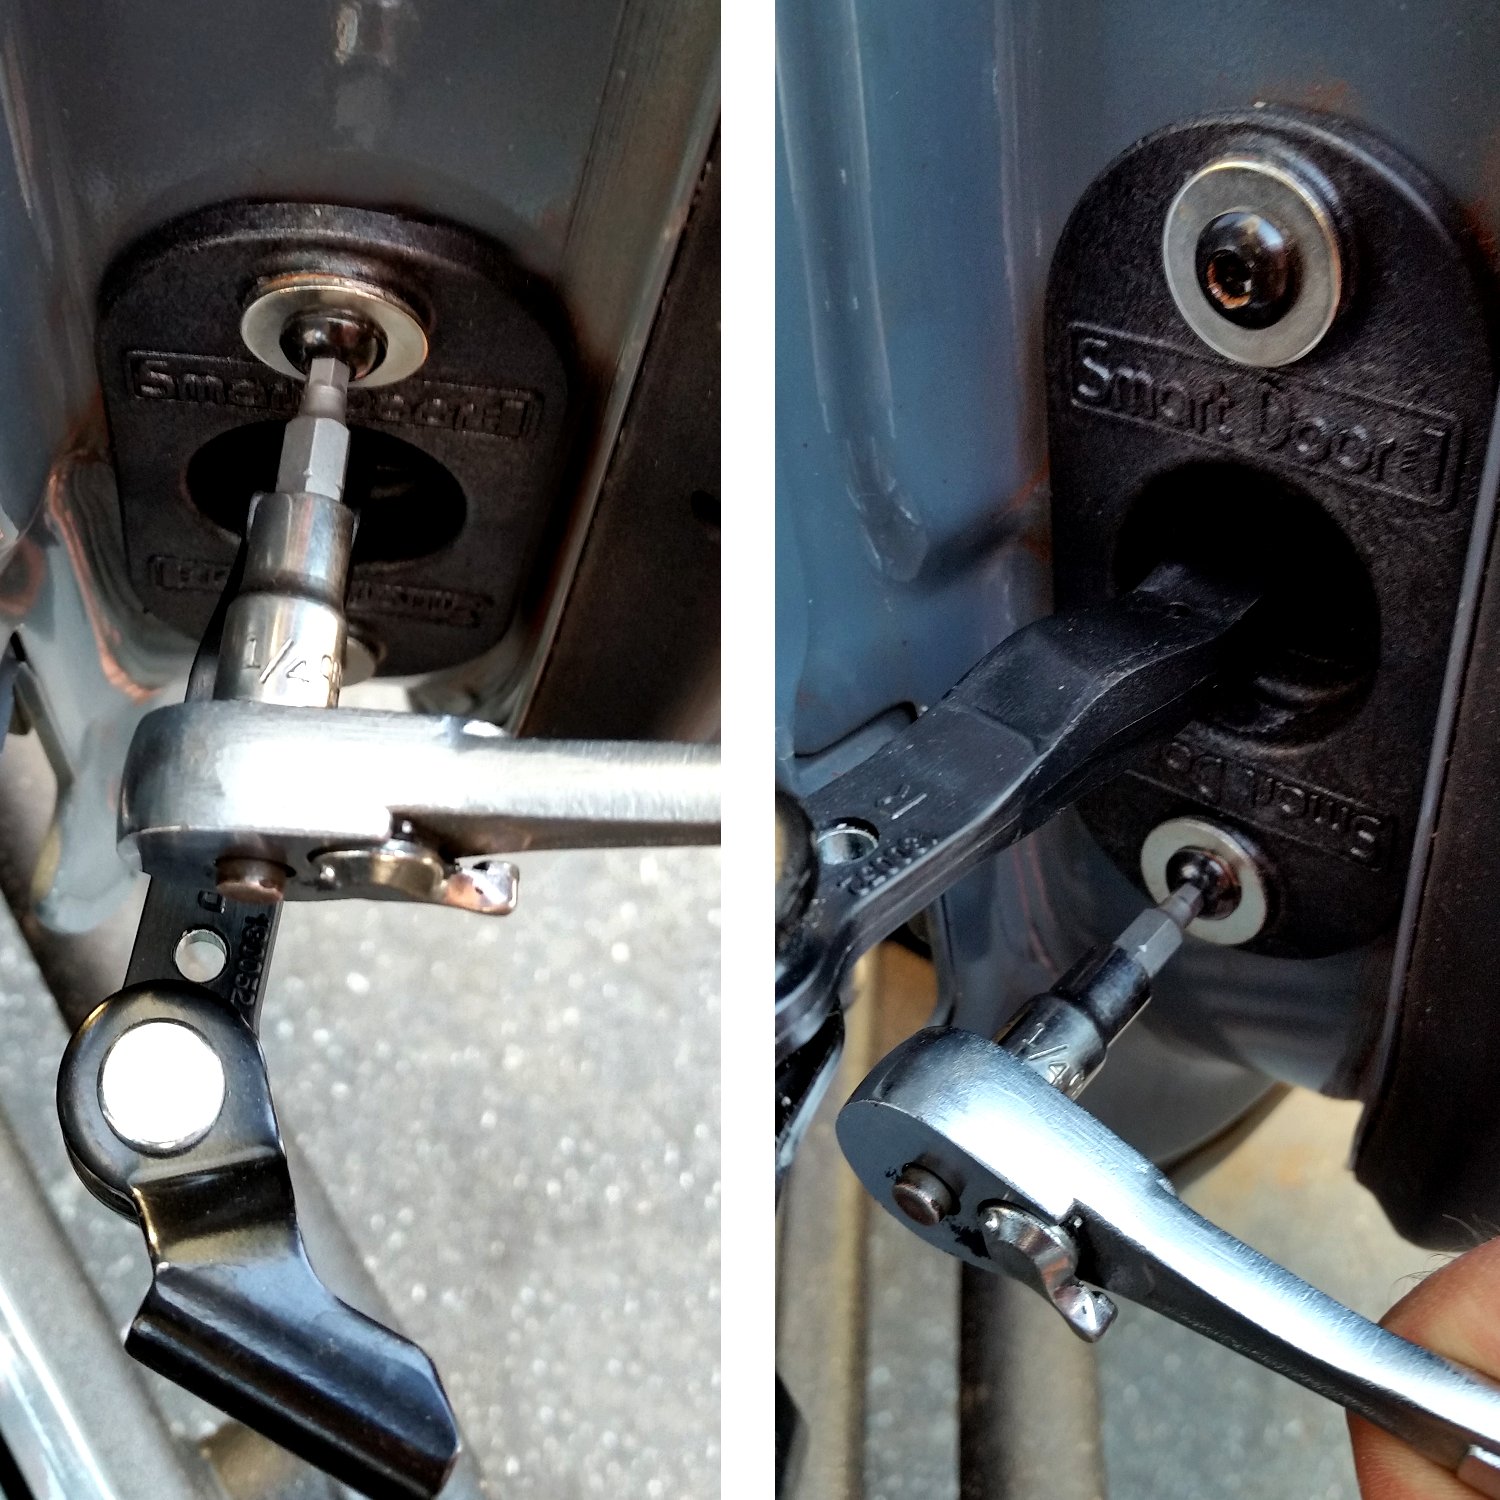
10. Secure the Smart Door Check Strap into position using the supplied 1″ long Socket Head screws and washers.
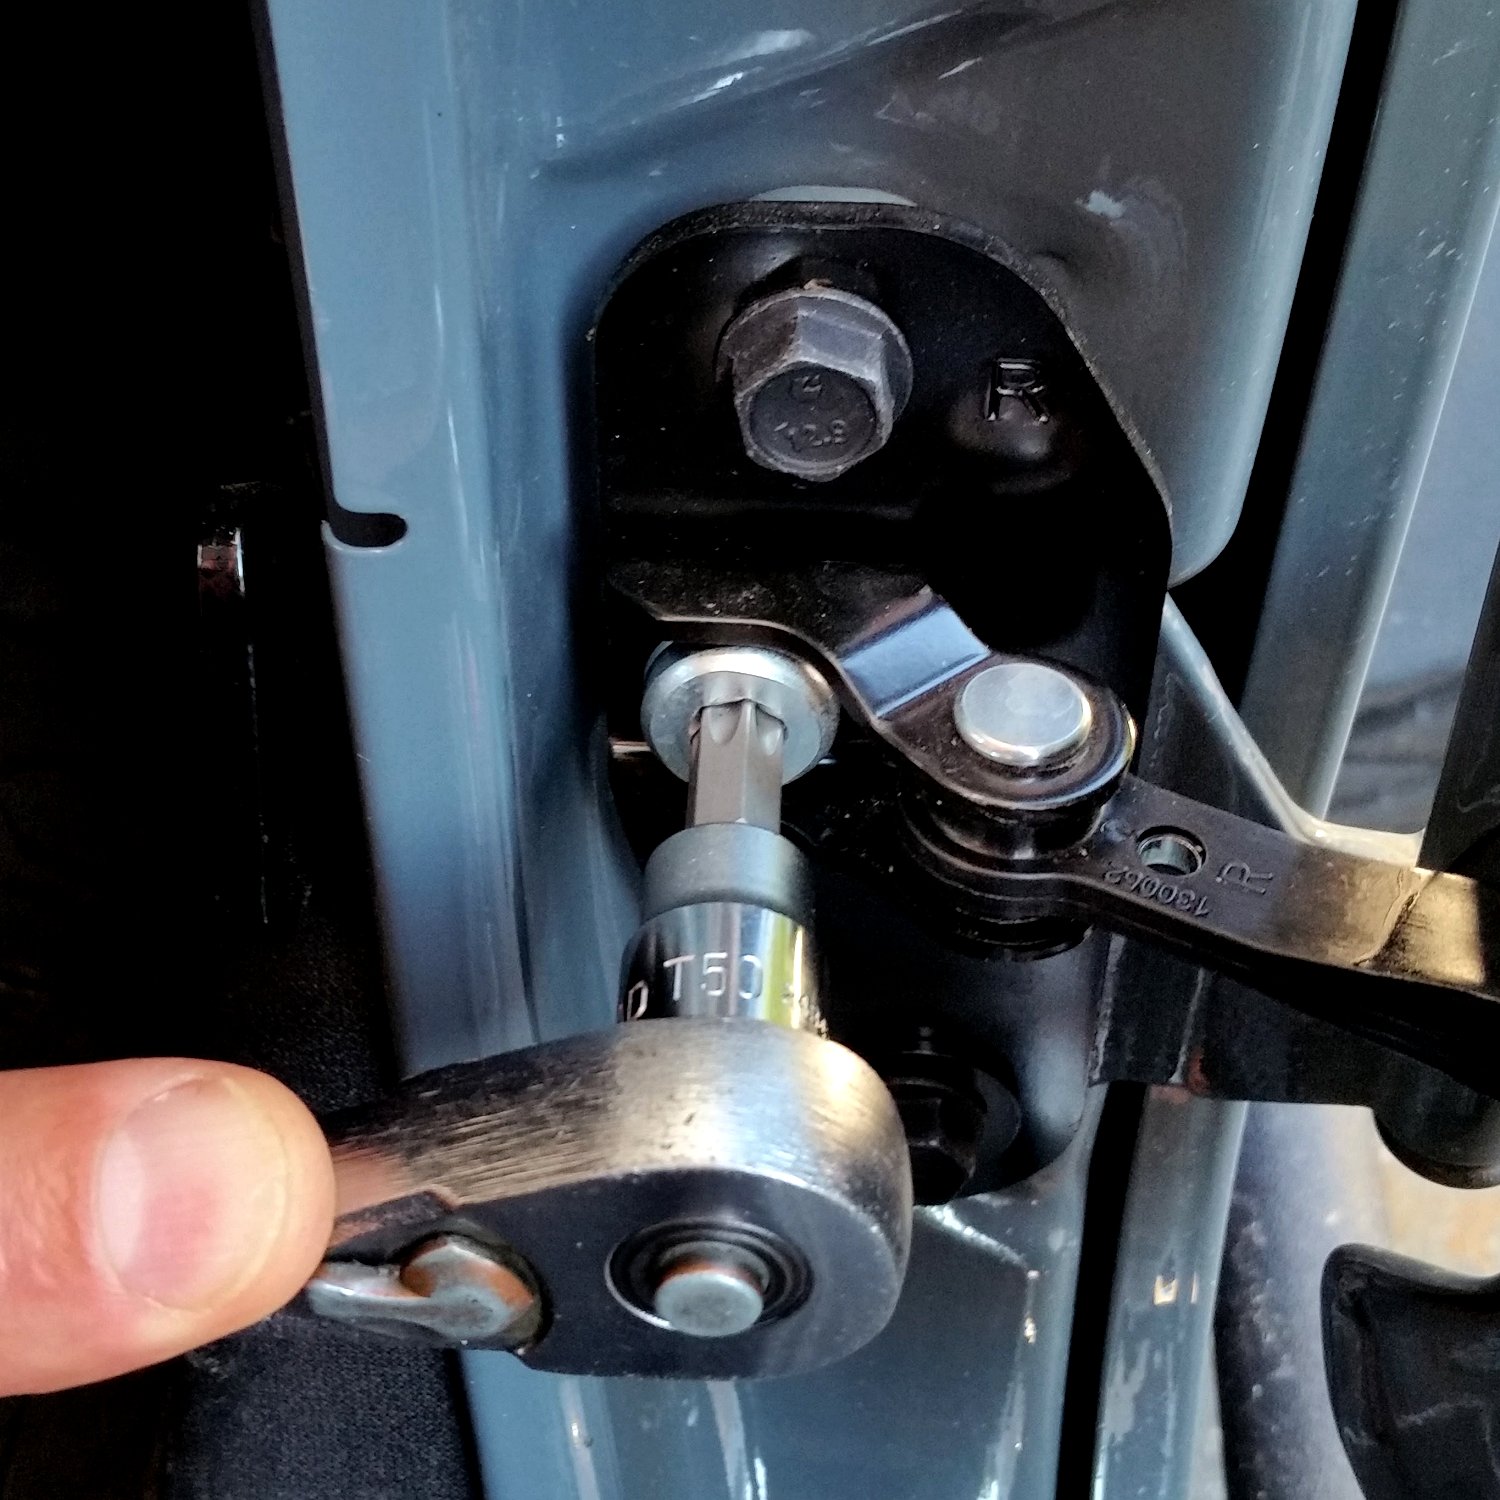
11. Last Step! Secure the Smart Door pivot arm bracket into position using the supplied barrel nut. Make sure the door operates freely and the Smart Door Door Check works smoothly. If you feel any binding, do not force the door. Investigate and make sure everything aligns properly. The screw holes have enough play to allow adjustments.
With the door operating smoothly, re-secure the limiting strap and reattach the wiring harness.
The other side of the front will install exactly the same.
Rear Installation
For the rear installation, slide the front seat forward as far as it will go and remove the plastic plate on the center pillar seatbelt box. Remove the factory fabric door limiting strap and the electrical connection. As like the front, secure the door to the vehicle and protect the paint using a pillow or blanket. Then follow the same steps again to install the rear Smart Doors.
Thoughts & Review – Star Fabricating/Mopar Smart Door Hinge
My opinion is the Jeep JK should come with these Hinge Door Stops from the factory. The Door Stops give you a much more user-friendly door that doesn’t take long for the Jeep owner to get used to and appreciate. Fabricated from black powder-coated steel, the Door Stops have 3 door stopping positions all of which are just right for different situations with a fully wide open position limited by the factory door strap. The stops help to keep the door from swinging closed or open even when the Jeep is tilted on a hill. This is a great improvement over an uncontrolled free-swinging steel door especially in tight parking lots or on the trail. Door removal is made easy with quick disconnecting T50 Torx nuts. Installation is easy and only requires minor mechanical skills and basic tools. Each kit, front or rear, contains two hinge Door Stops and all the mounting hardware. Fits the Jeep Wrangler JK 2007 through 2017 2-door and 4-door models.
Note: Star Fabricating Jeep JK Smart Door Stops have been discontinued. Check out these alternatives instead.

Where can i buy t hff e SMART DOOR STOPS and how much are they for the 4 door Wrangler X 2007.
Dave Arthur
It seems that the Star Fabricating Jeep JK Smart Door Stops have been discontinued but if you’re lucky, you might be able to snag a leftover set from somewhere.
I think this company went belly up. I ordered this product several months ago from Quadratec and cancelled the order after several months on ‘back order’. Their site is no longer active.