DEPARTMENT OF: Cheap Tricks & Useful Tips …
New Car Shell – Rust Prevention – A Cheap, effective alternative to undercoating …
 You crawl under your 4×4 and look at the underside of the body, the frame, the suspension parts, axles and all that other stuff under there and think, it doesn’t look too bad now. But you know in a few years, it’ll all go to hell. After miles of abusive trail riding, years of exposure to the elements and hard winters of salty slush, it’ll look so bad you won’t even want to look at it anymore.
What are your options? Well, you can just say the hell with it and do nothing. You can’t stop mother nature from claiming your steel. But what good is that kind of attitude going to do? You can get it professionally under coated. But that can be costly and not always that best thing to have stuck all over the underside of the vehicle, especially if you are going to be working on it. You can buy some of that off-the-shelf undercoating spray crap that comes out like tar. Personally I haven’t found an off-the-shelf undercoating I liked and have removed several applications over time because it was crap. Sort of running out of ideas here….
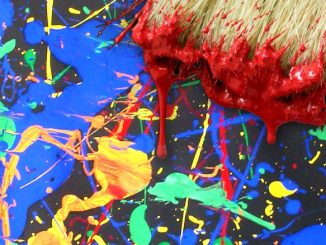
 Here’s an idea that is not only cheap, but in my experience has lasted the test of time on a few of my older vehicles. It almost sounds too simple. Paint it. Well duh, what kind of tip is that?. Here’s the tip. It’s how you apply the paint that matters. We’re not going for the perfect paint job here, we want a good thick application that can get plastered to everything, even the tight, hard to reach places because we all know, that where the rust is going to appear first. This method of underbody painting works best with that newer vehicle that hasn’t seen years of mudding or those that have already succumbed to the rust bug but some of those 4 wheelers out there still have hope.
Alright, so how do we do this? Before we get into the how to apply the paint part, you have to get it fairly clean because painting dirt, mud and grease isn’t going to stick, and is a waste of the paint. I’d be concerned mainly with the dirt rather than the grease and oil. Greasy oily parts aren’t going to rust anyway, but the dirty parts will because the dirt holds in the water and corrosive elements like winter road salt. Get under there with a high pressure washer, maybe at your local car wash. You can also apply some degreaser (like Simple Green) before heading to the car wash. Get the pressure wash up under the body, behind the frame rails, up under the hard to reach places to get that dirt out. It might take several attempts to get it acceptable. Also make sure it’s going to have time to dry.
Now the trick here is to use a durable paint and apply it everywhere metal is exposed. I like Rustoleum. Gloss Black Rustoleum to be 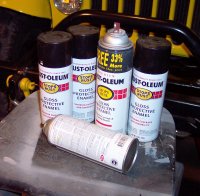 specific for these under body applications. Maybe you might like to opt for a little color but black will color blend with grease and it hides a lot. Plus for further applications of paint, gloss black is a good color to touch up.
Look around for a good price because your going to need many cans. 4 or 5 probably won’t do it. More like 10 cans – or more. I occasionally find this cans with 33% more for the same price. Walmart is pretty cheap. Also pick up a few of those red spray extension tips you find on carburetor cleaner cans and WD-40 spray cans. Your going to need them. You probably have a few laying around.
The application method I’ve found to be best is NOT to use spray tip the cans come with. Not exactly anyway. Most of the area you’ll be covering is in tough to reach places like above the frame rails behind suspension components, behind brake lines and wires, above and behind all kinds of things. So you need to shoot the paint from a distance, accurately. That’s where the red tubes come in to play. If you pop out the white tip with a utility knife, you can then insert the red tube. 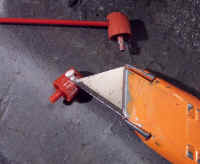
You might have to expand the tube tip a little with a sharp all or needle to get it to fit tight into the spray nozzle’s hole (you don’t want to fire the red tube off the spray tip). Then jam the red tube into a few of these tips. Have a few extras just in case you clog one or two ( they can and do clog after a lot of spraying), or if you loose it.
The Gum-Out Carb cleaner nozzle actually fits the Rustoleum can so you can use that. Just be sure not to try to re-use that tip for carb cleaning after spraying paint through it.
Now to prep for this you want to raise the vehicle if you can’t easily get under it. Have a shop light so you can see everything. Do the job outside because the fumes will be heavy and you’ll need to breath. Get a respirator and use it. The more protection it will give you the better. You don’t want to be blowing black snot for weeks to come. Also wear a hat or a hair cap of some kind to keep the paint out of your hair. Your going to get drips and over spray on you so try to cover yourself so you don’t have to do as much clean up later.
Mask the vehicle somewhat if you’re concerned about it. When I did my daily driver newer truck, I tapes a few old sheets over the body to keep the black paint from settling on the red paint job.
Now get under there and start at one end towards the center of the vehicle and move out and towards the other end. Try to avoid laying under the areas you just painted because it will drip. Cover everything, body, frame, axles, parts, suspension, whatever. You’ll find that the red spray tube will fire the paint a good two to three feet so it’s great for applying it in hard to reach places. Use the regular nozzle for flat, easy to reach places because it won’t clump it on so much. Don’t worry about drips and runs. No one will see it and more is better anyway.
When you’re done, you’ll probably look like to just came out of the coal mines. The vehicle will stink for a few days but boy will it look good under there.
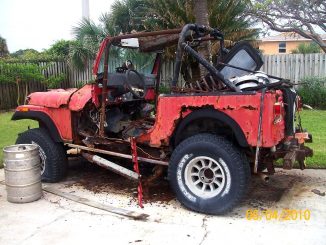
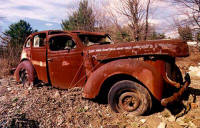
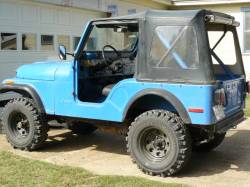
As time passes, the paint will stay and the rust will occur much less than had you not covered it if it occurs at all. I’ve had the chance to see two older Toyota trucks to compare over about a 7 year period. One with this treatment and one without. The with (mine) still has very little rust, except where it was scratched off from rocks. Otherwise the paint is intact. The other truck looks like wall to wall rust under there and the body has holes. These trucks are about the same year and were both wheeled over the years.
For me, this cost about 35 bucks for about ten cans of Rustoleum. 35 bucks. 7 years and No rust. Now it started off with no rust so it was preventative. This won’t reverse or stop rust that has already begin to occur but it can help slow it down if you have rust. It’ll at least hide it for now and stop new spot from starting. And it looks damn good again.
 William Garrett from Friendship, Arizona sends in expanded notes on this tip…
Here is an expansion of the above tip, which is great, by the way. My frame rails and tub underside have a lot of surface rust. I happened to find a product at WallyWorld called Rust Converter by Kleen Strip about $4.00 each in spray cans. It’s also available in regular cans for brush on use.
I thoroughly coated the underside with Castrol Super Clean then power washed it. I followed the instructions on Rust Converter and found my rust now converted to zinc and a nice black primer finish. I then applied a coat of Rustoleum black primer and finished it off with Rustoleum satin black. It all looks like new. Now I think I will finish it up with Durabak on the tub underside and interior floors.
Rust Converter is similar to POR 15 except you can pick it up at the local WallyWorld. Time will tell how well it will hold up.